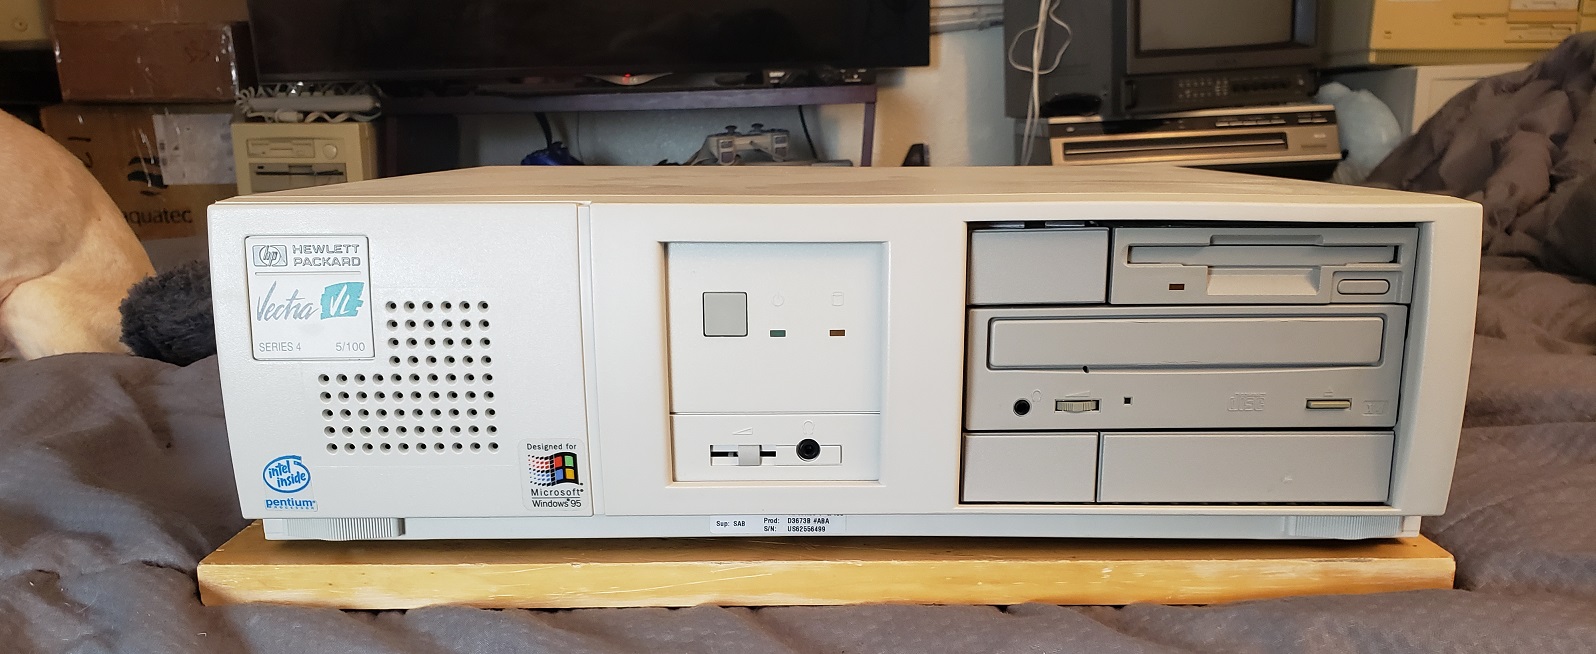
Today we’re going to be looking at another Vectra, This time the Vectra VL series 4 5/100. This Vectra uses a similar case to the Vectra VL series 3 5/90 that I did an article on some time ago although this one uses a socket 7 motherboard as opposed to the series 3 socket 5 board. The Vectra series were more designed as an office or work computers than anything else but with a few additions, I’ve found they make excellent DOS and Windows PCs. This Vectra has a designed for Windows 95 sticker but I decided to install DOS and Windows 3.11 instead.
On the front of the case we have a large speaker grill on the left side of the case. This Vectra does have a rather large full speaker behind this grill so one could get sound without speakers if you had no option though I really wouldn’t recommend it.
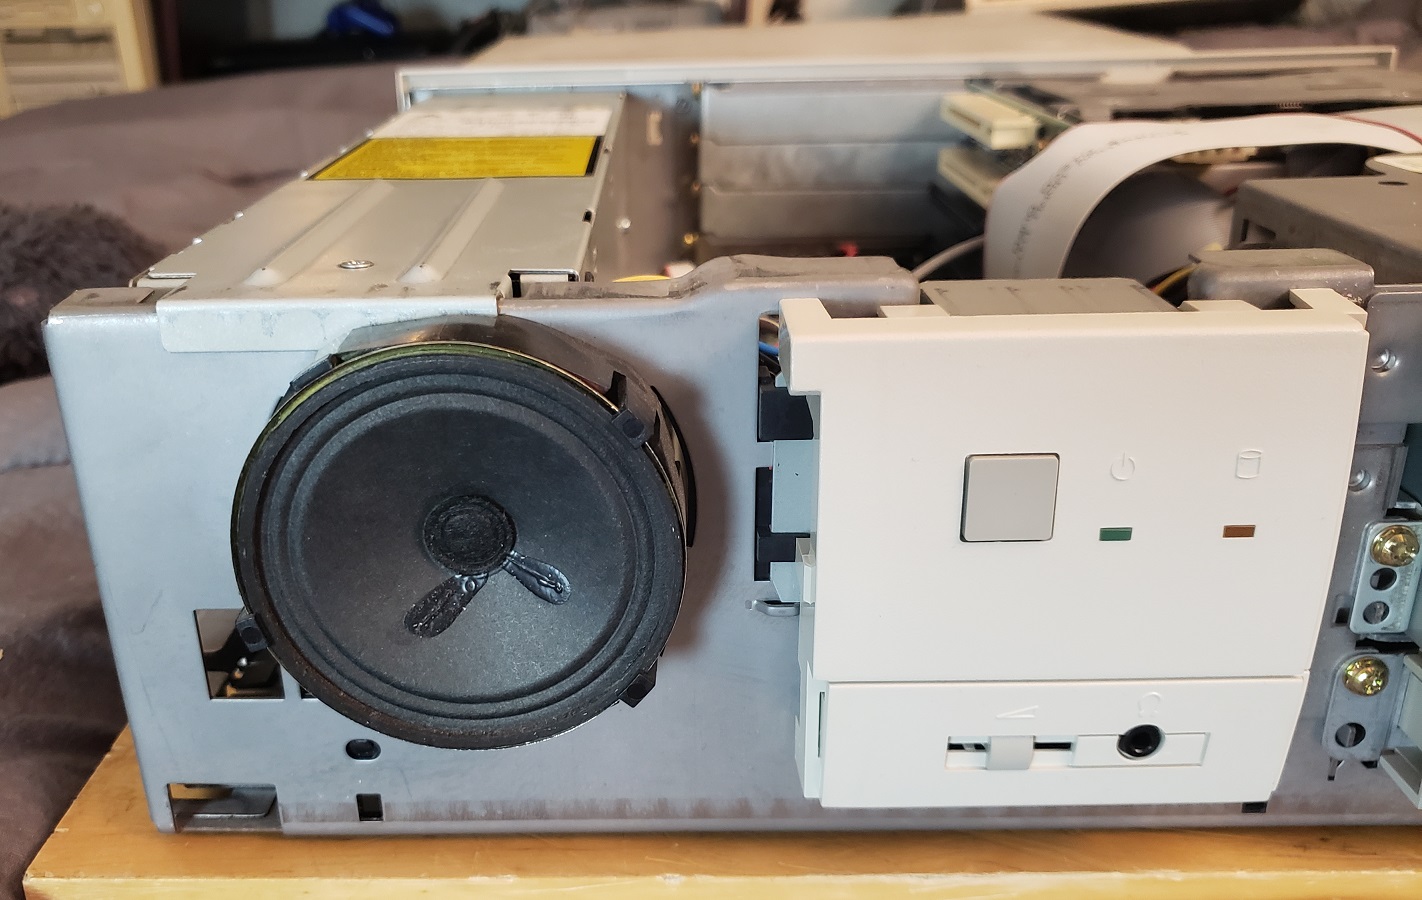
At the center of the front of our case we have a rather large square power button as well as LEDs for power and HDD activity, no reset button is to be found though. Below this we have a conveniently placed volume slider as well as a 1/8 headphone jack.
To the far right we have dual 3.5 bays as well as a single 5.25 bay though I think I would have preferred dual 5.25 bays. My current setup has the original CD-ROM drive and one 1.44MB floppy drive installed though I’ve considered adding a ZIP drive to the lower 3.5-inch bay.
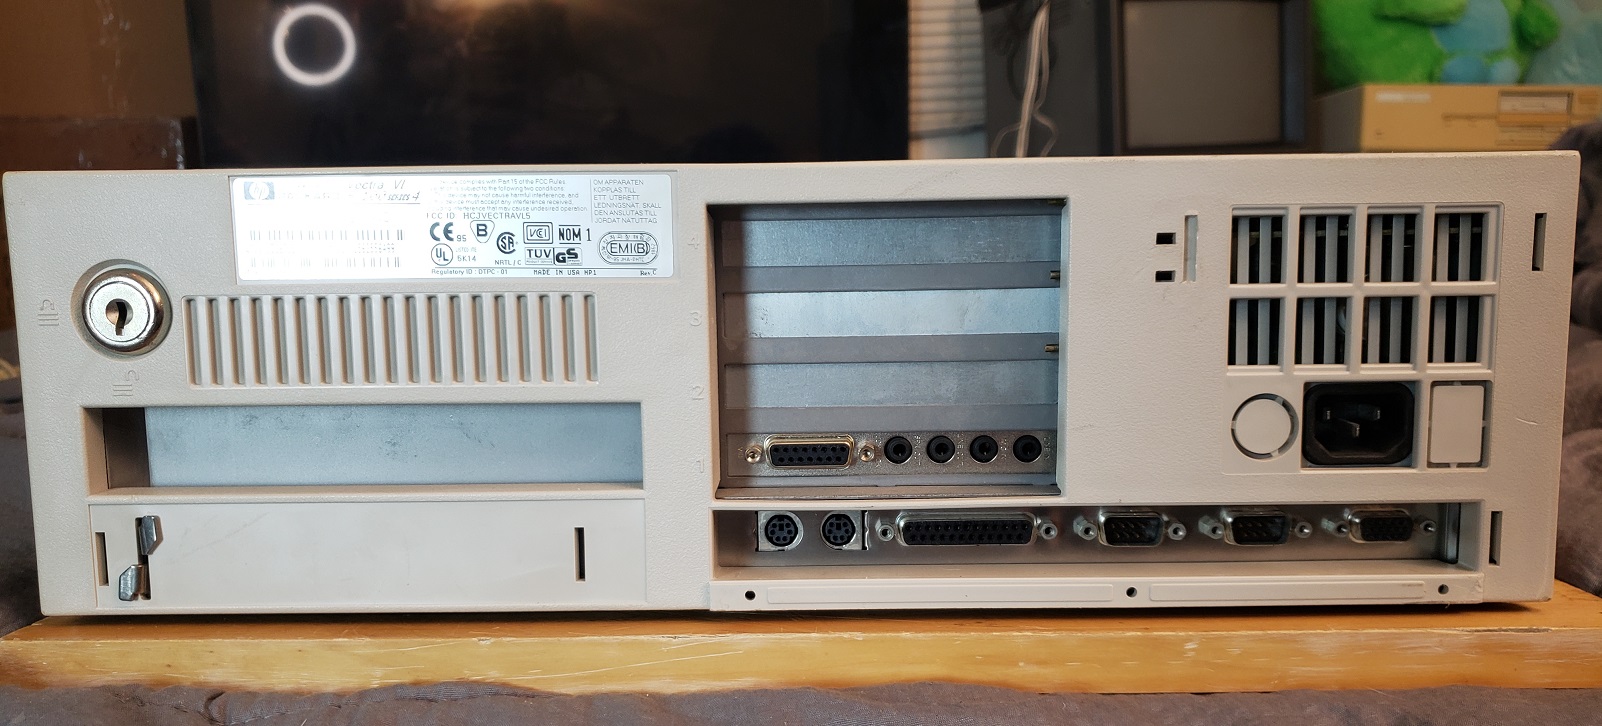
On the back of the case there is what appears to be a slot on the left side. I believe on some models that this slot is used for an optional network connector card but on this model the slot is not present.
Next to this we have four vertically oriented expansion slots. below the expansion slots we have multiple built-in I/O. starting on the left we have dual PS/2 ports for the keyboard and mouse followed by a parallel port, two serial ports and then finally a VGA out port for the built-in video. Lastly, we have a standard 3-prong power connector on the right of the case.
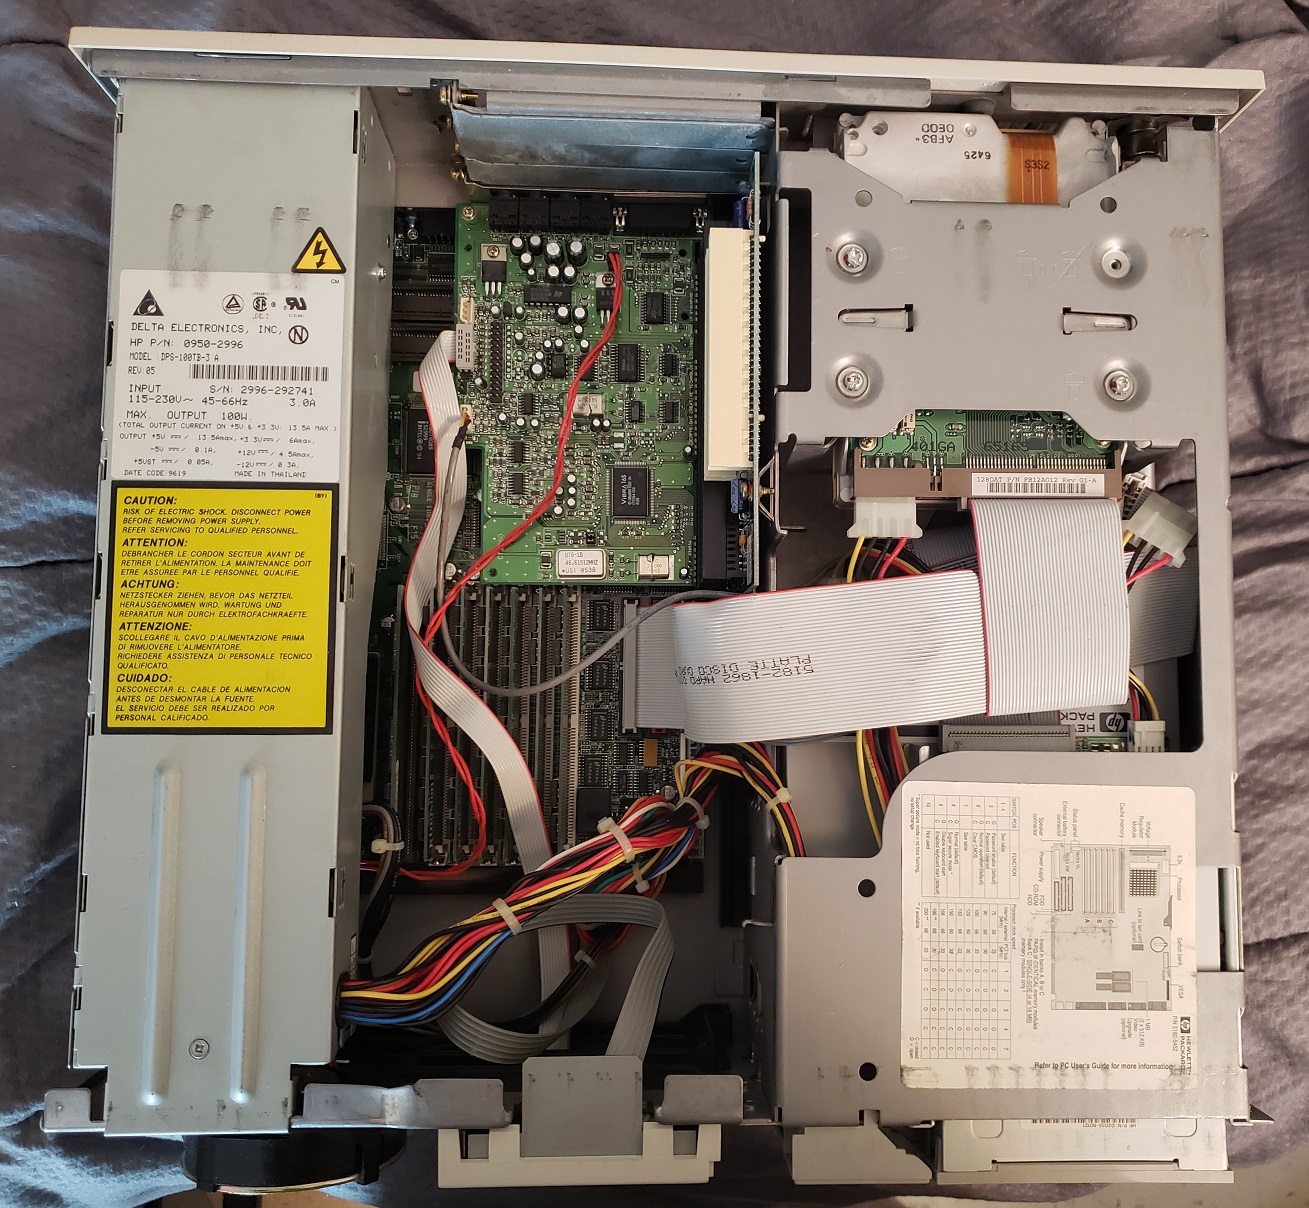
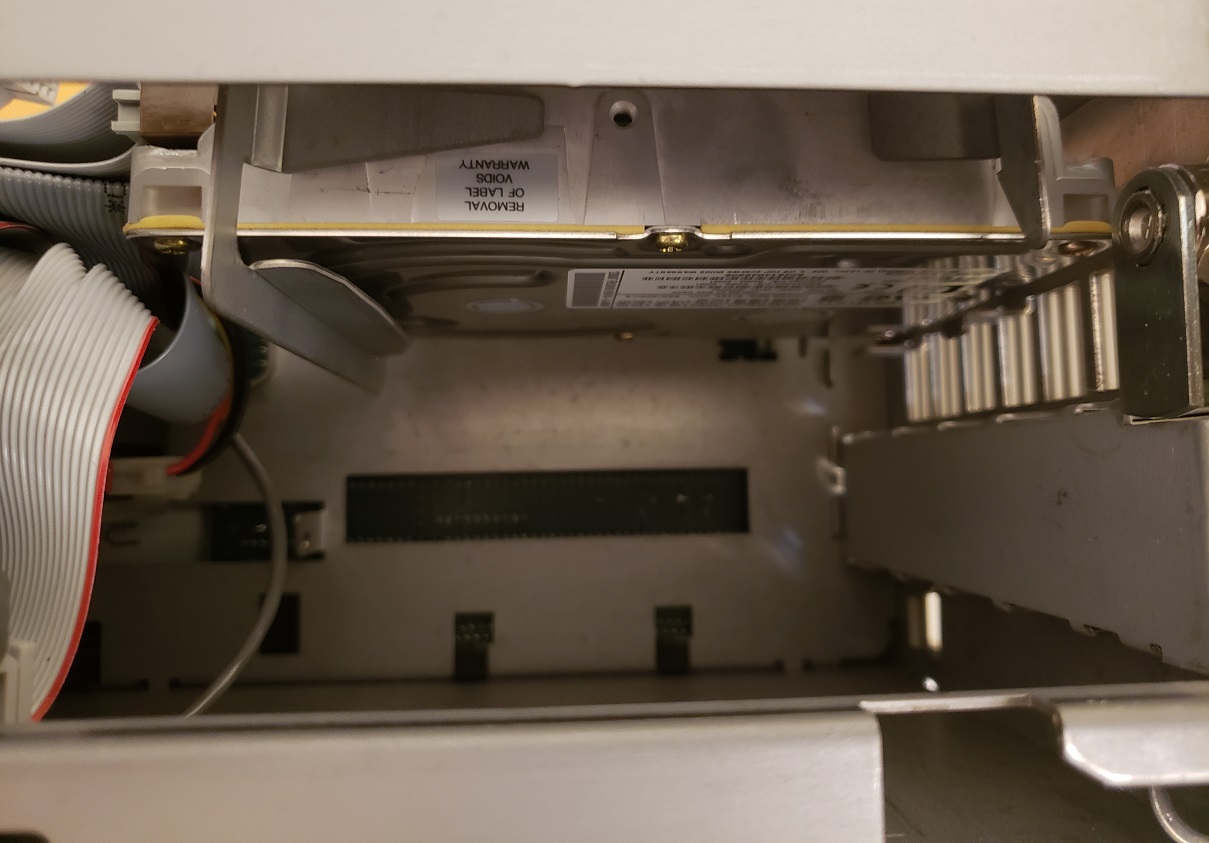
Here is the Vectra with the top cover removed. The proprietary power supply on the left which also acts as a cooling fan for the CPU can easily be removed by pulling it up and out. On the right we have the drive bays to the front of the case and behind these we have a spot for a hard drive to be mounted in a horizontal upside down orientation.
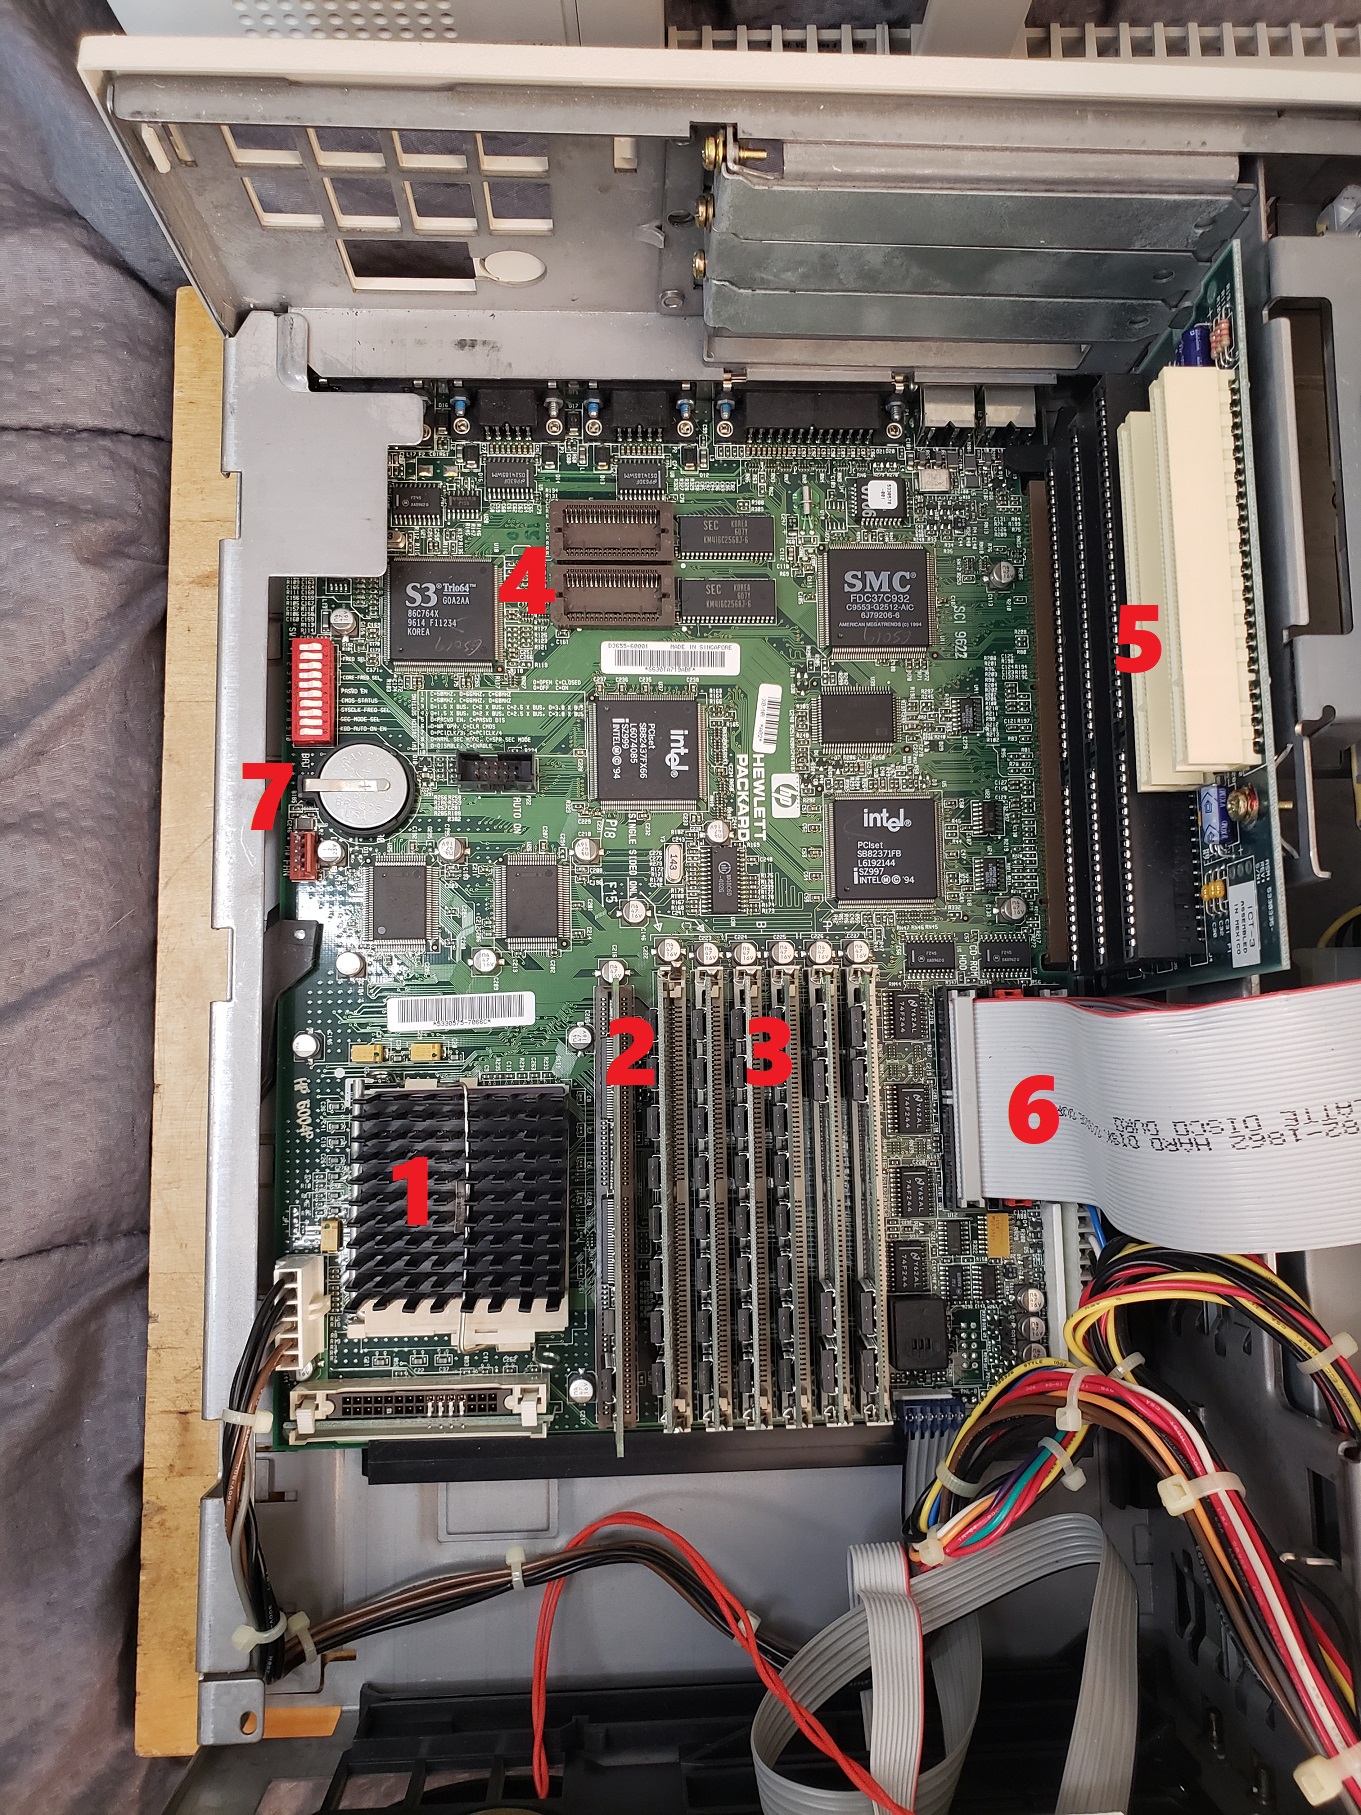
The motherboard as we can see above uses the Triton 430FX chipset and uses a riser card for connecting expansion cards.
1) CPU – The CPU on this Vectra VL is a 100MHz Pentium. This is a good all around CPU for late DOS titles and Windows 3.1 or even Windows 95. The socket 7 board does allow for a wide range of CPUs to be installed from 75MHz to 200MHz non MMX. There is a voltage regulator module next to the CPU socket and I believe with the proper module MMX CPUs can be installed.
Next to the CPU socket on the left is also an AUX power connector for the proprietary power supply.
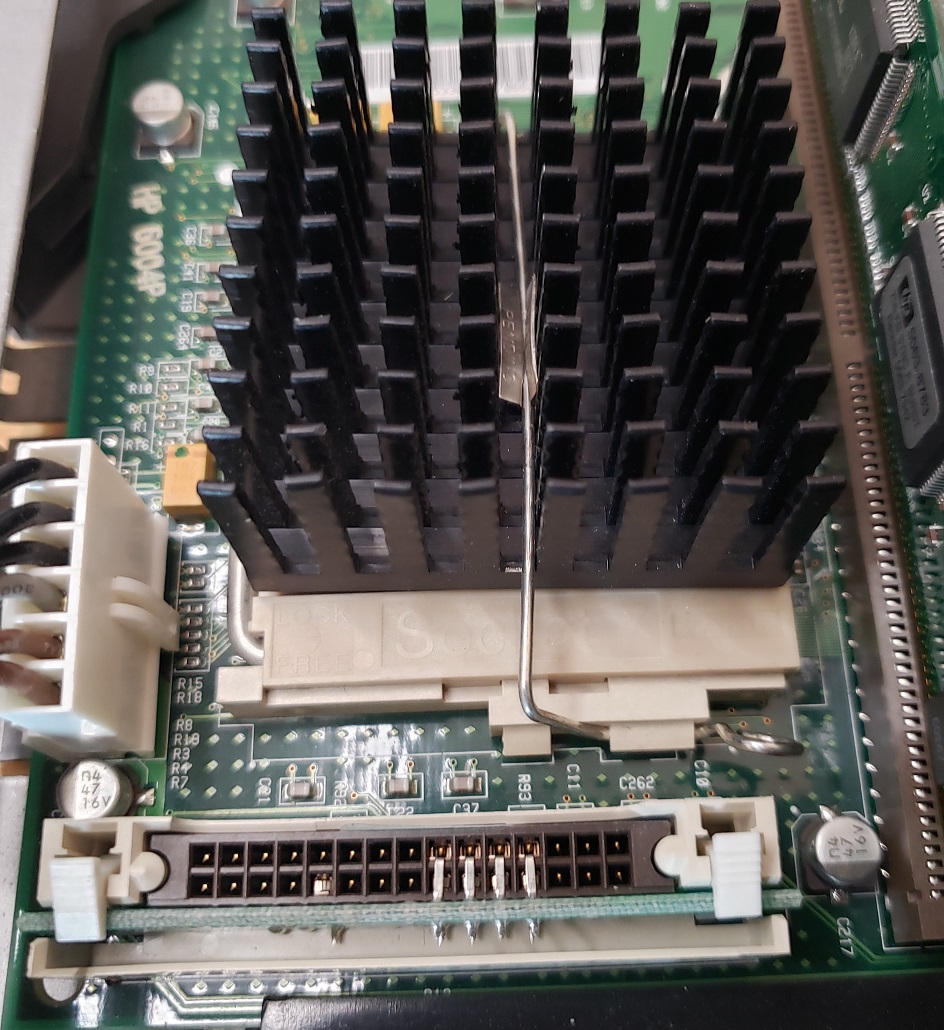
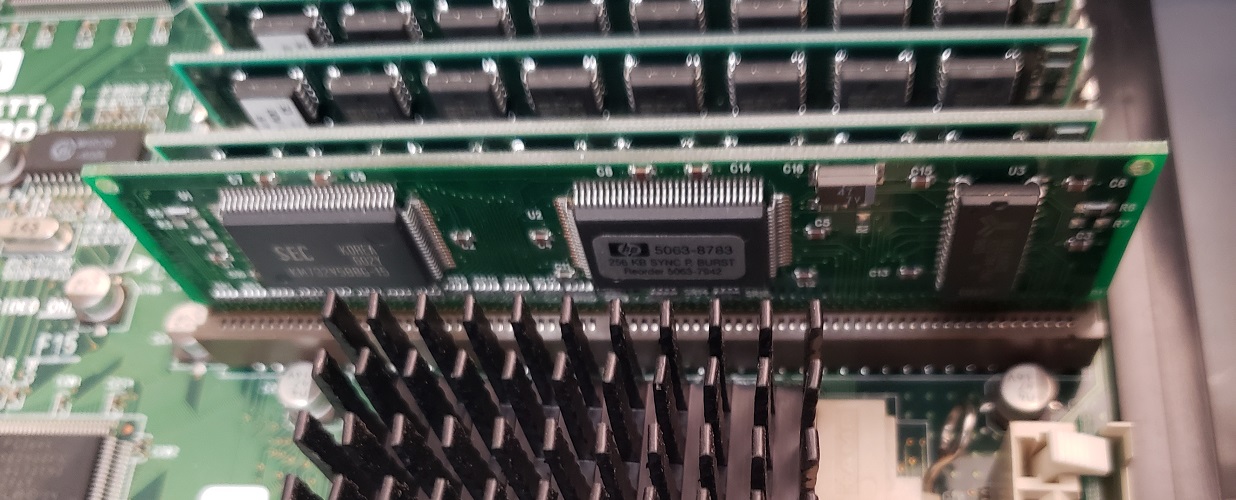
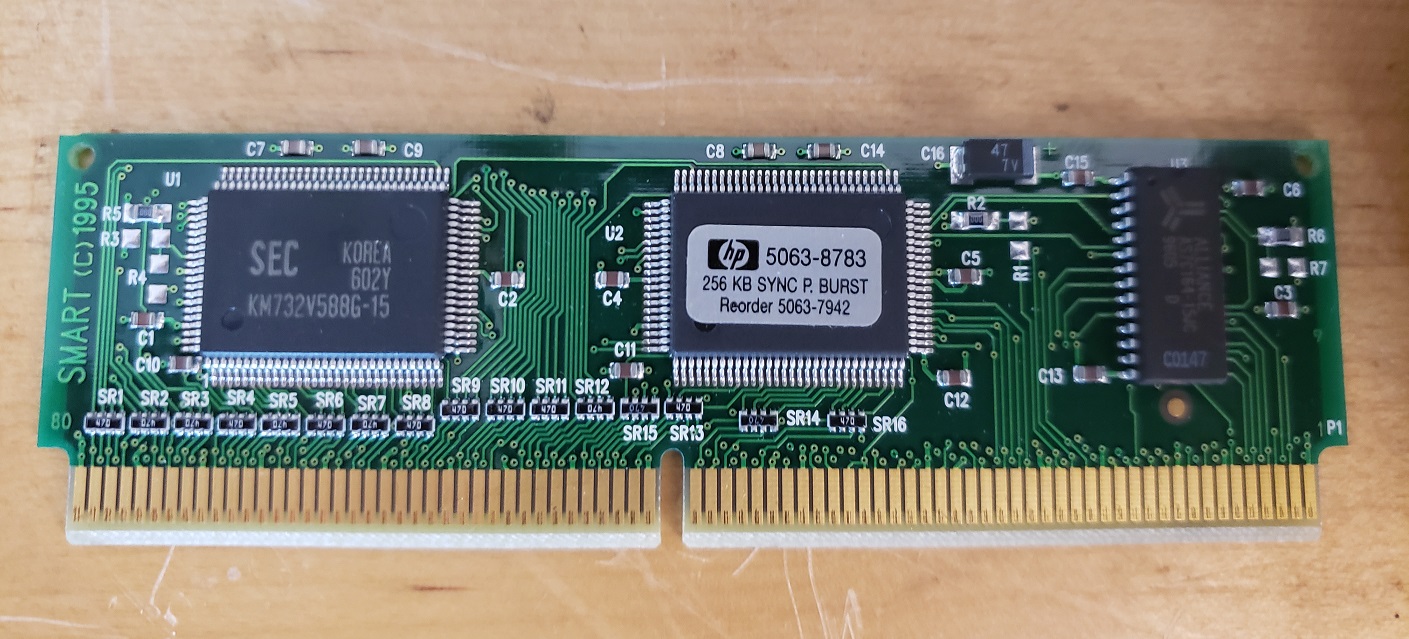
2) L2 cache – This board uses a pipeline burst COAsT module for L2 cache memory. COAsT modules or cache on a stick was a fairly common method of adding L2 cache on the early socket 7 motherboards. The module on my board was a standard for the time 256KB though larger ones may be available. running without the module installed can significantly degrade performance.
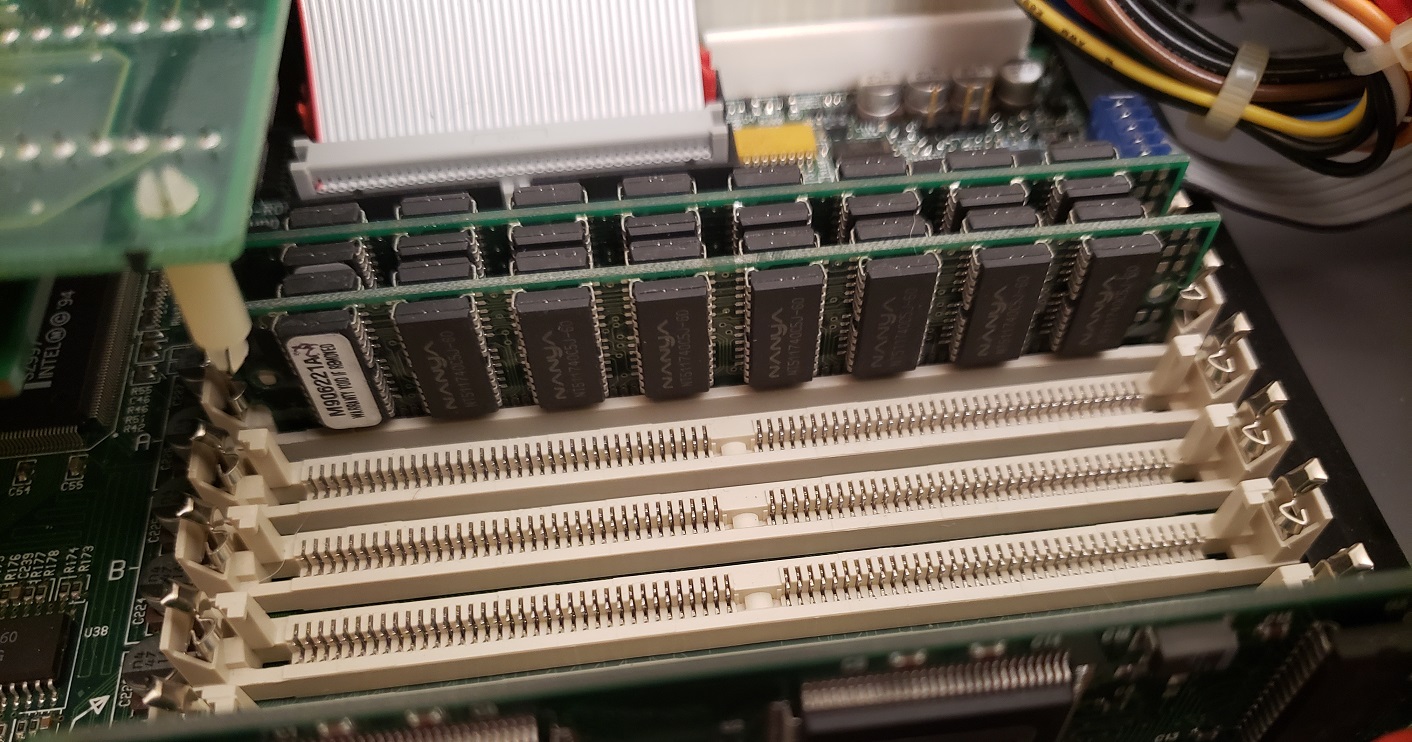
3) RAM – This board has six slots for accepting 72-pin memory modules. The max memory wasn’t stated but going by the chipset the maximum memory should be 128MB. When I received this PC I believe it had 16MB of RAM installed but I upgraded it to 64MB total via two 32MB sticks of memory as seen below.
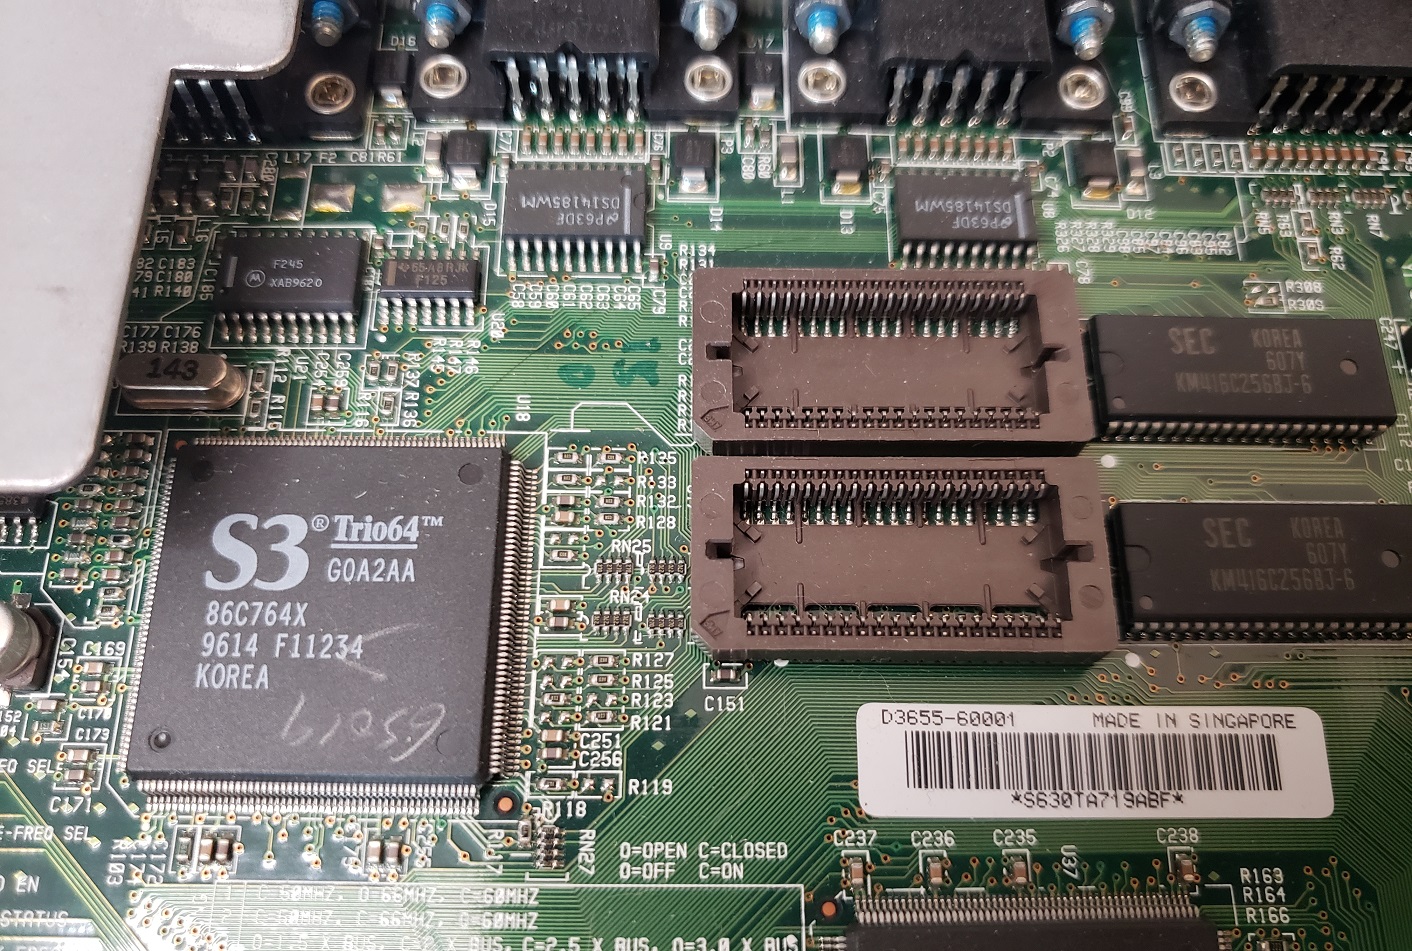
4) Video – on-board video is provided by a Trio64 video chip and 1MB of video RAM expandable to a full 2MB. The S3 Trio64 is an excellent 2D chip for DOS gaming and should provide maximum compatibility with games. If you’re building a pure DOS PC the built-in Trio64 should be sufficient for most needs but There are faster options available if you’re willing to install a PCI video card.
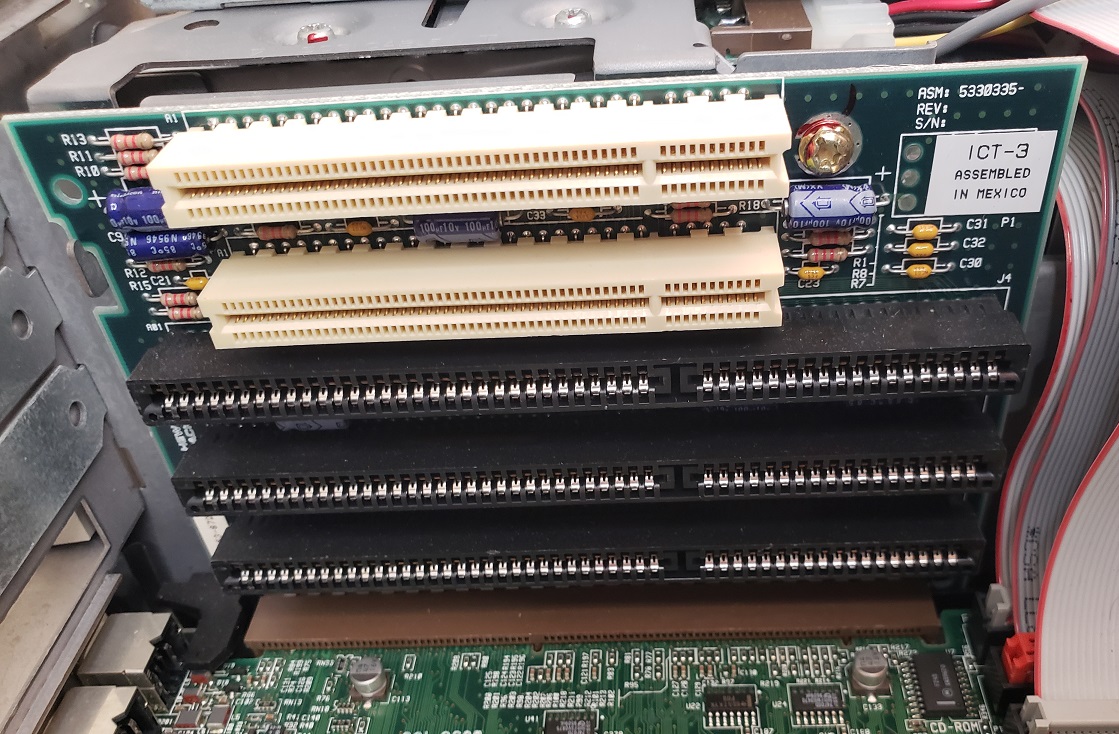
5) Riser Card – The riser card provides five expansion slots in total, two PCI and three 16-bit ISA. The two PCI slots can be utilized for a primary video card as well as a Voodoo card for 3D if desired for a significant video upgrade.
6) IDE and a floppy connector supporting two floppy drives and four IDE devices.
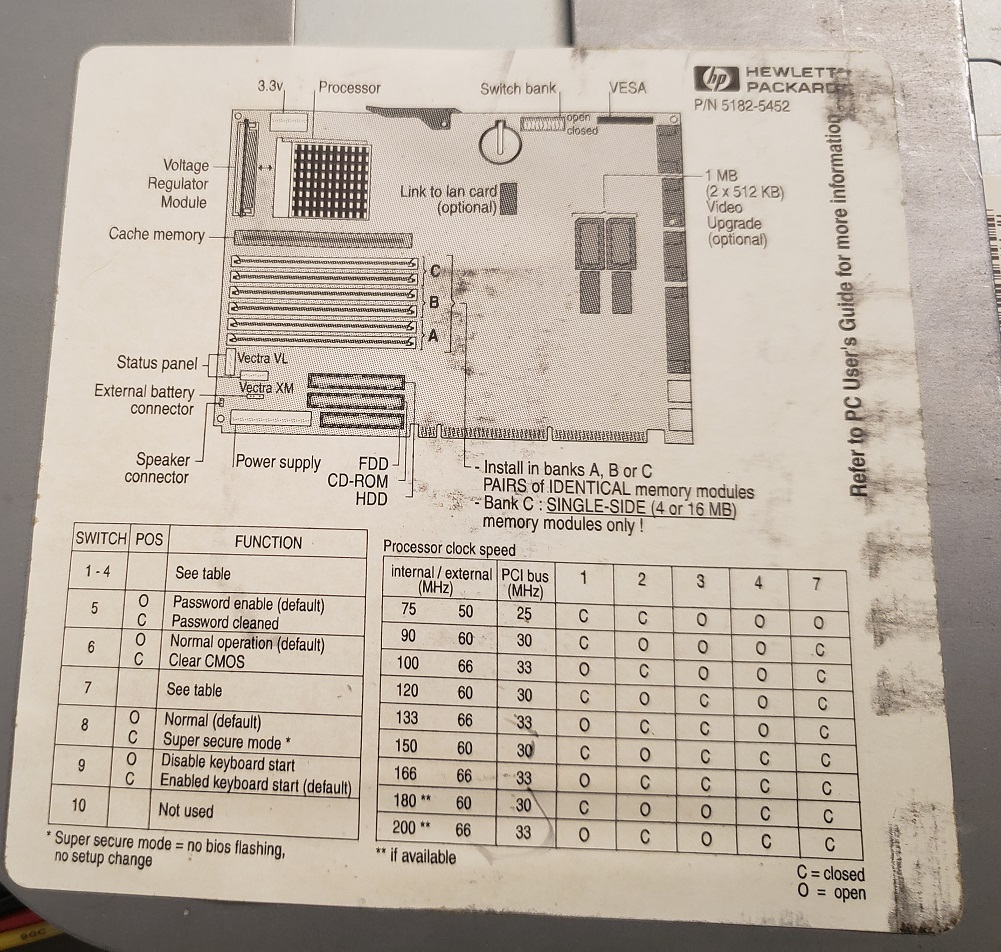
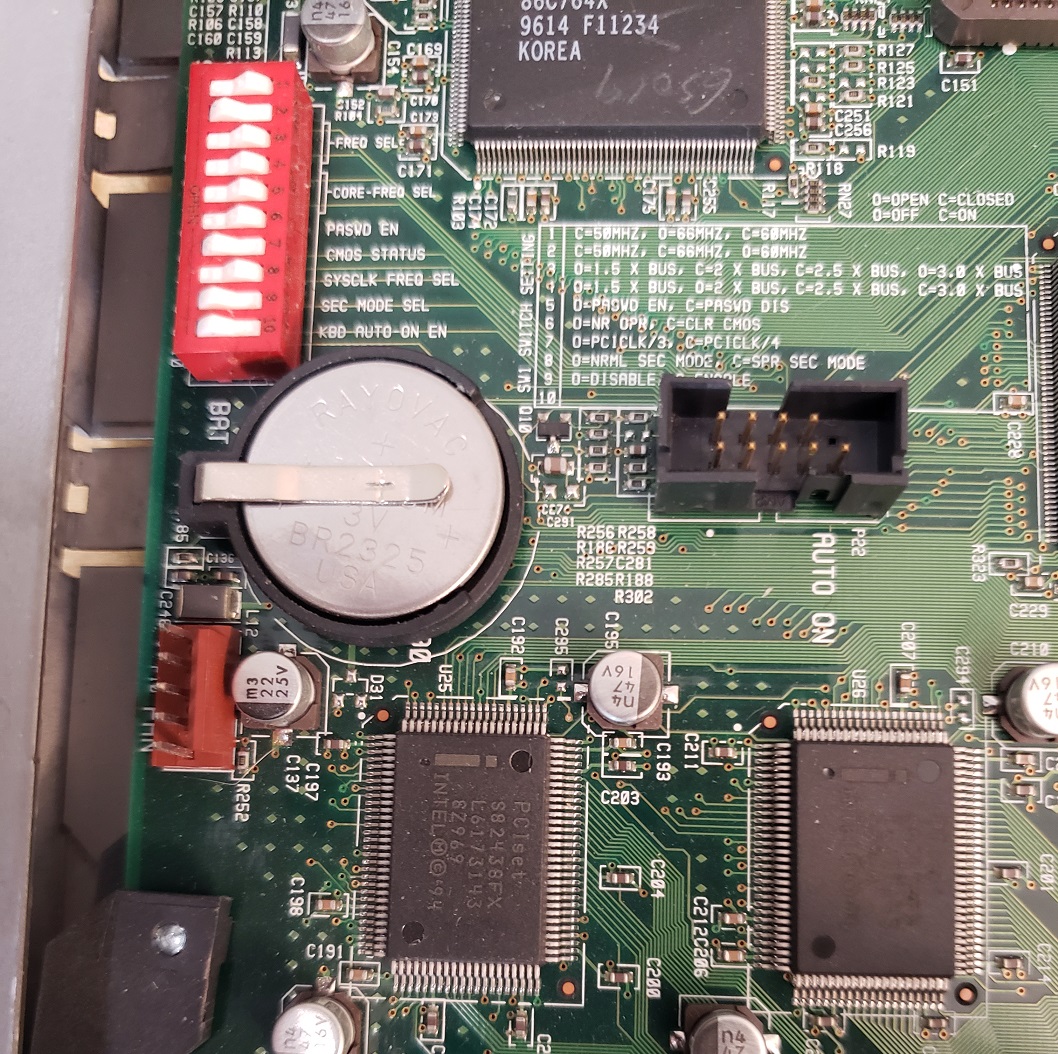
7) CMOS battery and switch box – The switch box is used to configure things such as enabling passwords, clearing the CMOS battery and most importantly configuring the board to the CPU you have installed. please refer to the chart further up the page for settings. settings can be found on the case sticker over the drive bays as well as silkscreened onto the board itself.
Expansion Cards
Sound – The Vectra VL series 4 5/100 did not have sound built into the board but my machine did come with what appears to be an OEM Sound Blaster ISA card which had a connector to interface with the front panels’ audio.

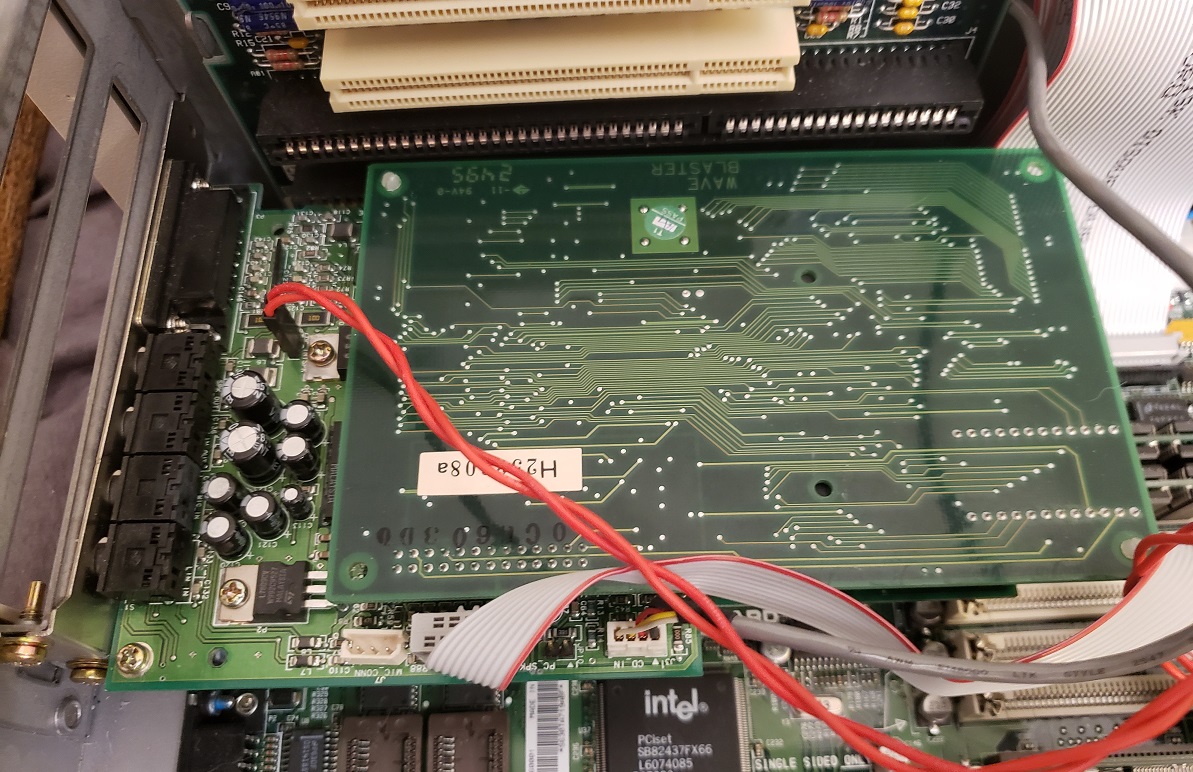
The card is a 16-bit ISA Sound Blaster model CT2860 with the Vibra16S chip on board. This board does provide a real Yamaha OPL3 chip as well as a wavetable header, midi/joystick port and a speaker connector as well as a connector to the front panel audio that I have never found on any other Sound Blaster card. Unfortunately, this card does suffer from the hanging midi bug if using it with a wavetable card. I also read online when researching these cards that several users described it as a “noisy” card though when I used it myself I found it quite adequate and it sounded just fine in my testing (though I’m not an audiophile).
You can replace this card with any ISA or PCI sound card though you will lose the ability to connect the new card to the front audio controls on the case. Despite the hanging note issues with this card I did decide to keep it installed and even installed my Creative Wave Blaster midi card.
Video – For video I decided to upgrade to a faster PCI card. Although PCI 2D/3D combo card options are abundantly available I decided to go with a discrete 2D and 3D card. For 2D video I decided to go with a ArkLogic based card.
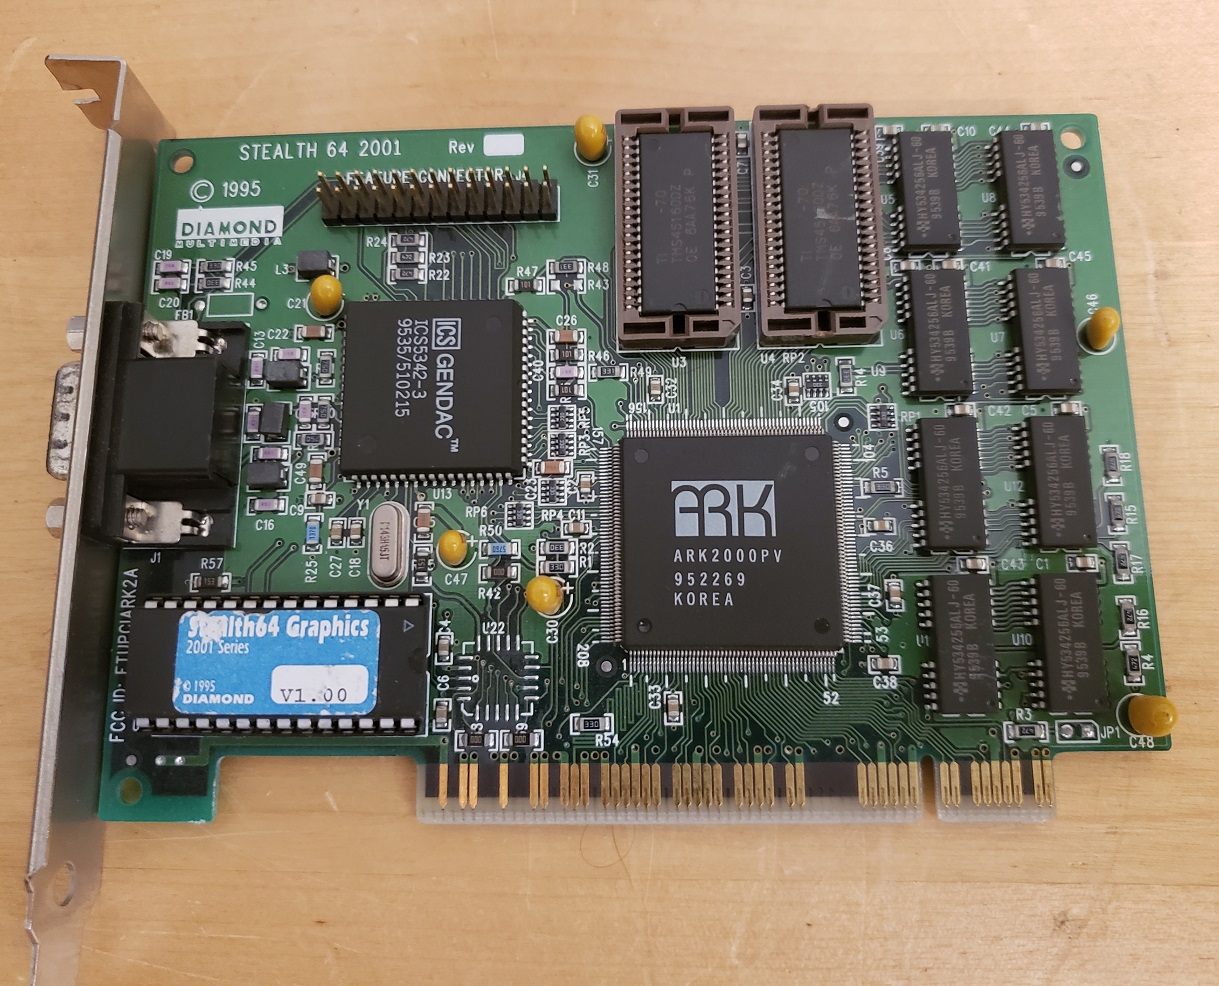
The card I used is the Stealth 64 2001 from Diamond multimedia and it is based on the ArkLogic 2000PV chip. My card is maxed out to its full 2MB of memory and provides excellent 2D compatibility and speed in DOS and early 2D windows titles though possibly slightly less compatibility than the Trio64 chip.
I did do some benchmarking between the ArkLogic card and the built-in Trio64 and found the ArkLogic card to be noticeably although not overwhelmingly faster than the Trio64.

For 3D I decided to pair the ArkLogic 2D card up with a 3DFX Voodoo 1 card which previously was installed in my older HP Vectra VL. Since I did build out this machine to be more DOS and Windows 3.1 oriented I felt the original Voodoo card and its better compatibility with DOS based Glide games would be most useful.

I still really like the HP Vectra line and this machine is now in my personnel permanent setup as a faster DOS/Windows 3.11 PC. There are some small annoyances like the proprietary power supply but they seem to be pretty durable overall. Although this PC was designed and mostly sold as a business or work at home computer it’s very easy to tweak them into very capable DOS and early Windows gaming PCs.


One Comment
Wise to stick with 64 MB. I’m not sure you’ve addressed the memory maximums with the Intel 430 FX, VX and TX chipsets before, but they are a bit deceiving. Regardless of the maximum addressable main memory (128 MB for FX and VX, 256 for TX), these chipsets could only address enough L2 cache tag (the little chip on the COAST module in this system; also often seen as a 9th SRAM chip in machines that use individual chips) to allow 64 MB of main memory to be accessible to the cache. The tag kept track of which addresses in main memory were present within the L2 cache.
Because most protected mode operating systems load from the highest memory addresses downward (to avoid the funniness of the 1 MB of conventional memory at the lowest addresses), using more than 64 MB of memory would mean the majority of data would be above the addressable space that the L2 cache could see, resulting in a performance penalty. Windows NT and 9x behave this way, but I’m not sure about how DOS and Windows 3.x load XMS memory. Anyway, as you’ve pointed out numerous times, DOS and Win 3.x don’t benefit from more than 64 MB anyhow.
The 430 LX, NX and HX did not suffer from this limitation. Indeed the cache tag was integrated into the chipset itself with the LX and NX, and these machines don’t require a separate tag chip. Intel dropped the integrated tag from the HX chipset, and many HX systems were by default only equipped with enough tag for 64 MB of L2-cachable main memory. An empty extra SRAM socket was often seen on HX mobos to allow for expansion of the tag.
VIA chipsets also had differences in maximum memory vs L2 cacheable memory, and with them, the amount of cacheable was influenced by the size of the cache. Bigger L2 cache = more cacheable main memory. These quirky old schemes weren’t usually a limitation at the time, but can be problematic now when maxing out socket 7-era systems. The CPU’s L1 cache was unaffected by all this.