Today we are going to take a look at one of my newer PCs which has recently taken its place as my flagship example of a 286 class PC. DTK or Datatech Enterprises is a Taiwanese PC manufacturer that was a fairly large player in the 1980s computer world and even into the 1990s. The DTK tech-1230 we see here is one of their earlier PC compatibles from 1989 and is considered a “mini-desktop”.
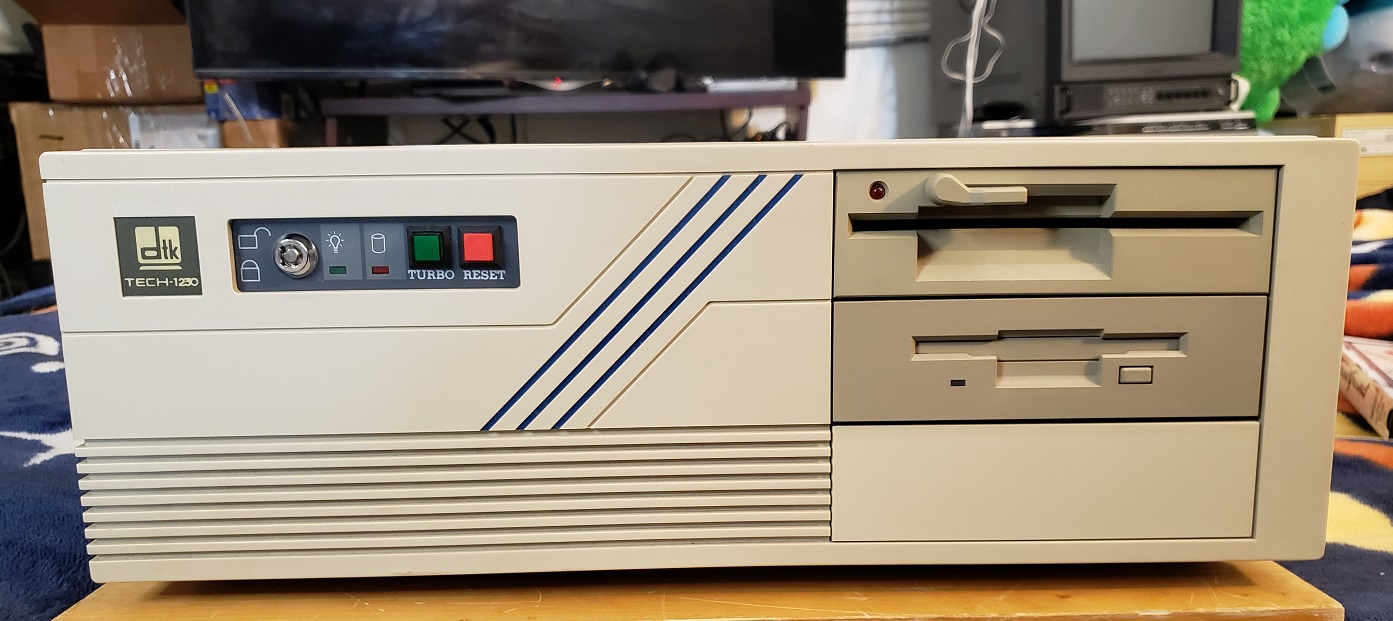
The DTK tech-1230 has three frontal 5 1/4 bays for expansion. I currently have installed a pretty standard for the time setup of dual floppy drives, one 1.2MB 5 1/4 drive paired with one 1.44MB 3.5 drive in an adaptor bay. Although not common or particularly era correct a CD-ROM drive can always be installed in the third bay if so desired.
Next to the case badge on the left, there is a keylock and LEDs for power and HDD activity. The dual buttons are a green turbo and a red reset button. The turbo button lights up green when pressed and is used to toggle the speed of the CPU which in the case of this PC is between 8 and 12MHz. One thing I really like about the look of this case is the three blue diagonal stripes at about the center of the case. They aren’t much but they work to differentiate this machine from the sea of beige boxes that existed at the time.
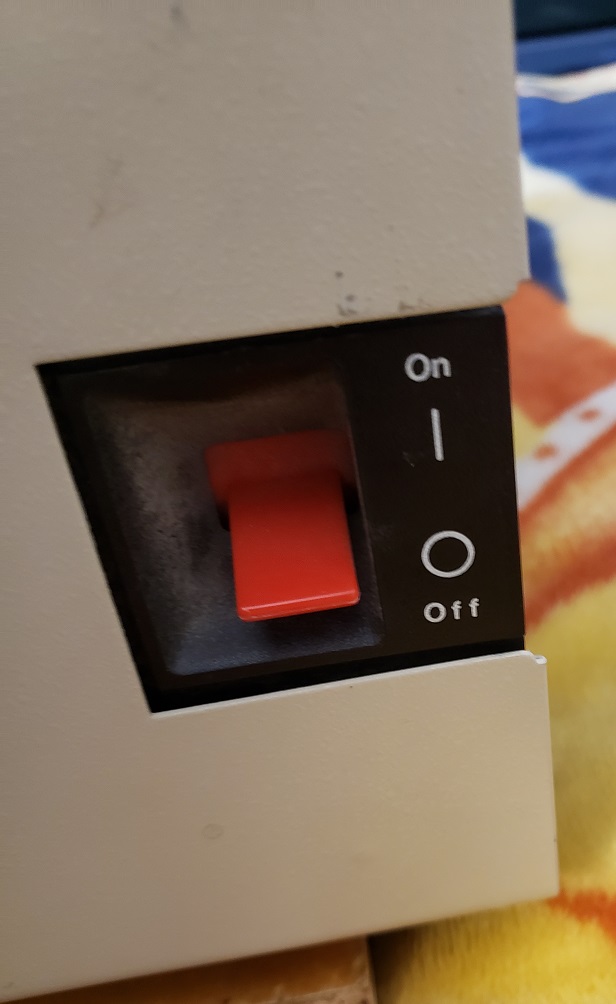
The power switch is on the right side of the case and is in the style of many early PC and XT style PSU switches.
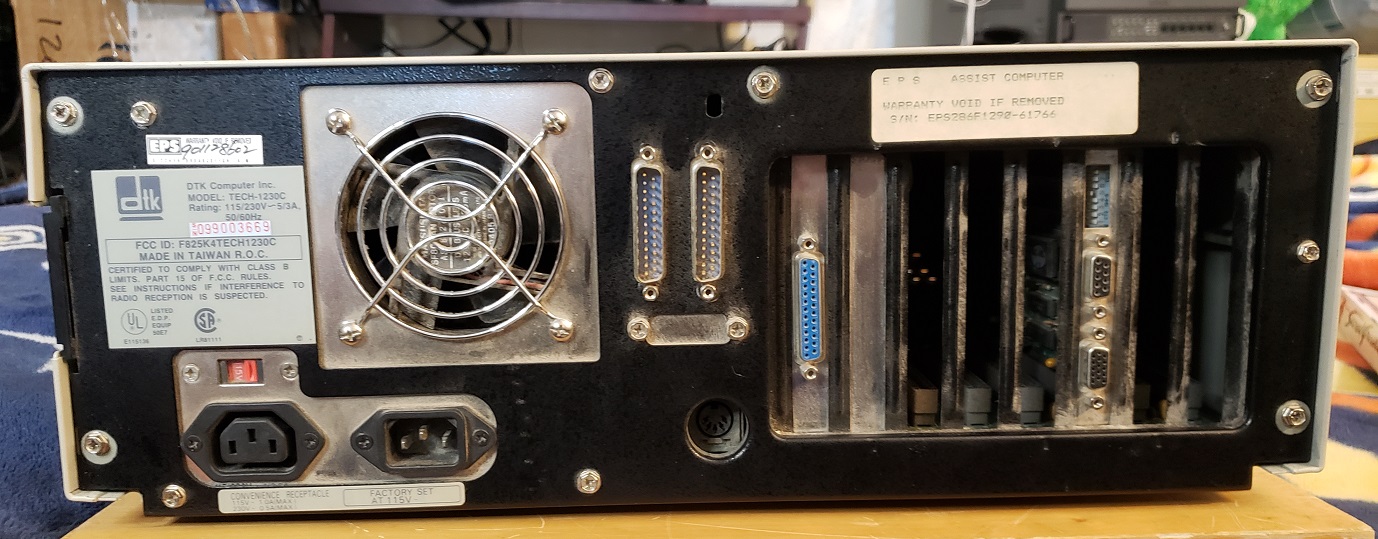
The back is pretty standard for a case of this type. We have a PSU with the additional connector for attaching a monitor directly which is always a nice option. To the right of the PSU are dual 25-pin serial ports. If you’re planning on using a serial mouse I would suggest getting a cheap and easy to find 25-pin to 9-pin serial adaptor.
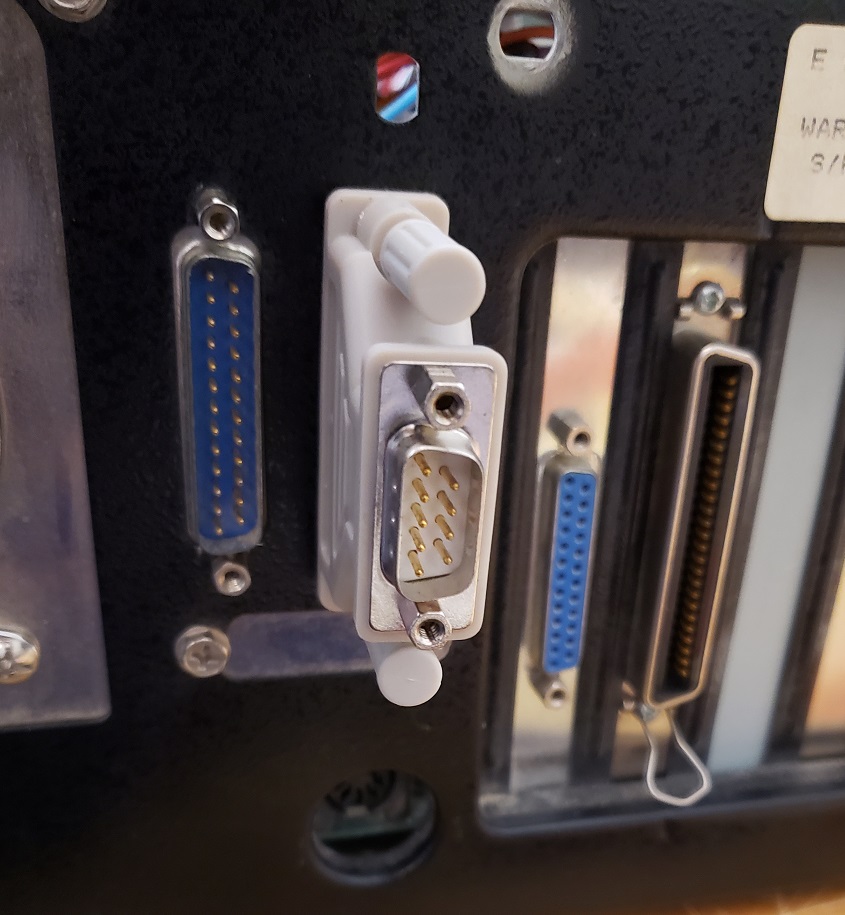
Next to that, we have a parallel port. Other than these connectors the only other card it appears we have installed is a video card. We will take a look at this card as well as what I added later in the article.
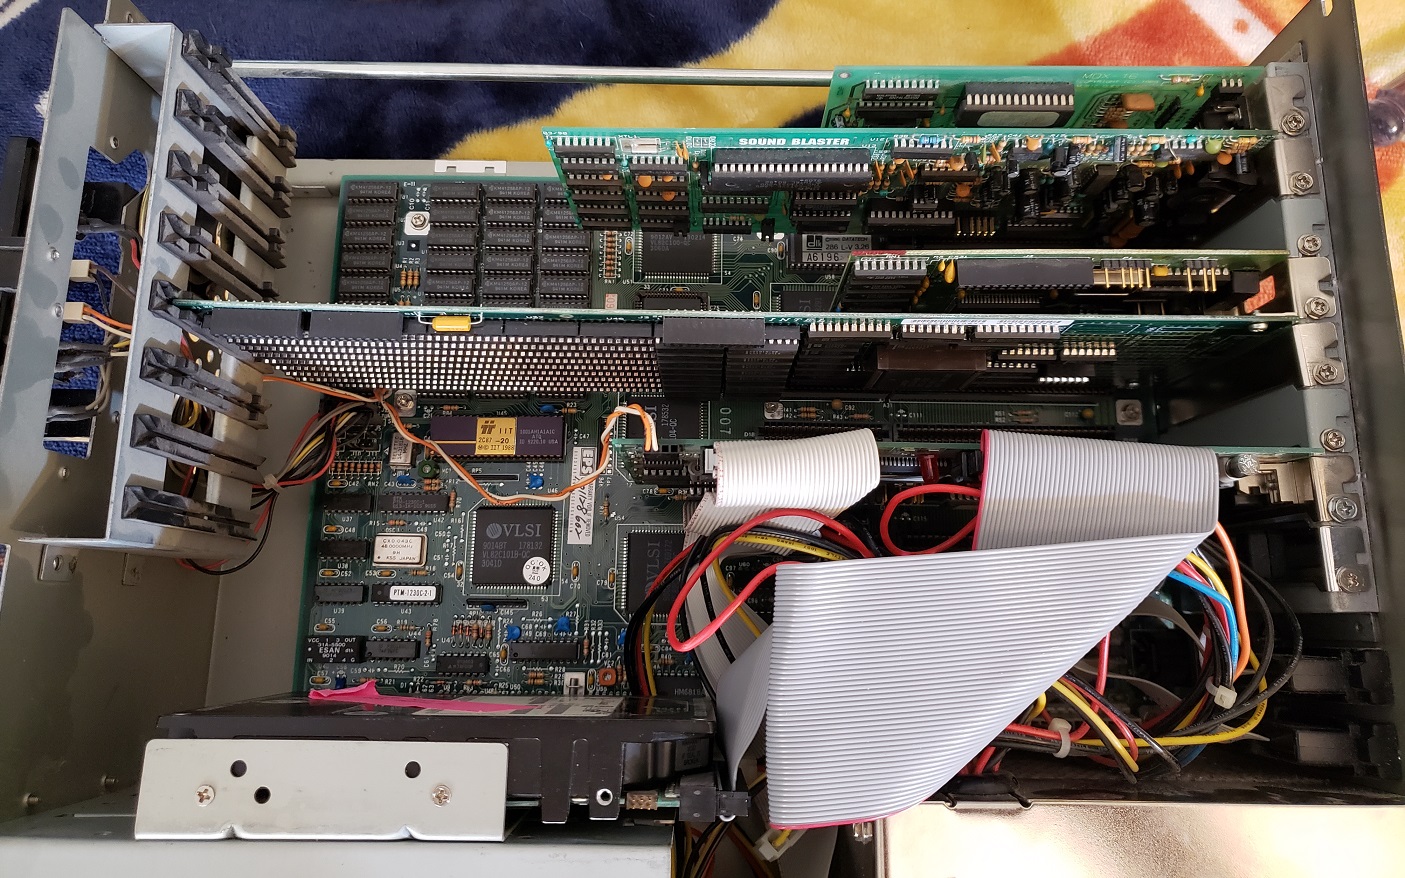
Okay, let’s take off the cover and get a look at the inside.

Pretty simple on the inside with just a video and an I/O expansion card installed as well as what looks like an IDE hard drive installed vertically on the side of the 5 1/4 inch bays.
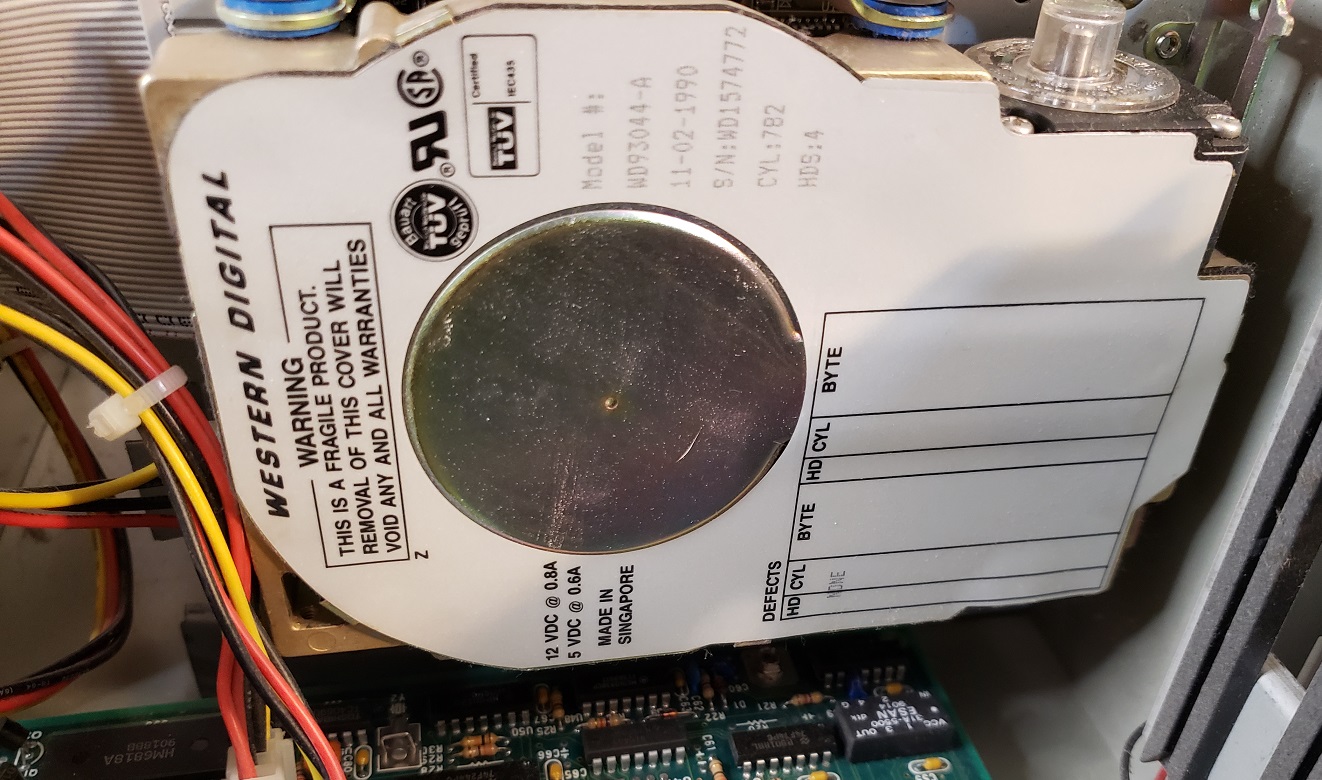
The hard drive is a 43MB Western Digital WD93044-A IDE drive being controlled by our multi I/O card. The drive did spin up but was not detected by the controller card.
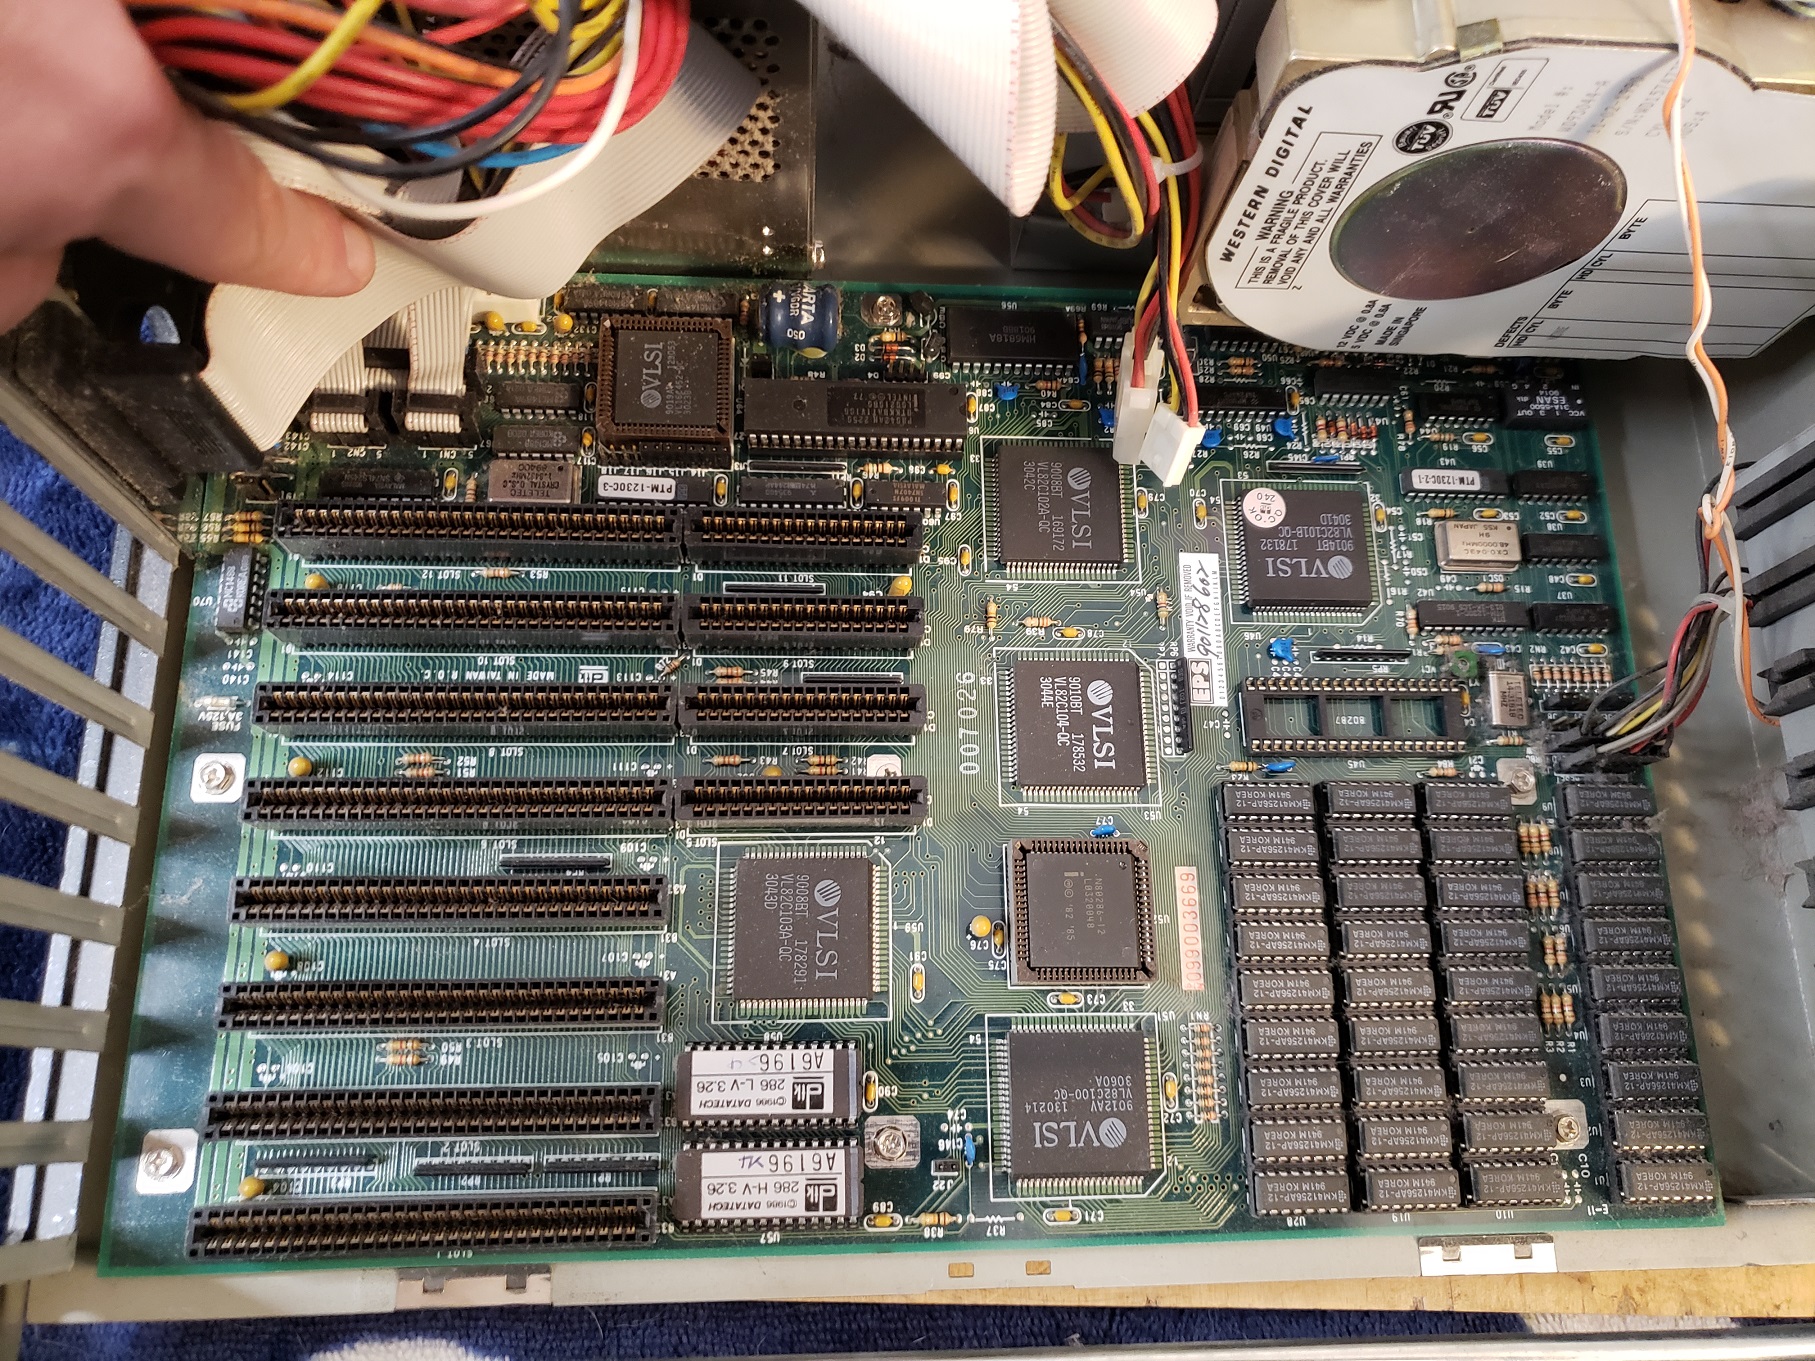
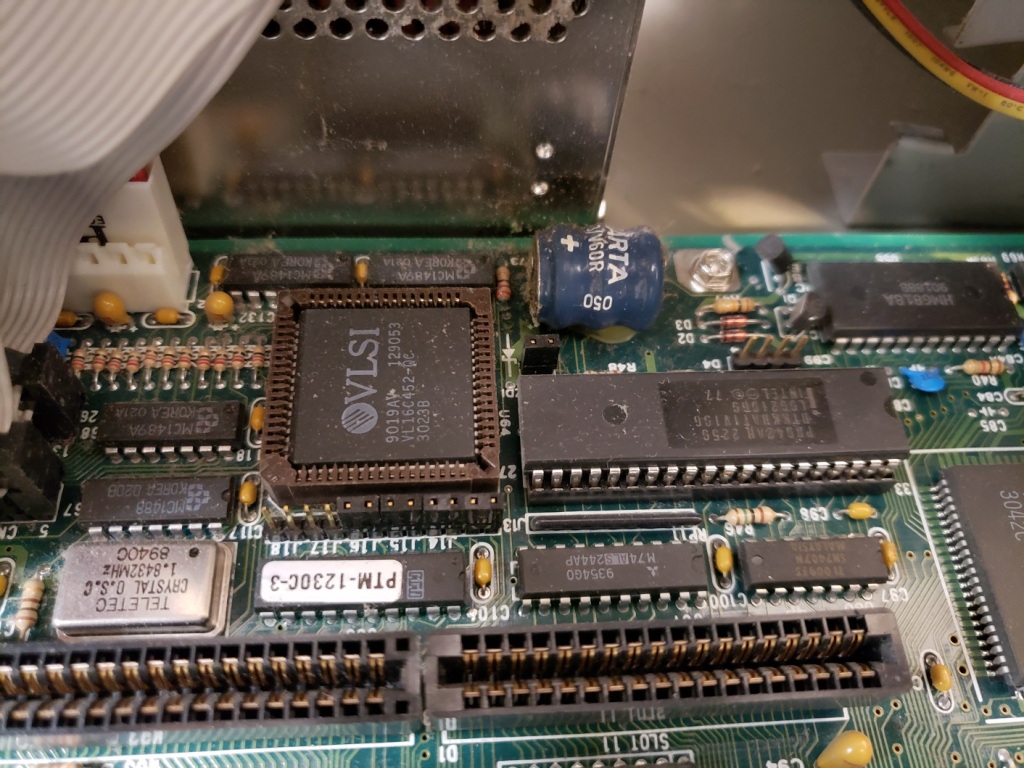
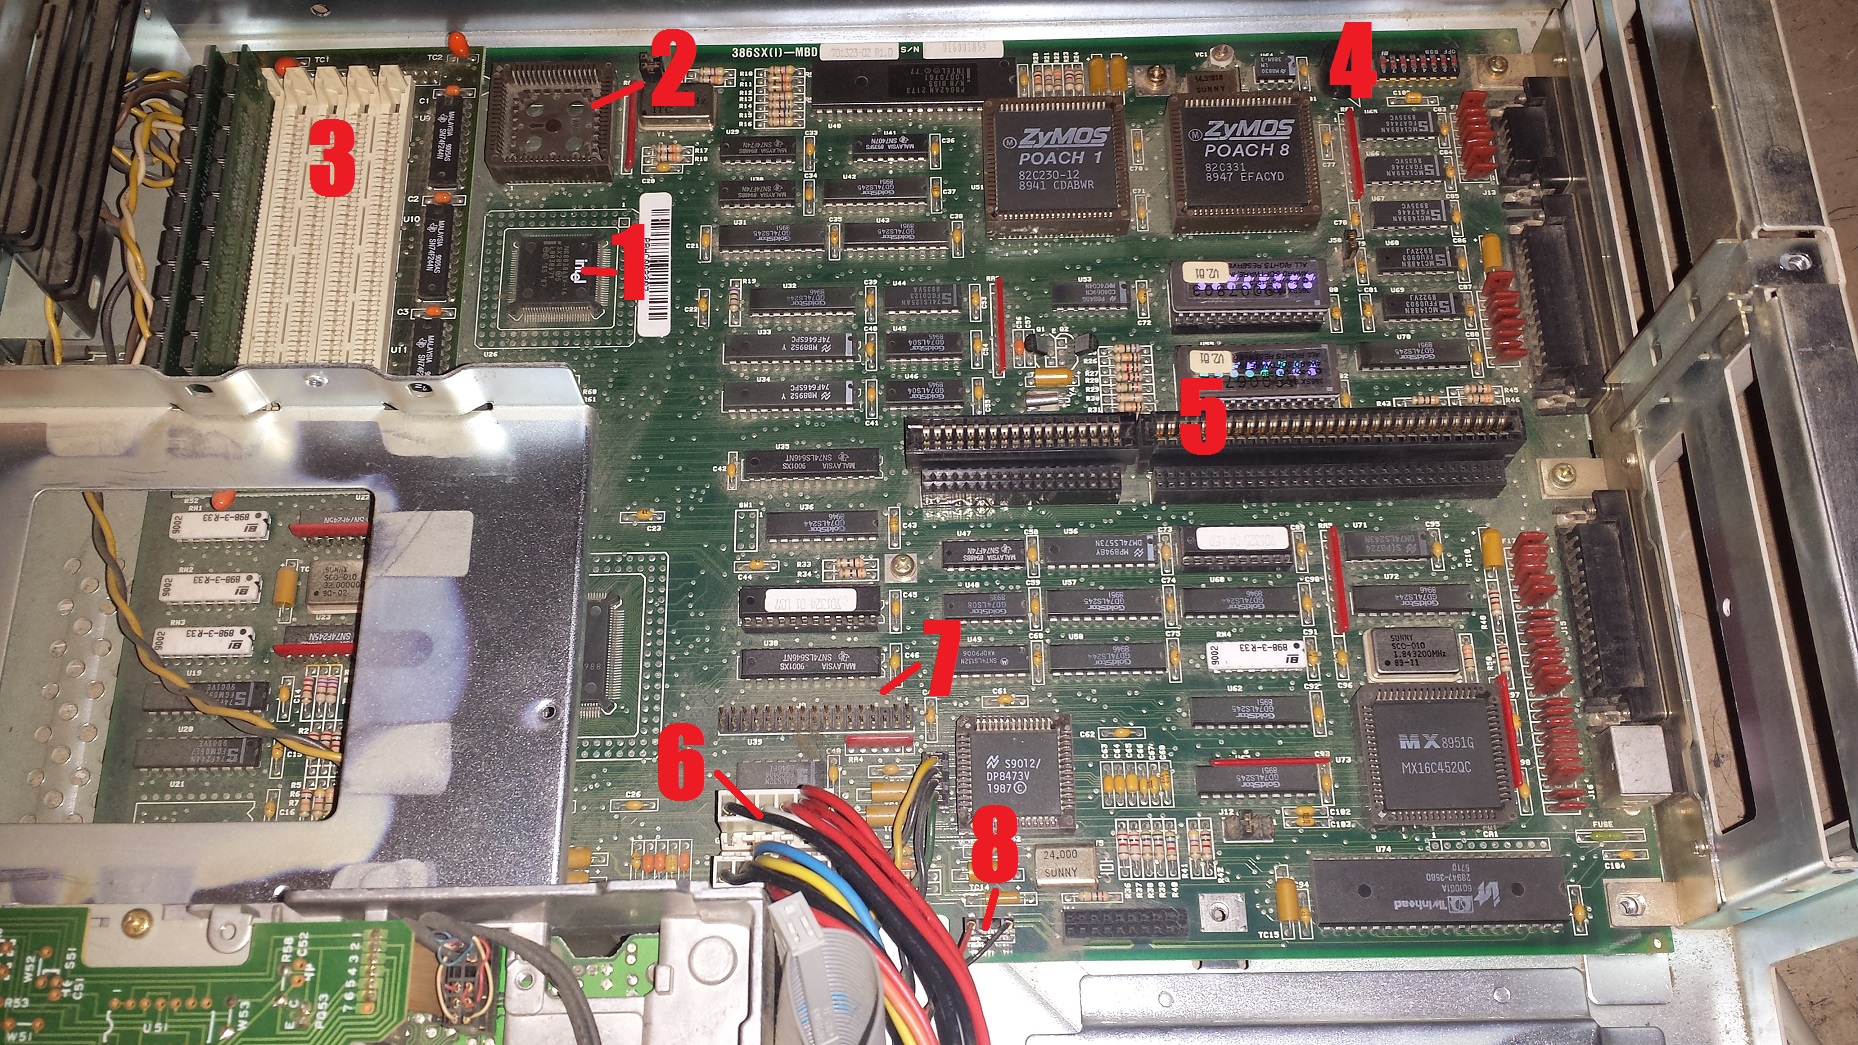
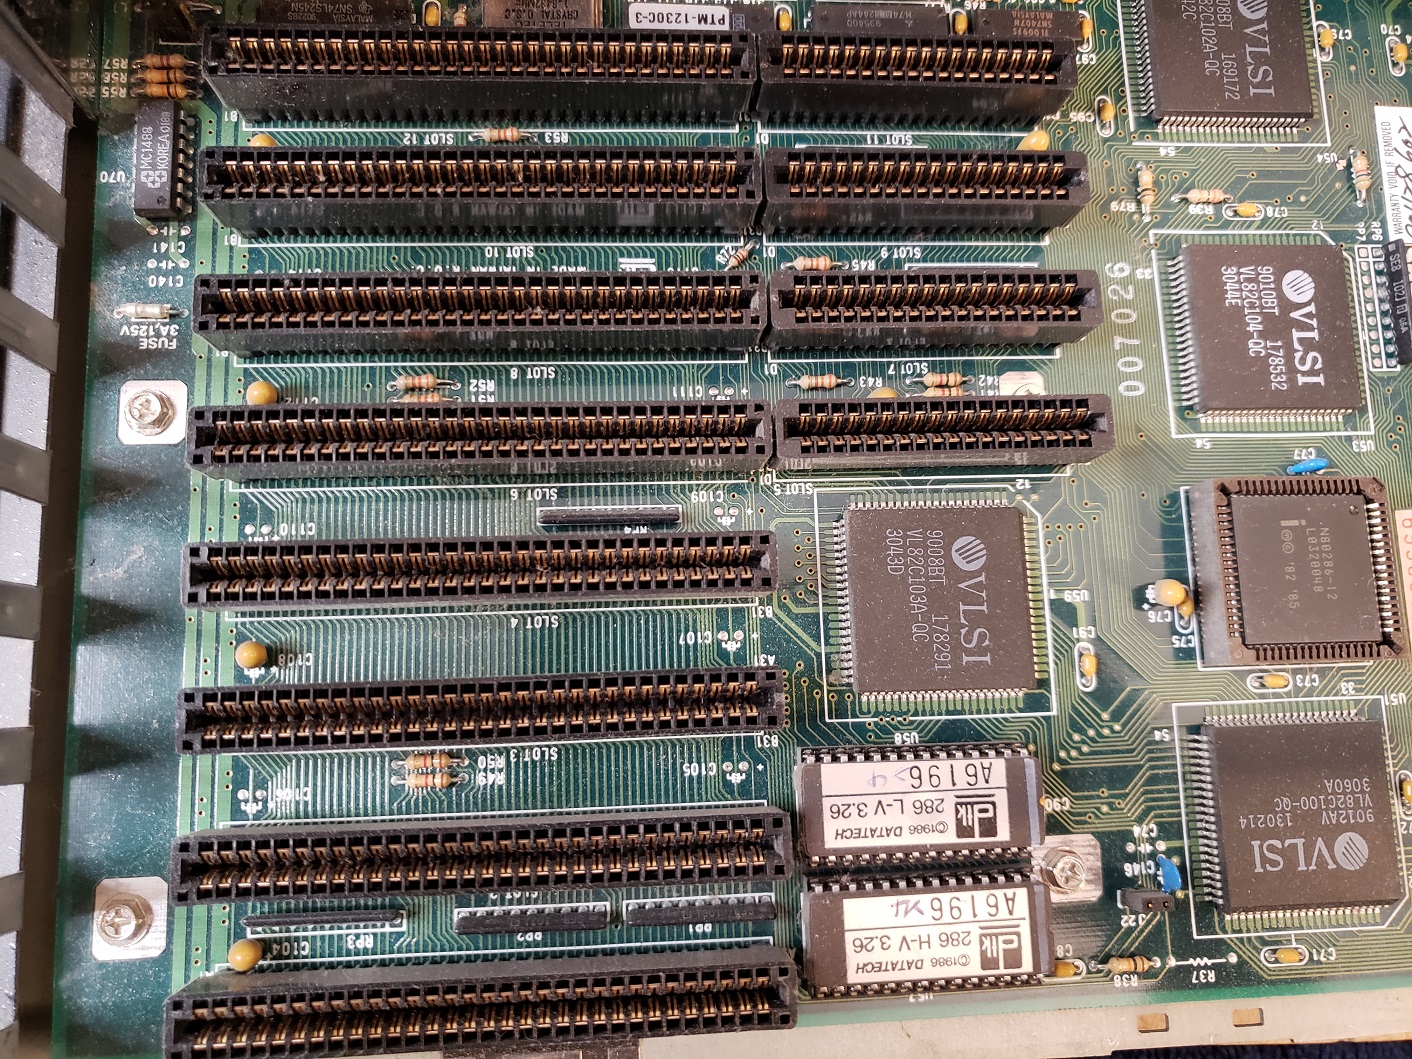
The motherboard is fairly well integrated for a 286 board though it does lack ZIP or 30-pin RAM sockets which I tend to find on the later 286 motherboards I tend to come across. Sorry for the dust on the components in some of these images as I took them immediately after getting the machine home and before proper cleaning.
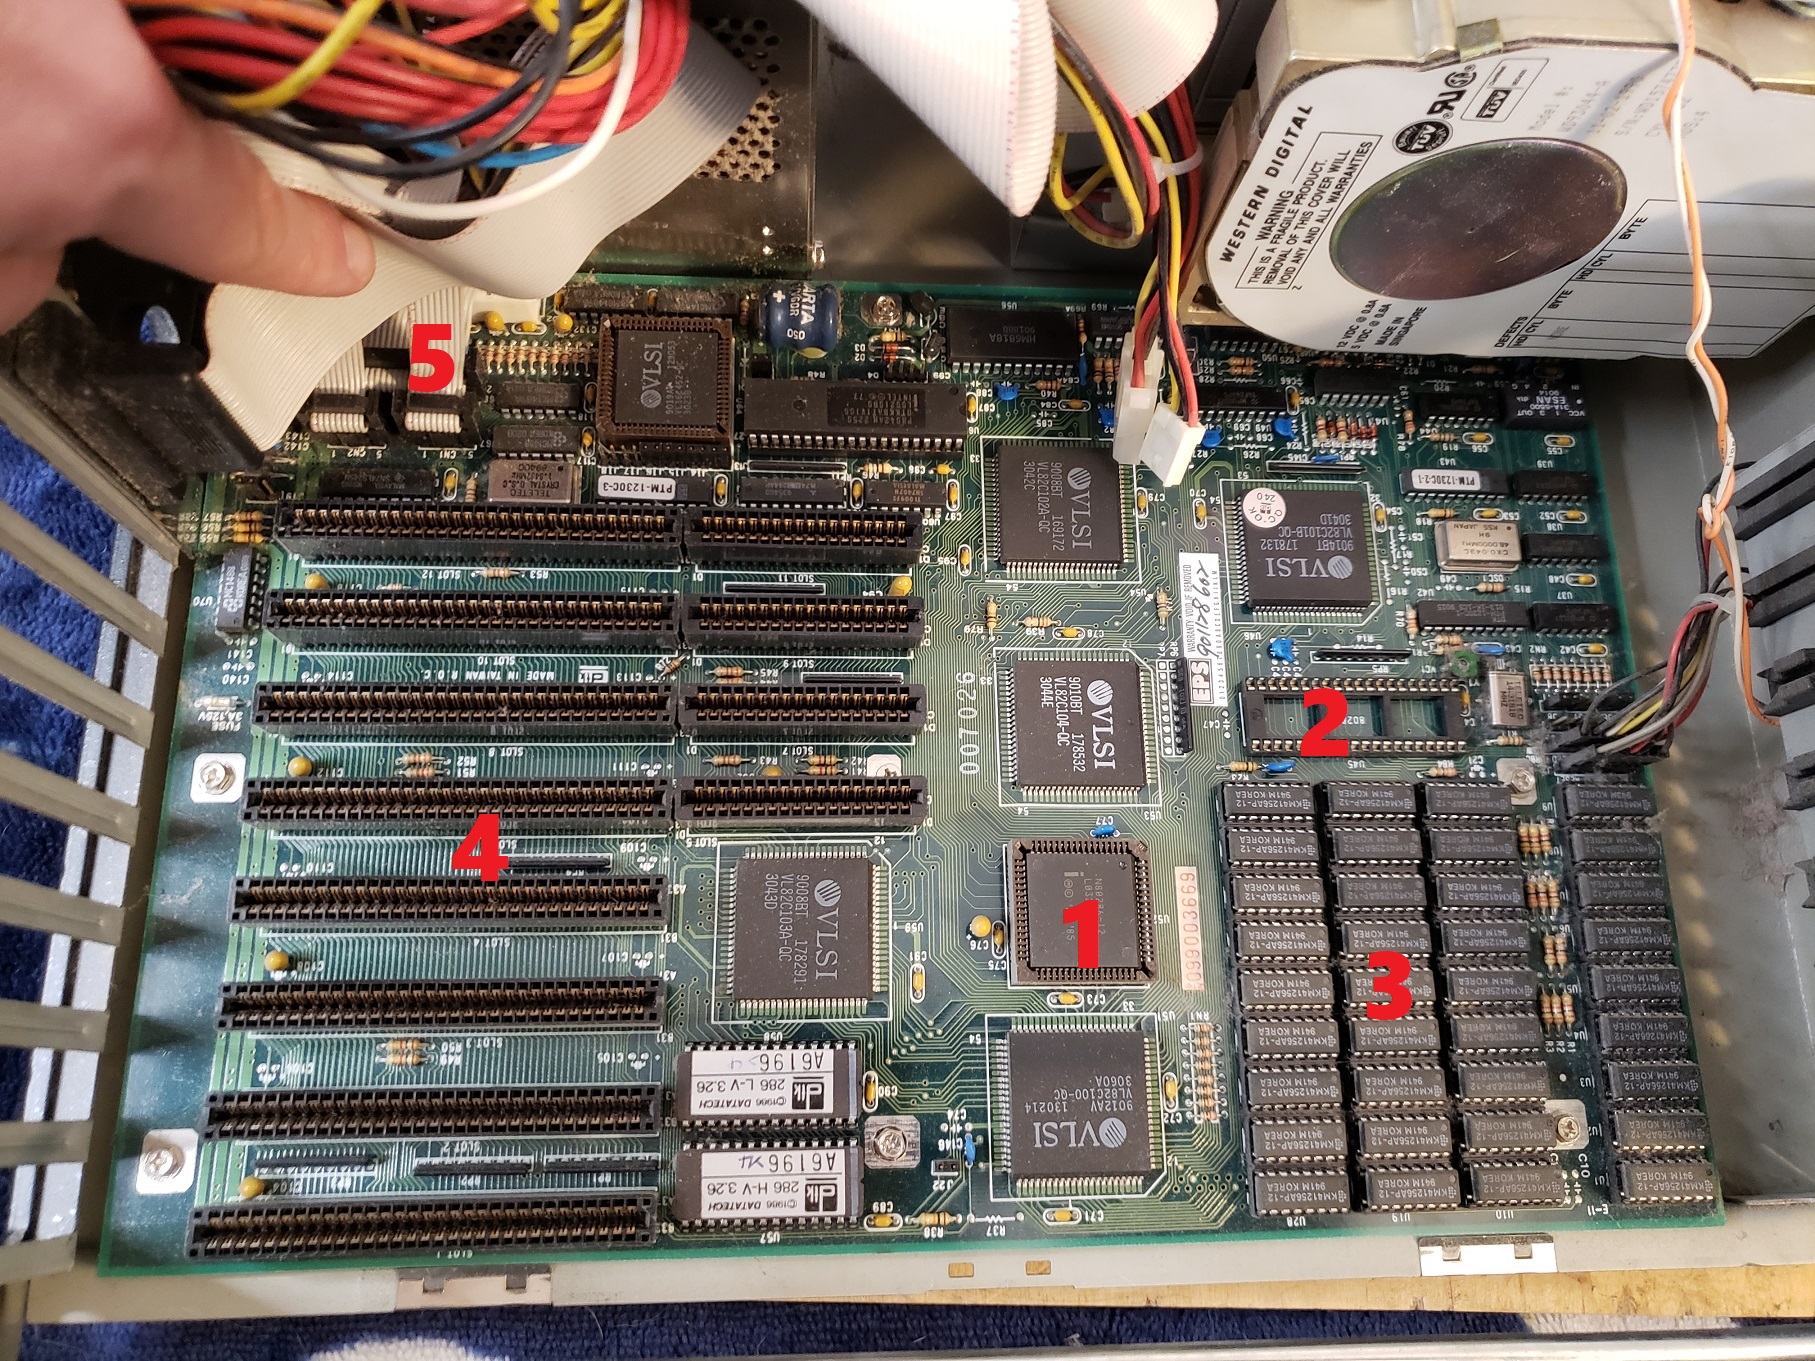
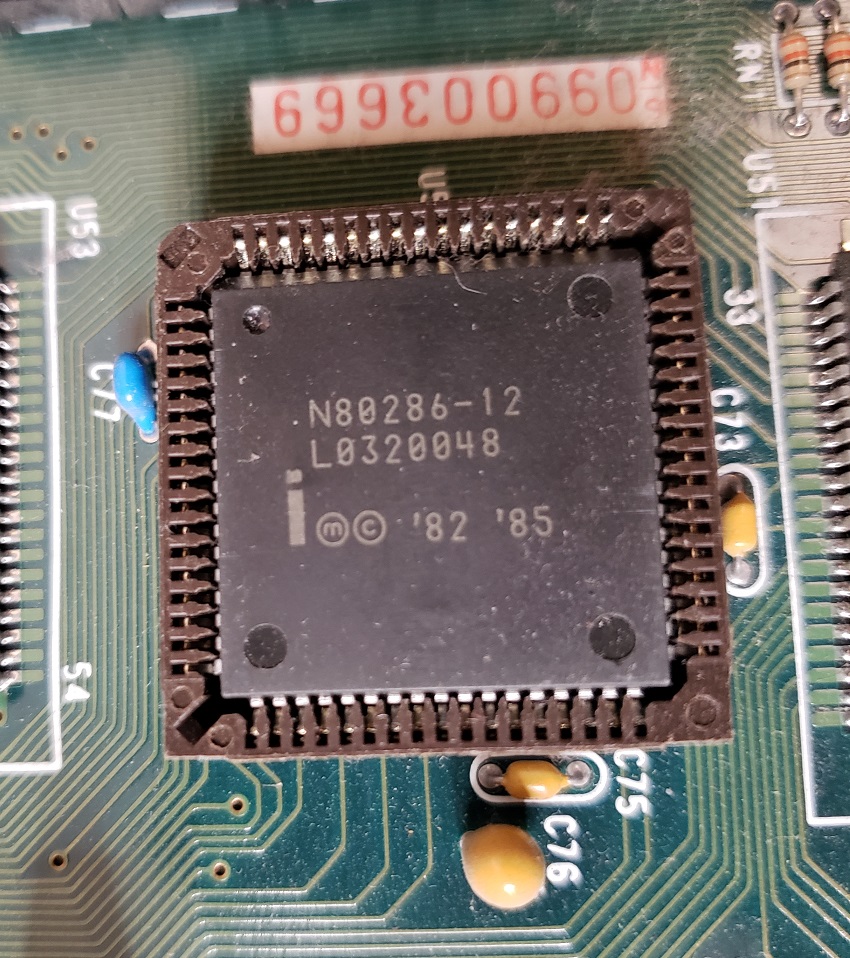
1 ) CPU – The CPU is an Intel 286-12 running at 12Mhz (though the turbo can cut this speed down to 8MHz). The 12MHz 286 could be considered, along with the 16MHz 286 one of the quintessential CPUs of its class. They were fairly common and are fairly capable as well being suitable for playing EGA as well as early VGA titles. The ability to use the turbo button to downclock to 8MHz isn’t incredibly useful as it’s still too fast for speed sensitive CGA titles but if you want something more akin to IBM AT speeds it’s nice to have the option.
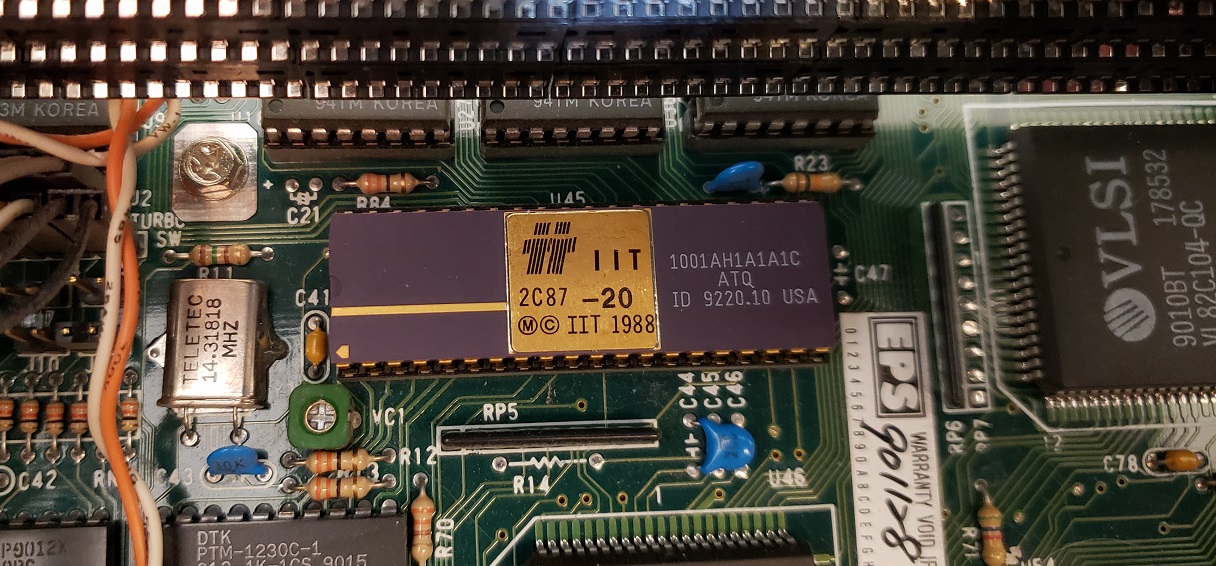
2 ) FPU – The board also has a socket for an optional math co-processor. Usually adding a math co-pro isn’t very helpful but a few games and CAD software can take advantage of one. My PC came to me with this socket empty but I added an ITT 2C87 math co-processor rated for 20MHz. This FPU is a little more powerful than a standard 287 processor but is a bit overkill in this machine. It was formally installed and paired with my 20MHz Harris 286 PC but after I replaced it there with a 287XL it found a new home in my DTK machine.
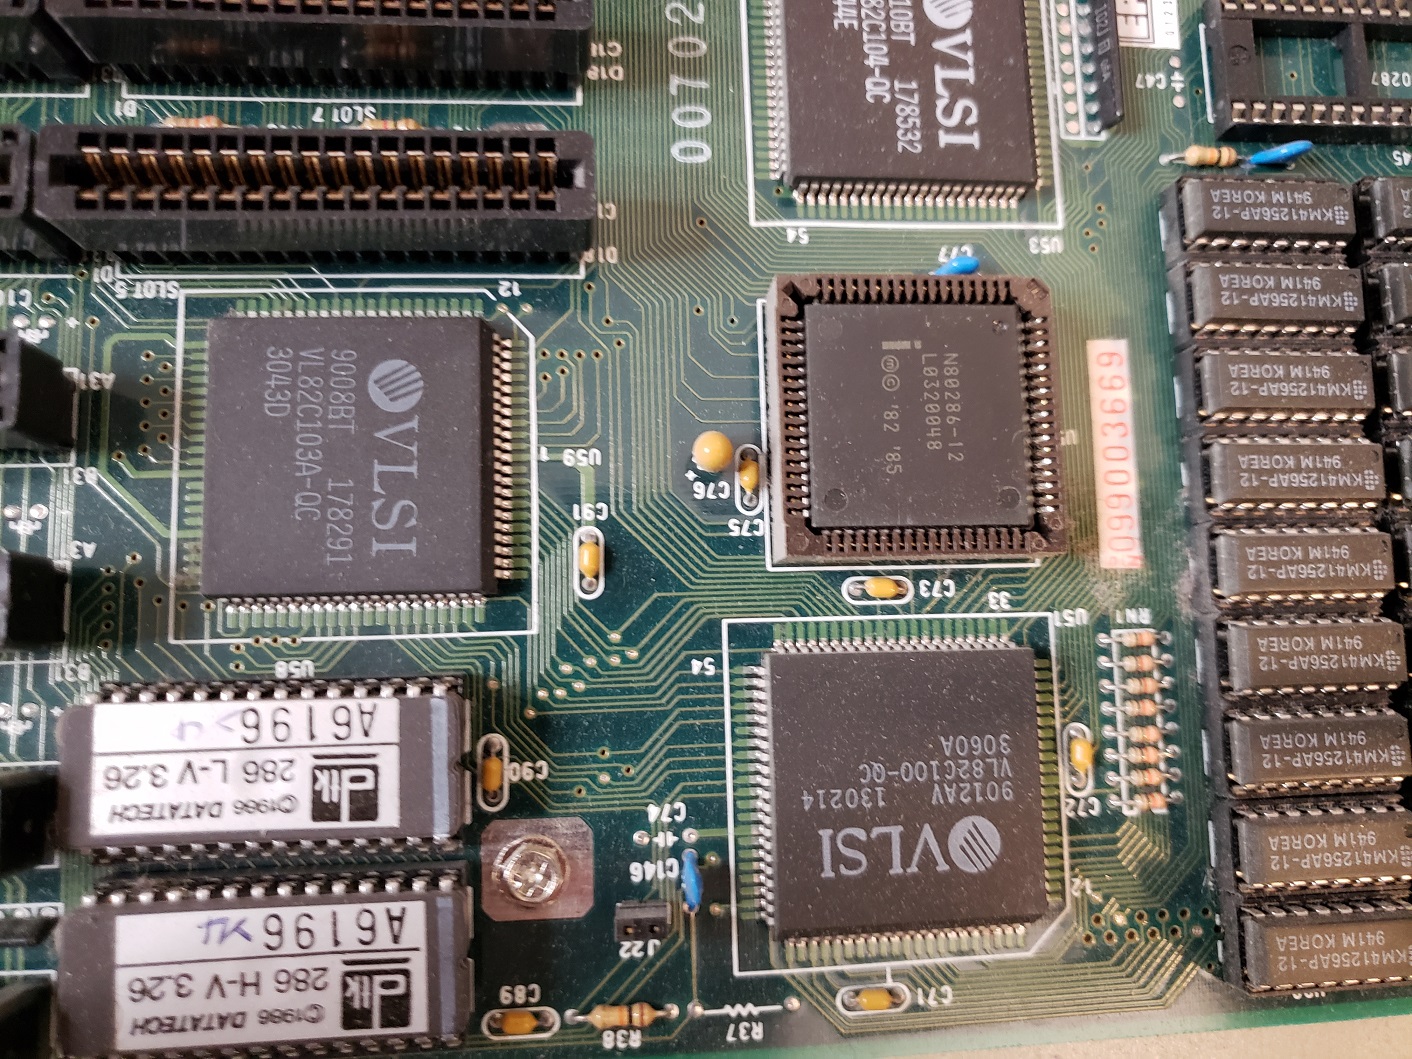
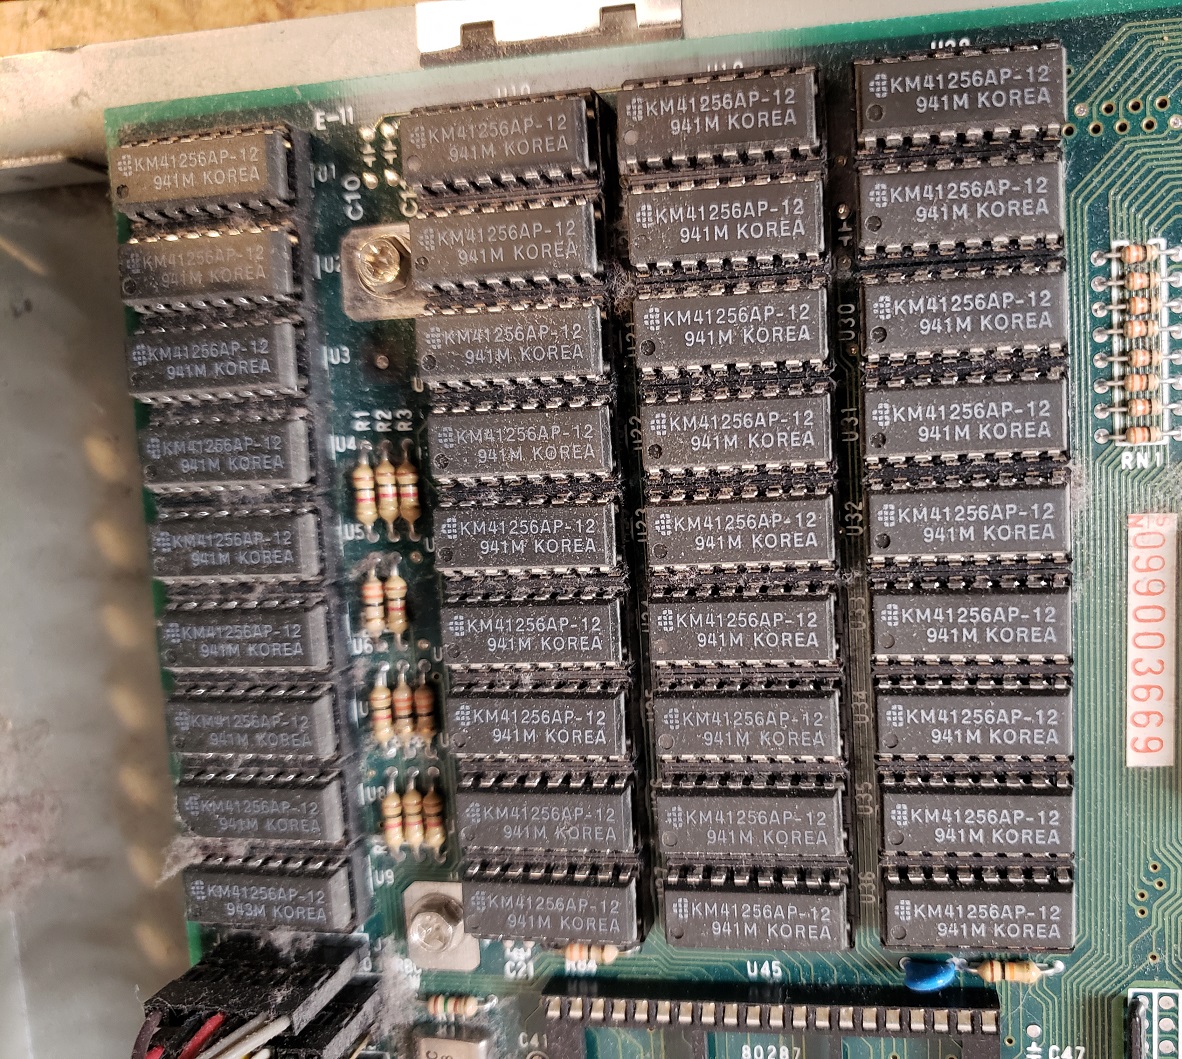
3 ) RAM – The motherboard comes with a full 1MB of DIP memory on board. This is a capable amount for a 286 and should be more than enough for any game that would play well on this system. For those wishing to push the DTK tech-1230 or wanting a bit more memory overhead you can always add an ISA memory card.
4 ) Expansion slots – This DTK motherboard sports eight total ISA expansion slots, four 8-bit and four 16-bit ISA slots.
5 ) I/O – In the upper left hand corner of the board we have on-board connectors for the dual serial and single parallel connectors. This is also the location of the AT power connector.
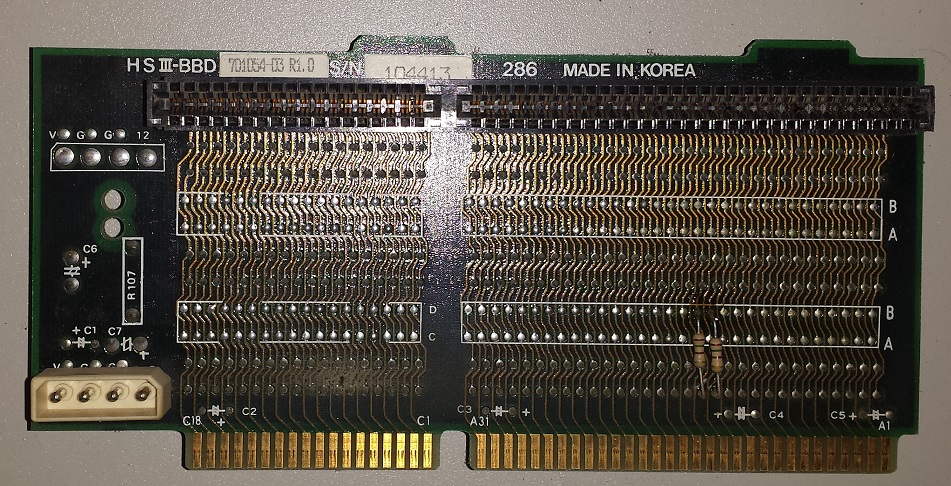
Now let’s take a look at the two expansion cards that came with this PC.
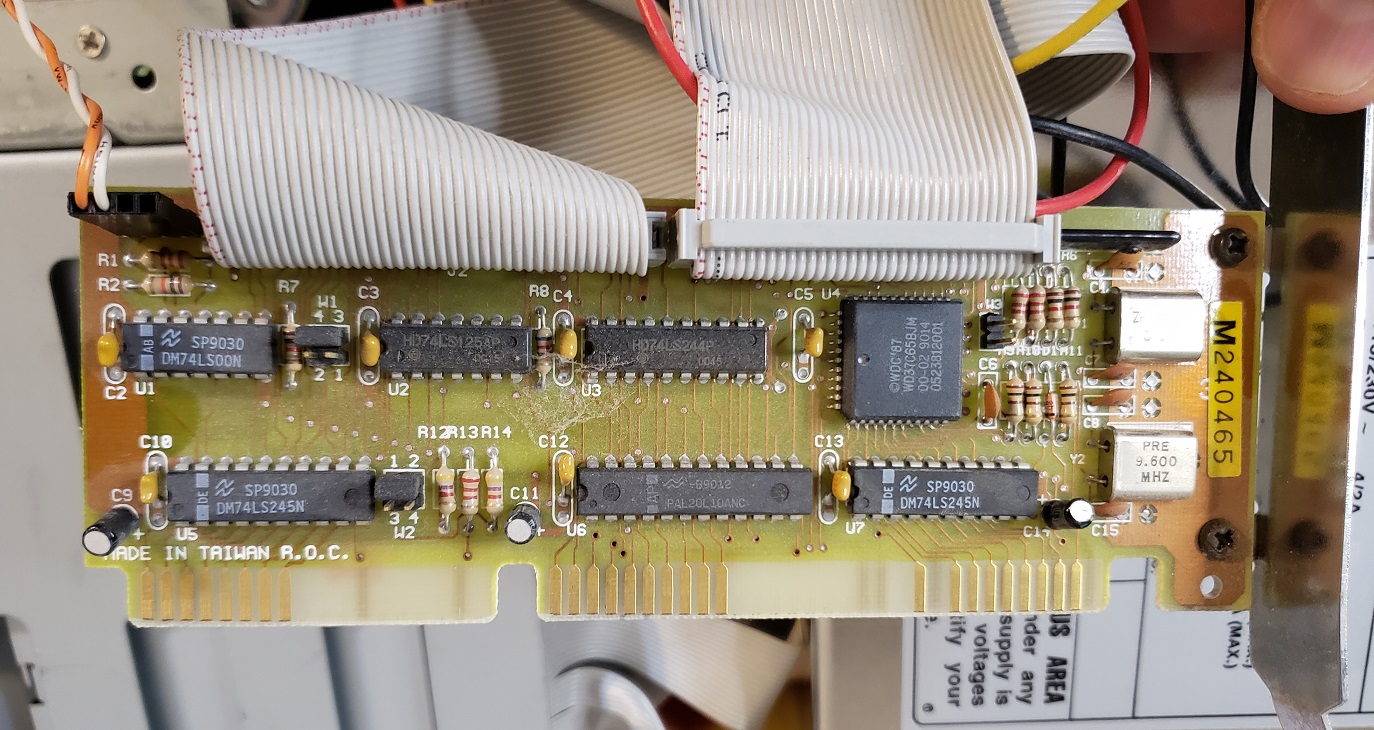
The first card is just a pretty standard I/O card from Western Digital. It looks pretty basic and comes with an IDE and floppy controller. I’m not sure if this and the HDD were factory stock but I think there’s a good chance they are.
When it comes to a video card I was pleasantly surprised at what I found when I opened this PC up.
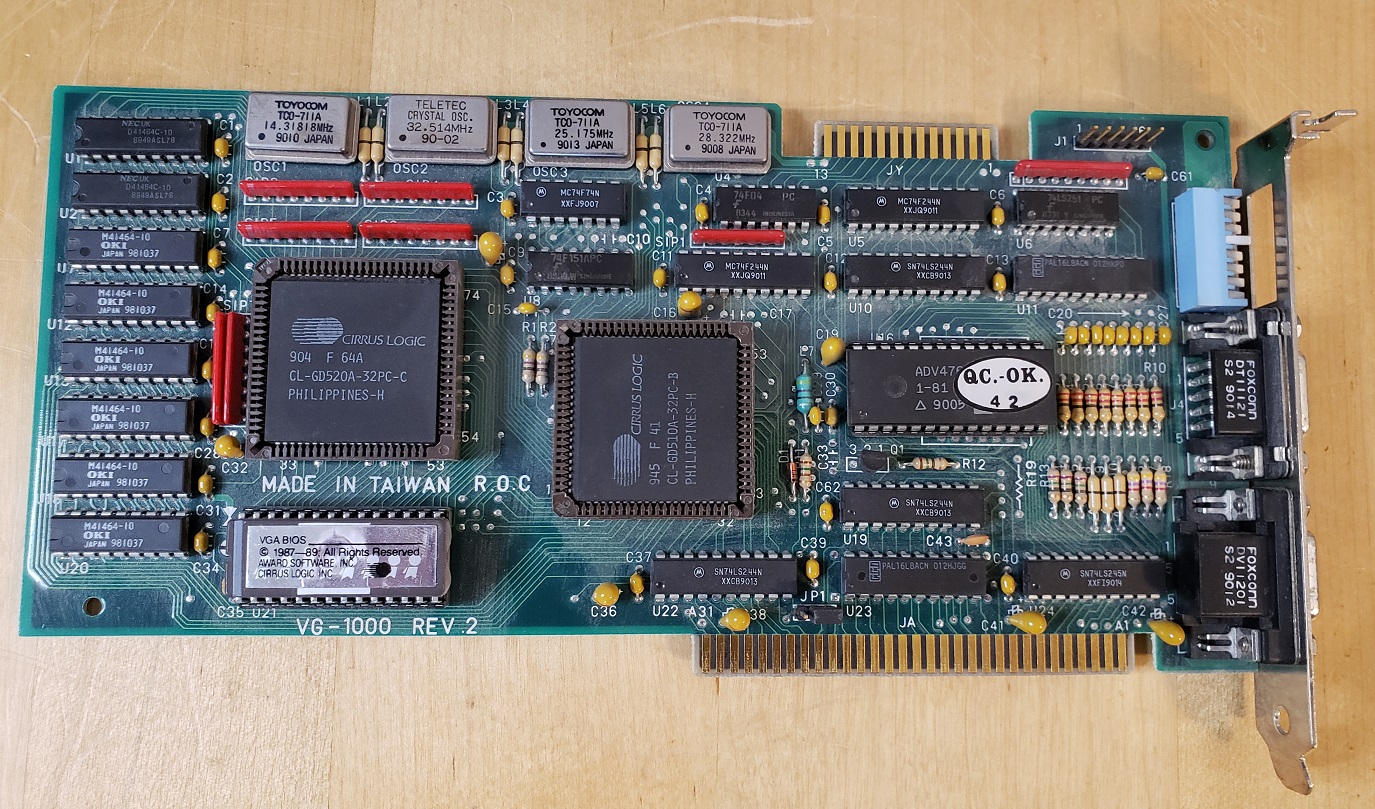
The video card I found installed was a fabled and quite uncommon Cirrus Logic “Eagle II” card. This 8-bit VGA card is one of Cirrus Logics’ earlier cards but is known for its excellent compatibility with CGA games.
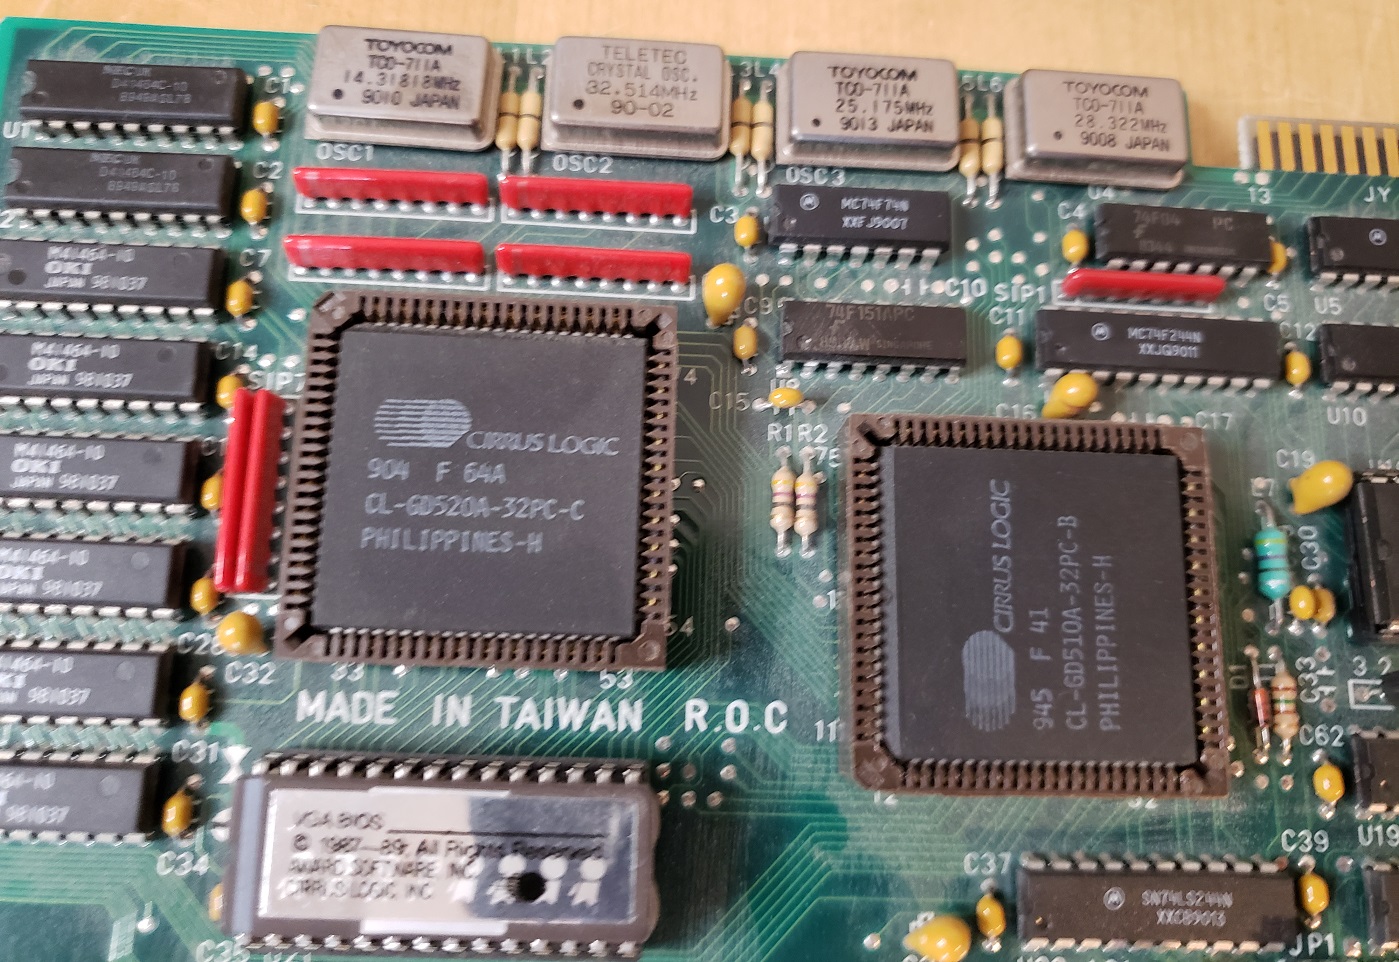
After personally testing this card I can confirm it runs several CGA titles that generally have problems when run on a VGA card without issue, this is without the use of any CGA compatibility TSRs or software being run. Games such as Digger which display garbage on my VGA cards ran without issue on the Eagle II. Starquake is a CGA game that shifts CGA palettes as well as color intensities as it switches screens. On most VGA cards it stays the Magenta, Cyan, and White palette we mostly associated with CGA but again, on the Eagle II it displays correctly. In my personnel testing I put this card up against a Trident 8900D, Tseng ET3000AX, ATI VGA wonder 24XL, and ATI Mach 8 video card and the Eagle II was the only card to display these games correctly “out of the box”, that is without any CGA mode software running.
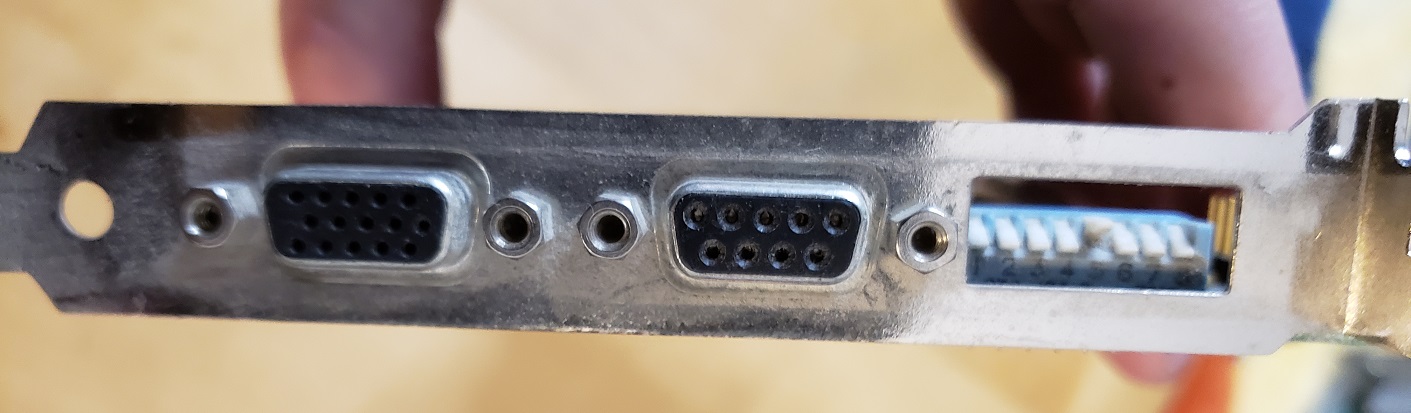
The card comes with both a 9-pin TTL connector for hooking up to older CGA/EGA style TTL monitors as well as a standard 15-pin VGA port. Output mode is determined by a switchbox next to the 9-pin TTL output.
One thing to note is that my testing found the Eagle II VGA card to be a rather slow card, scoring in benchmarks generally lower than the other VGA cards tested. In a 286 class PC though this shouldn’t much of an issue.
MY UPGRADES
SIIG EIDE card
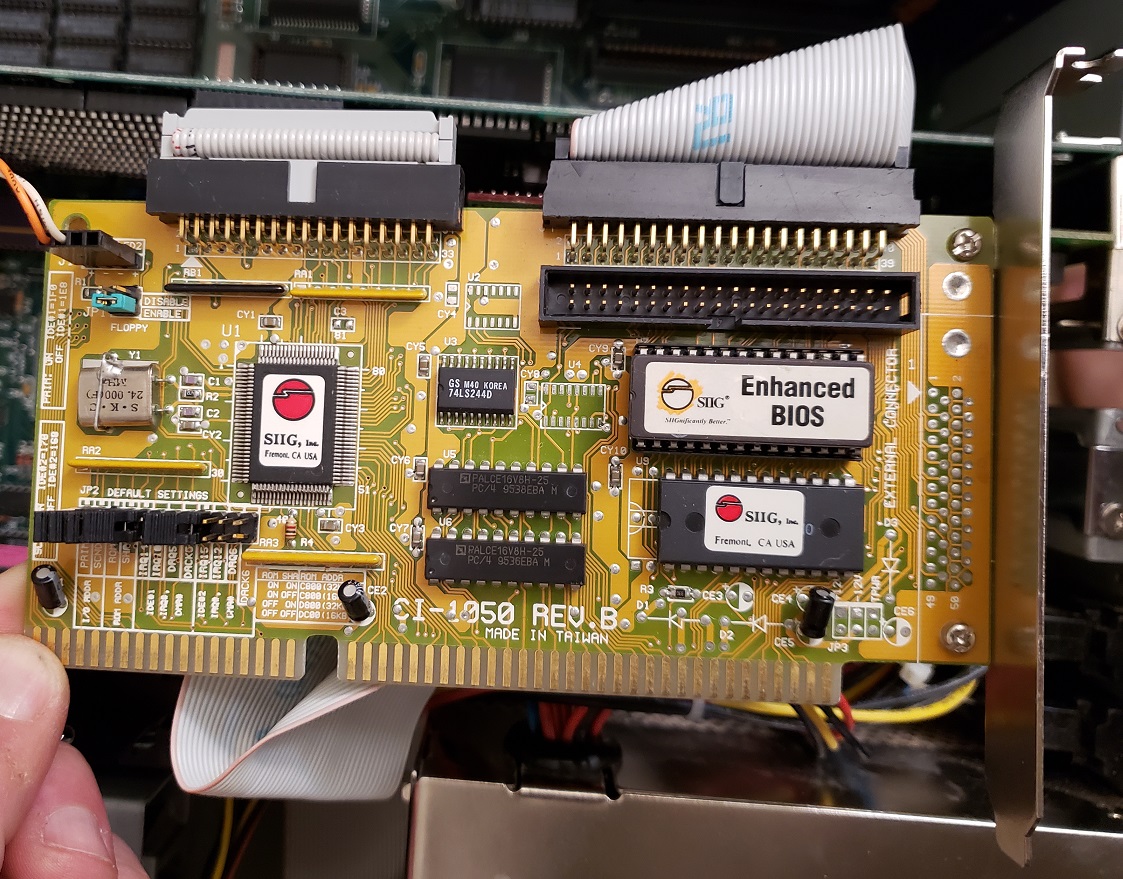
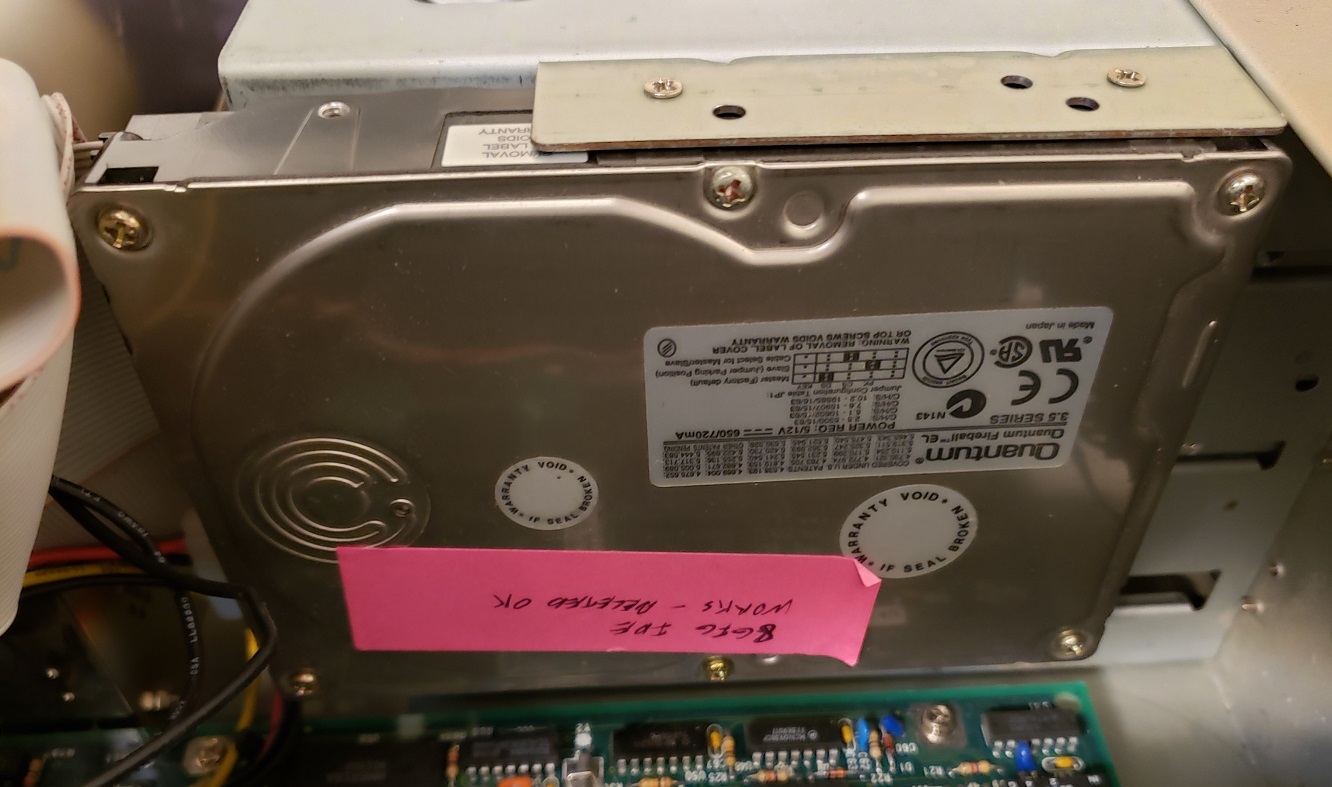
Originally I decided to upgrade the IDE with a SCSI card and drive but unfortunately, the SCSI controller card conflicted with my midi card so in the end I decided to upgrade the HDD to a Quantum Fireball 8GB (seen as 2GB by the OS) and this SIIG CI-1050 EIDE controller card which now controlled my hard drive and floppy drives.
VIDEO
The next “upgrade” could probably be seen as a downgrade as I decided to remove the Cirrus Logic VGA card and install a true EGA card. I feel EGA is probably a little more era correct for a 286 though it’s hard to champion era correctness for this build after adding EIDE and a whopping 2GB hard drive. I’ve really wanted to mess around with a real EGA card though so I thought this machine was the perfect opportunity. Whether you go with an EGA, CGA, or VGA card is up to you and your needs. In general the best all around option I would recommend is probably a VGA card since it’s probably the cheapest, most available and most all around compatible card that will also work with just about all VGA monitors.
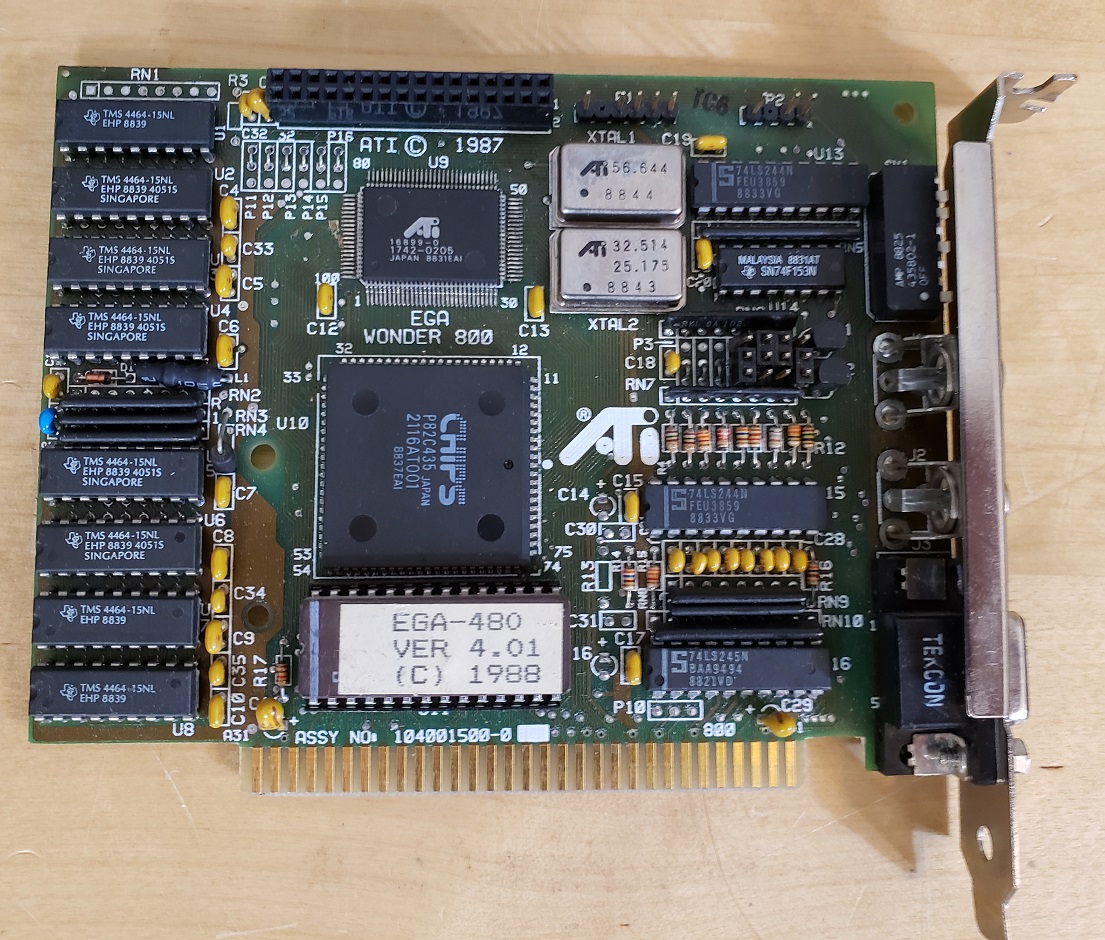
The EGA card I went with is the 8-bit ATI EGA Wonder 800 with 256KB of memory from 1987. This would be considered a higher end EGA card and is capable of extended EGA graphics mode as well as 16 color VGA modes (provided it’s attached to the correct monitor). One uncommon supposed feature of this card is that one of the RCA feature connectors (the upper one next to the switch box) is supposedly a true composite video out though I have yet to test this. The card does have a switch box for selecting a mode and it does require a TTL monitor to connect to via its 9-pin out. A MultiSync or EGA monitor is required to display higher resolution EGA modes but it will display low-resolution 16 color EGA to a CGA monitor just fine.
There is a higher end EGA wonder 800+ card that is completely jumper free and switchless but this card is supposedly a cut down VGA card that has compatibility issues with 25kHz monitors at 640×400, this is unconfirmed by me though.
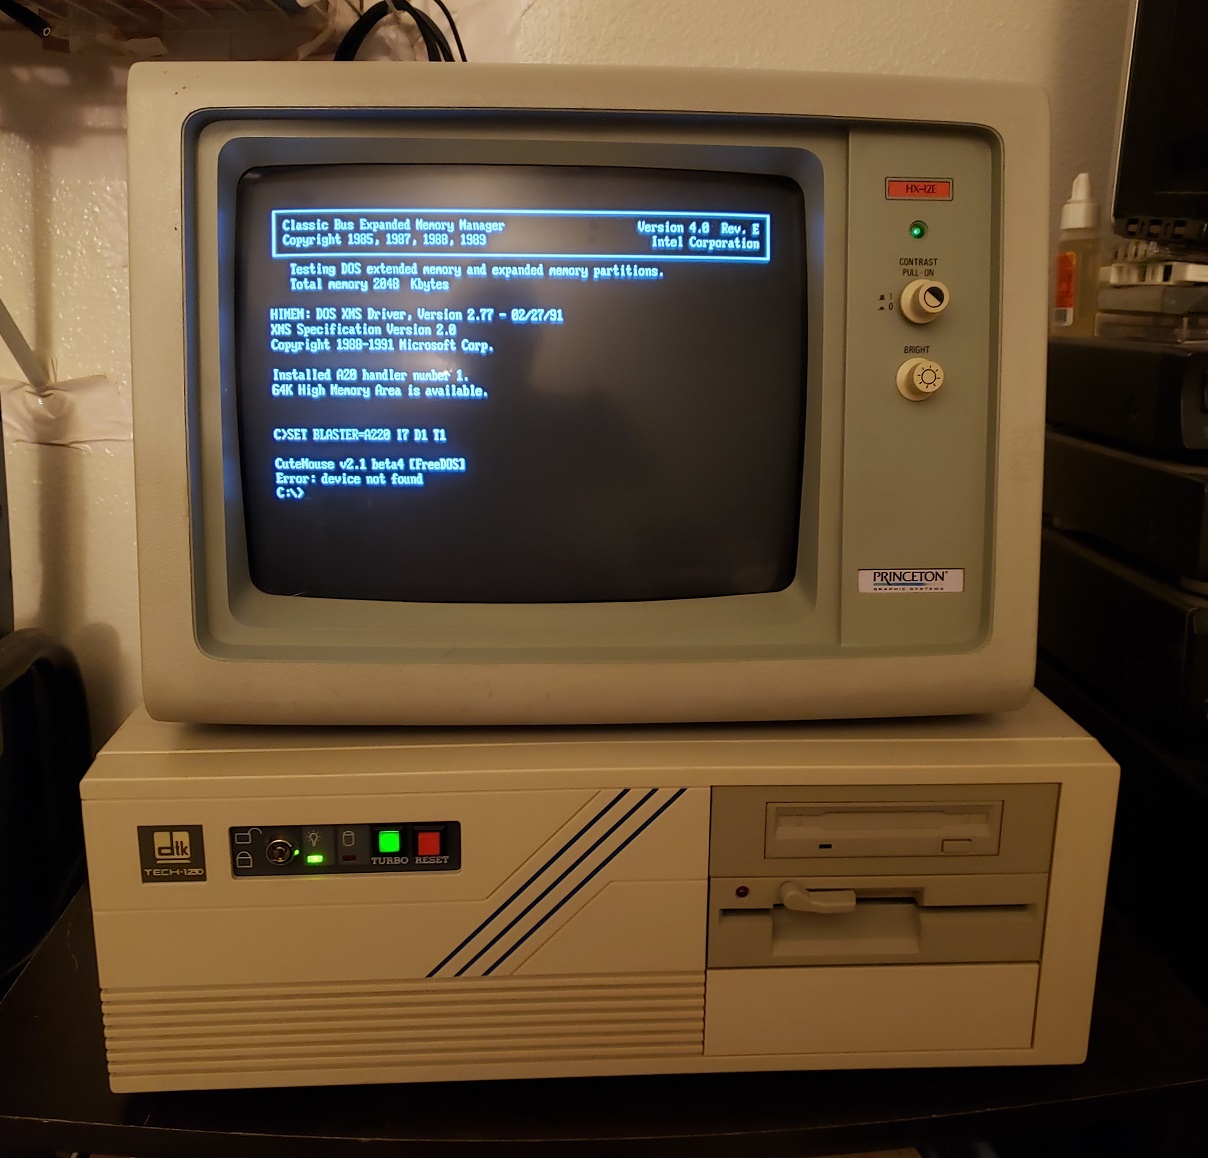
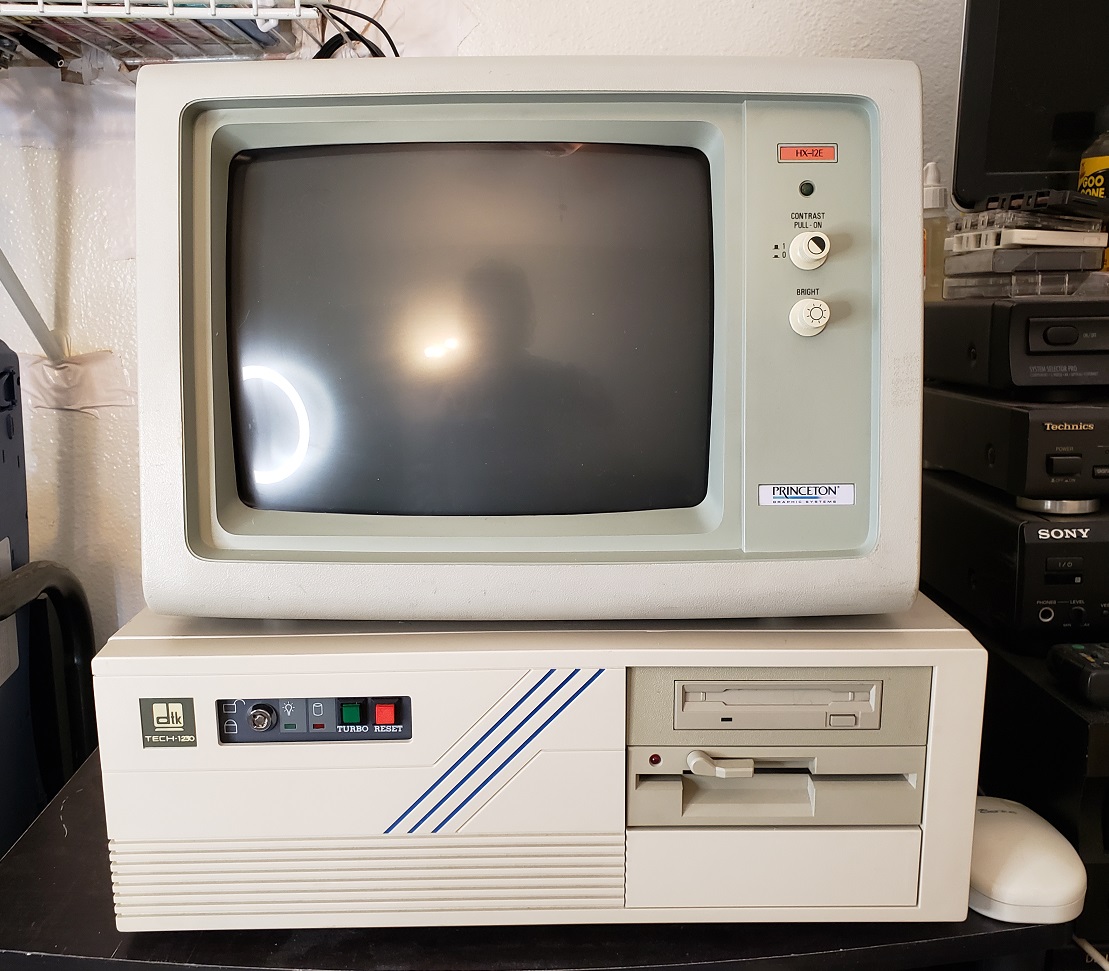
I have been displaying this card on a Princeton HX-12e EGA monitor and the results have been excellent. The Princeton HX-12e is an EGA monitor style in a similar fashion to the IBM monitors for the PC, XT and AT lines of computers.
Switch settings for this card can be found Here.
SOUND
For sound I decided to go with the old reliable Sound Blaster standard for maximum support among games of the era.
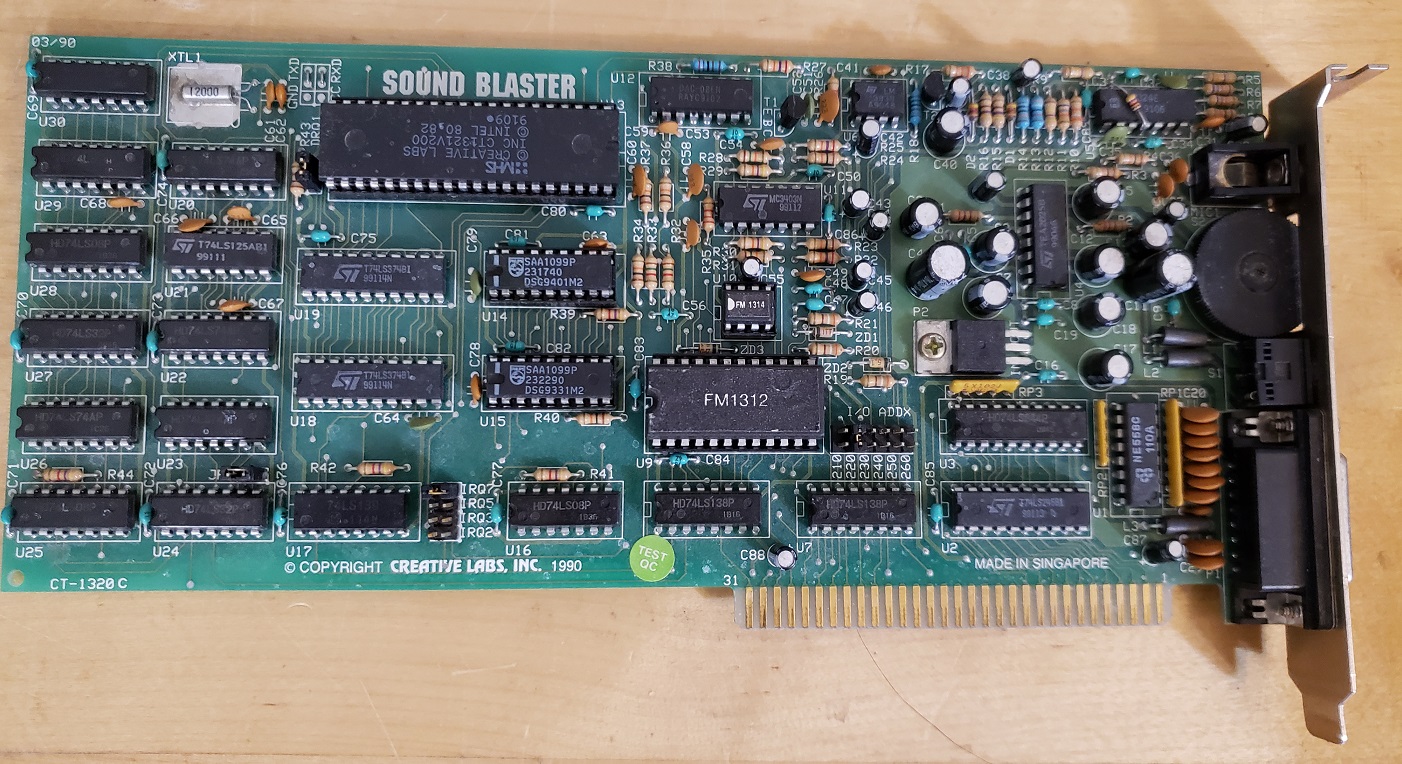
The card is a Sound Blaster 1.5 model CT1320C. This is an 8-bit sound card capable of digital sound effects as well as OPL2 FM synth and Adlib sound compatibility. My card has also been upgraded with the optional CMS (Creative Music System) chips for compatibility with most games that support this earlier sound mode. Seeing as Sound Blaster cards were the standard this card should support pretty much every game that will run well on this PC and that supports sound. The gameport is also a nice addition as it allows my PC to support a joystick or controller without adding an additional card.
The second sound card I decided to add was a midi card.
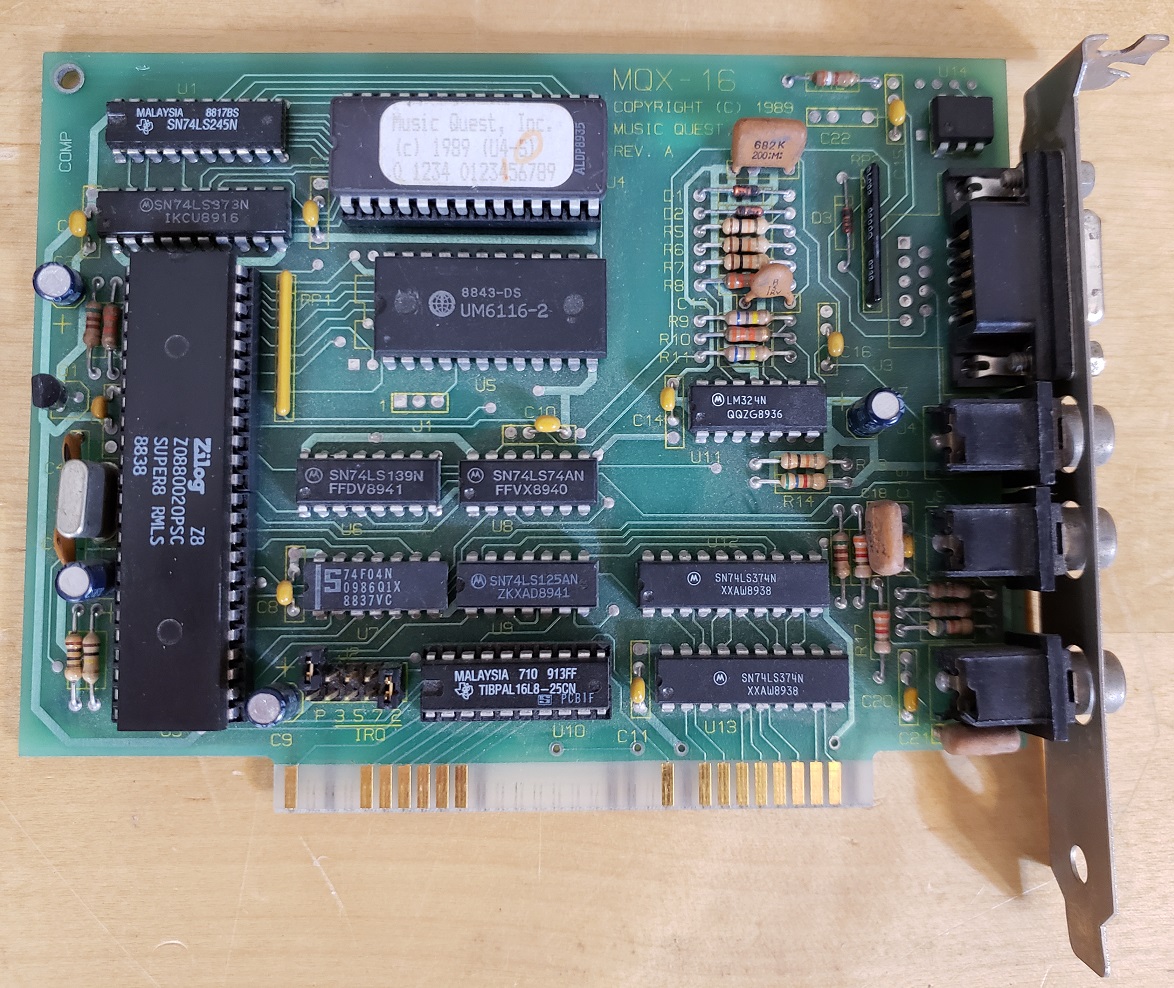
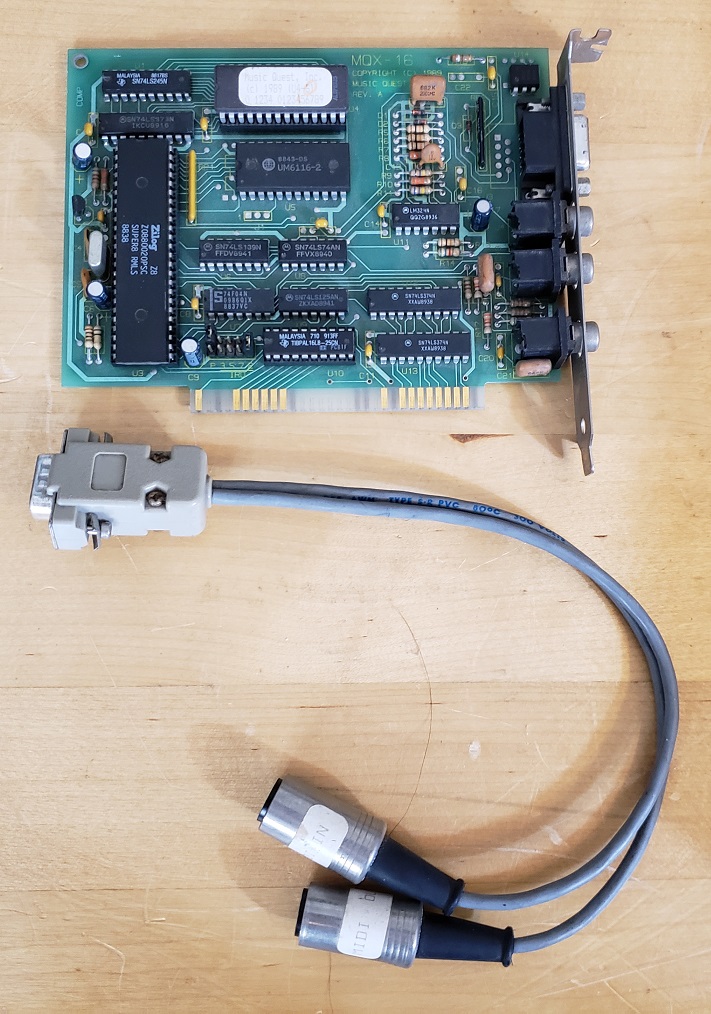
I decided to add a Music Quest MQX-16 8-bit card for any games that happen to support midi sound, most commonly in this era via a Roland MT-32 midi module. The card is also “intelligent mode” compatible so many games that use that mode, for example many Sierra adventure titles from the era, will run without issue when paired with a MT-32.
RAM
My last upgrade was an Intel Aboveboard memory expansion just to give me a little more memory overhead.
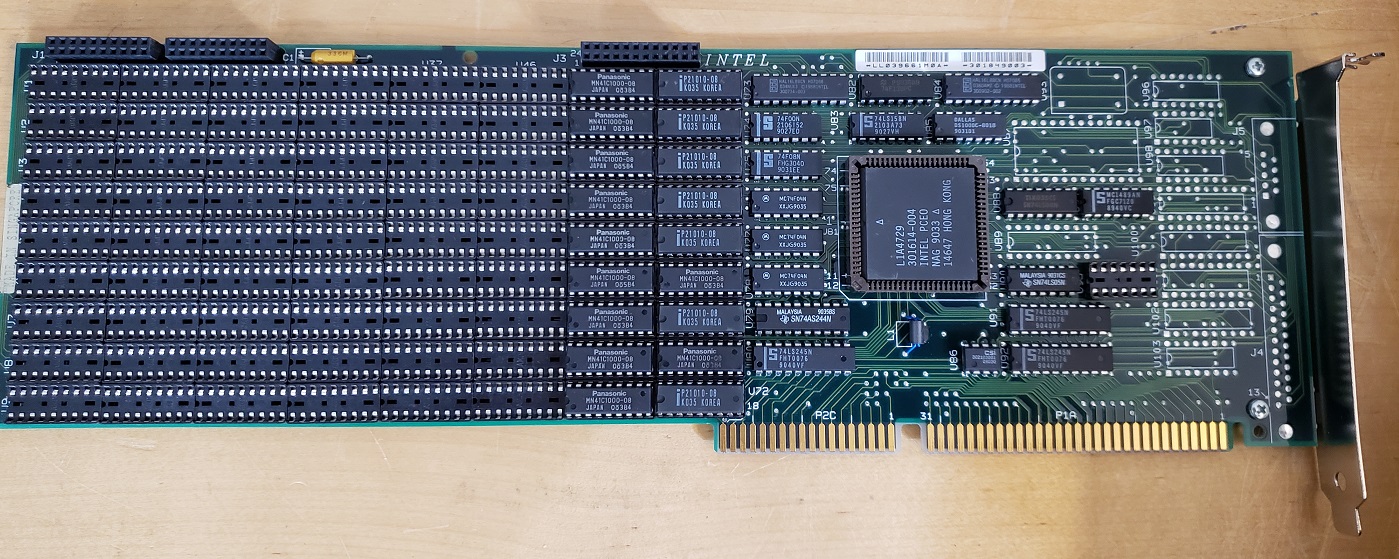
The Intel Aboveboard I installed is capable of adding a full 8MB of additional memory though I limited mine to 2MB giving my DTK tech-1230 a total of 3MB. This should be more than enough memory for any games I’ll be playing on this setup.
The DTK tech-1230 is currently my main 80286 class PC filling a small niche spot in my PC lineup. I really like this PC from the design of the case to the layout and capabilities of the board itself. My only minor complaint is I wish it supported RAM expansion on the board so I wouldn’t have to resort to using a card to expand the memory but this is a minor complaint. I may have also preferred a slightly faster 16MHz 286 to the 12/8 MHz one this machine received but it’s still only a minor complaint concerning my personnel desires for a machine of this class.
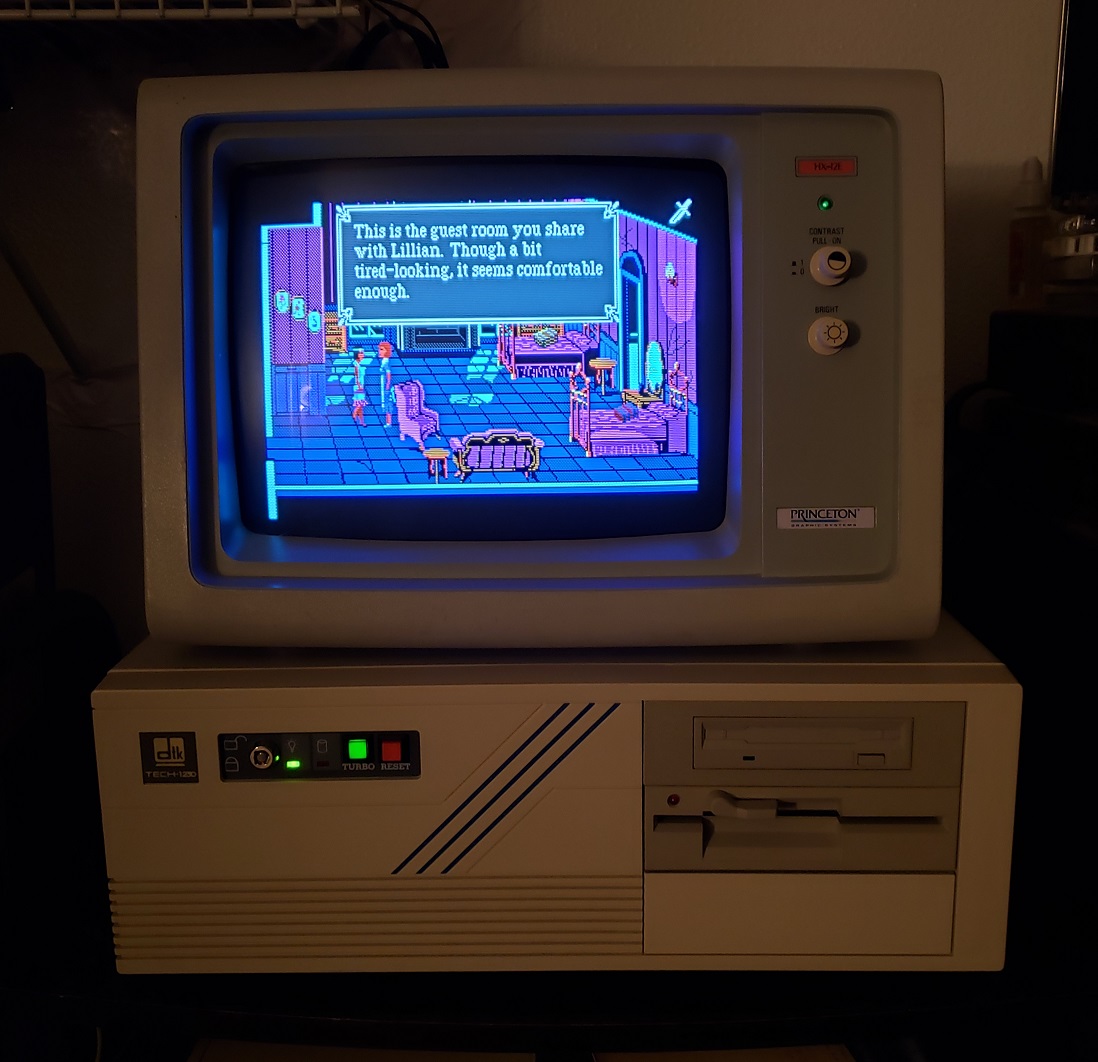
You probably don’t need a 286 in your collection as a 386 clocked similarly can do everything a 286 can but better but there’s still something magical about getting one of these beasts up and kicking again. Playing a game like the Colonel’s Bequest on a 286 and on an actual EGA monitor is just something to behold if you’re a retro PC geek like me.