Skip navigation

Tag Archives: HP

Last time we looked at an HP Vectra it was the Vecta XA. This time we are going to take a look at the slightly older Vectra VL and more specifically the Vectra VL series 3 5/90.

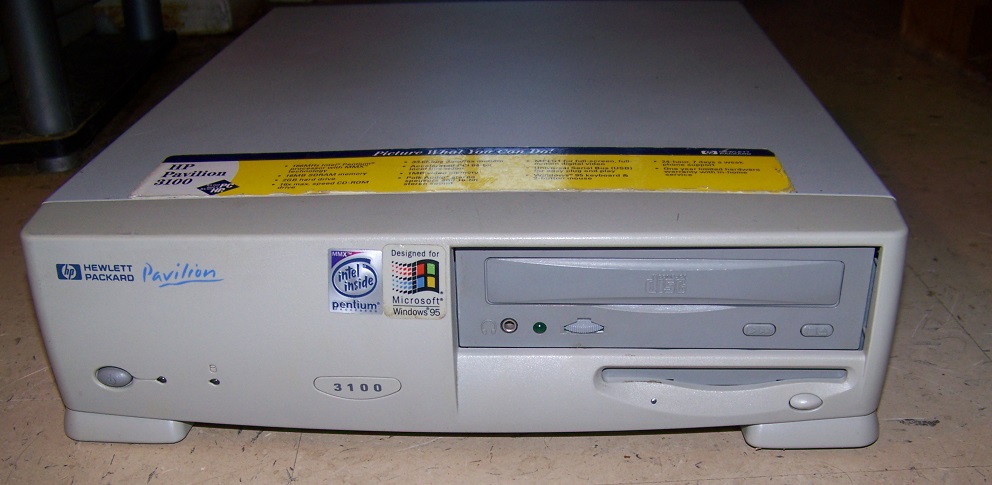
The VL series 3 5/90 that I have is in a desktop form factor. I wouldn’t really call it a small form factor but it isn’t as tall as some desktop cases. The center of the faceplate is removable and mine actually came with it missing. I had to source a new one on eBay. In the center we have a large square power button as well as a power LED and HDD activity LED. to the right of this is one 5 1/4 drive bay and one 3 1/2 inch bay commonly populated by a 1.44mb floppy drive and one CD-ROM drive but obviously these can be substituted by whatever drives will fit. Keep in mind these bays use drive rails to secure the drives.

on the bottom rights and left are two plastic tabs. They secure the case lid which can be removed by clicking these tabs inward and then pulling the case lid forward and up.

One the rear left we have a key lock which on my machine is missing as well as a spot below that appears to be an expansion bay. On some models like the XA a special network card would install here but the card and connector for it is not present on VL. To the right we have five expansion slots and underneath these we have a variety of ports.

From left to right we have a parallel port followed by two serial ports, two PS/2 ports for keyboard and mouse and finally a 15 pin VGA port with a standard three-prong power connector above.

The VL uses the same 100w proprietary form factor power supply as the Vectra XA. This power supply has a fan on the underside which blows directly onto the CPU socket for active cooling.

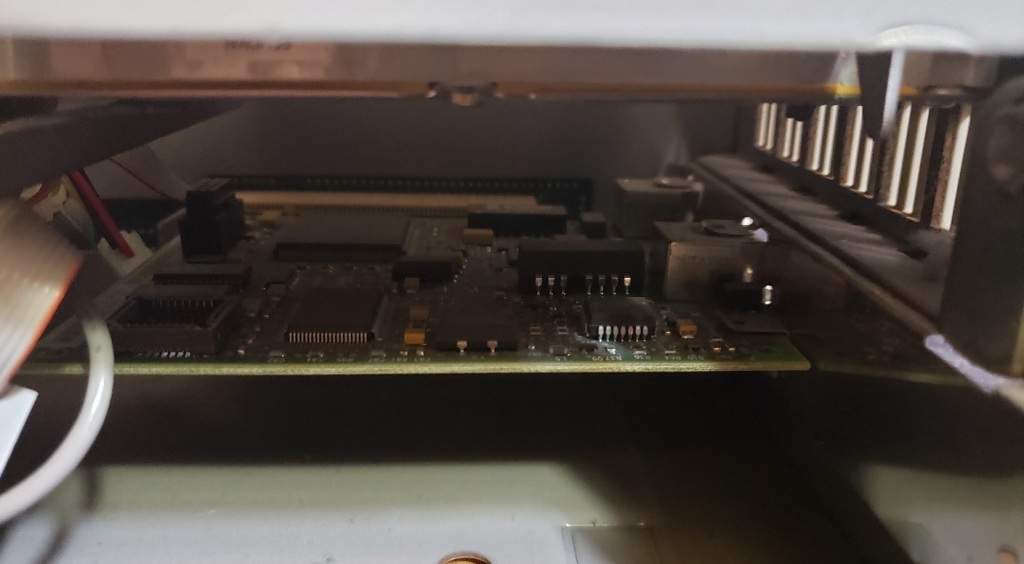
The expansion slots are all on a riser card coming off the motherboard.

For expansion we have two PCI and three 16-bit ISA slots. It’s a bit anemic with the PCI slots but for a basic setup it’s not to bad considering there is VGA built-in. For my build I decided to add a PCI video card, a Voodoo 1 3D accelerator and an ISA sound card which we will take a quick look at later.

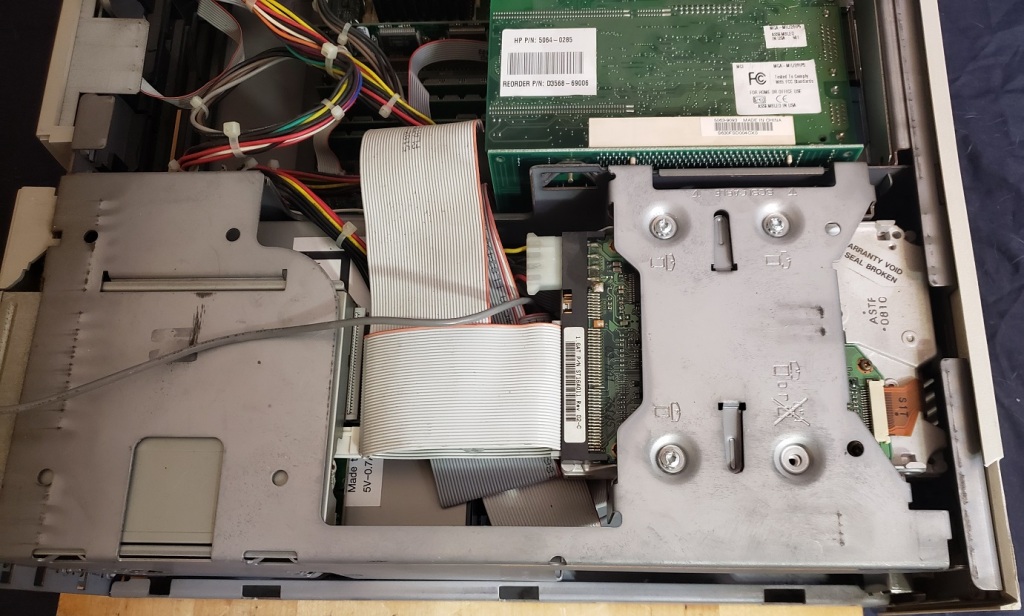
Behind the expansion slots is a metal plate on a hinge that with the removal of a screw opens up and allows the installation of a hard drive.

My Vectra VL did not have a hard drive with it so I installed a spare drive I had lying around and installed DOS 6.22 as well as Windows 3.1 though the machine is capable of running Windows 95 or 98 if you choose to.

And now to take a look at the motherboard with the PSU out of the way.

1) CPU – The Vecta VL uses socket 5 which was a fairly short lived CPU socket from around 1994 before socket 7 came out. Socket 5 officially supports the Pentium 75-120MHz but also supports various AMD K5, IDT and overdrive chips.

As per the model designation (series 3 5/90) the stock CPU was a Pentium 90 though my model came with a 200MHz MMX Pentium Overdrive.

The overdrive chip uses a pin adaptor and a voltage regulator to safely install into and run on a socket 5 motherboard. Since socket 5 motherboards do not support the lower voltages and split voltages of later Pentium CPU’s the voltage regulator on the Overdrive chips is required. The BIOS on my Vectra VL on boot detected the Overdrive as a 133MHz chip but running CPUID confirmed the CPU was running at 200MHz.

I did end up removing this CPU and replacing it with a stock Pentium 90.

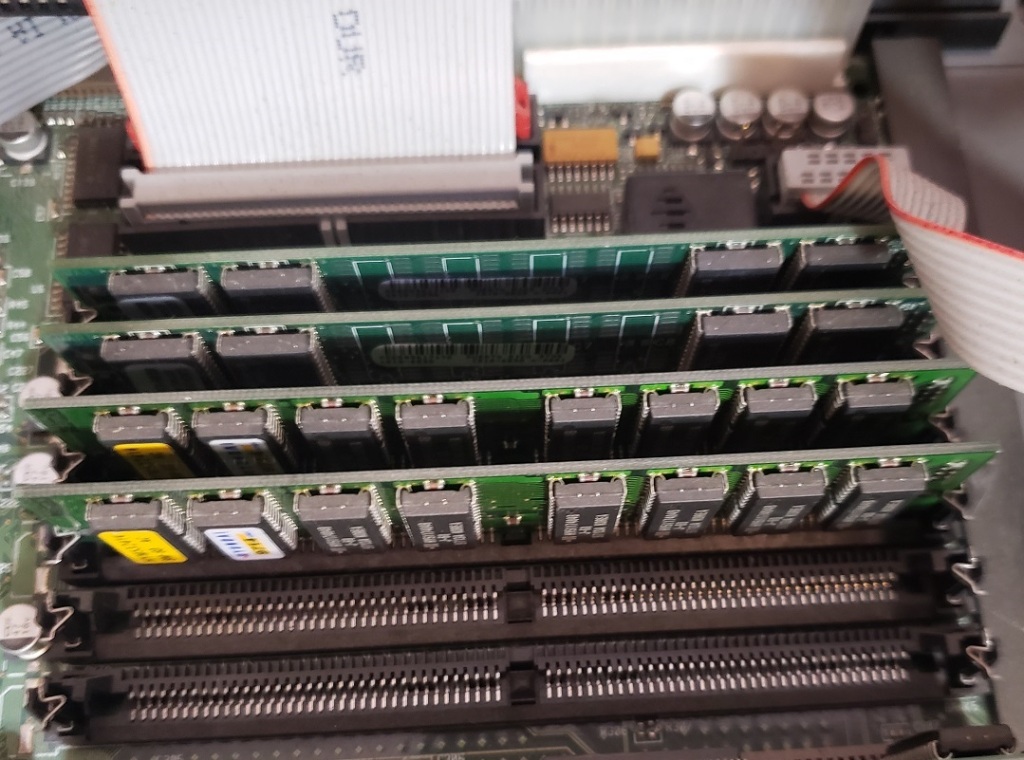
2) RAM – The VL has six RAM slots for 72 pin RAM for a maximum of 192MB of memory. Currently I have 160MB installed via four 32MB sticks and two 16MB sticks.

3) L2 Cache – The VL has 256KB of L2 cache soldered directly onto the motherboard.

4) Video – The built-in video is based on the CL-GD5434 chip. The 5434 is a later video chip from Cirrus Logic running on the PCI bus. There is 1MB of video RAM soldered onto the motherboard but it is expandable to 2MB via the “video memory” socket. with the additional 1MB for a total of 2MB the 5434 chip will support 64-bit mode. The GD5434 should be a fairly speedy and compatible video chip for 2D games and applications. There is also a VESA feature connector located next to the VRAM socket.

The switch box located next to the VESA feature connector is used to set various things like memory parity and can change based on your CPU speed.

5)  Power connection – Power connector, CMOS battery and front panel connector

6) Floppy/IDE – One floppy connector and dual IDE connectors for a total of four IDE devices, not that there is really room to install more than a CD drive and single hard drive. Word of warning though, the IDE controller chip is a CMD0640 PCI IDE which is known to corrupt hard drives under certain conditions.

For expansion cards I decided to install an S3 Vision 968 video card with the ram expansion increasing the cards video memory to 4MB. The Vision 968 is the business equivalent of the Trio64 and although it may be a little slower it does support more memory and is said to have a little better image quality. Compared to the on board GD5434 the Vision 968 may actually be a little slower but it does support more memory allowing me to run things at higher resolutions if I choose. Depending on your needs or if you need more free PCI slots you would probably be fine with the on board video.

I also installed a Voodoo 1 3d accelerator card for all those early games that support the Glide API.

The Vectra VL being a more business oriented PC does not have any built in sound so I decided to add an ISA sound card I’ve been wanting to use for a while. The sound card I went with is the Ensoniq Soundscape S-2000.

The S-2000 is Ensoniqs first attempt at a sound card and it’s a pretty successful card. Most late DOS games directly support the Soundscape and it also has built in MIDI capabilities that sound pretty good. The card is sound blaster compatible but does not have a true OPL FM chip so all FM sound is emulated to sometimes less than great effect.  One major plus of the S-2000 is the ability to support intelligent mode when using an external MT-32 MIDI module via the joystick port. This a feature that almost all other sound cards lack.

The Vectra line has always been business oriented and the VL is no exception though with a few additions it can make a capable gaming machine for DOS titles or early Windows. Personally I feel like a socket 7 and up machine is better suited for Windows 9x but for late DOS a socket 5 build like the VL is more than capable. The proprietary power supply, limited BIOS options use of the always annoying rails and limited expansion bays does make the VL less than ideal but it can make a serviceable PC in a smaller form factor if you at least add a sound card and possibly a video card depending on your needs.

(right-clicking on any image and choosing “view image” will enlarge image)

I’ve always liked the Vectra line. I don’t exactly know why as I never owned one and they tended to be meant for more of the business side of computing then gaming or home use but none the less I still always kind of had a soft spot for the series.

Today we are going to look at the HP Vectra XA, a decidedly business oriented model that still can make a great retro PC with some slight tweaking.

On the far right of the Vectra XA we have one 5 1/2 expansion bay as well as two 3 1/2 bays. The bays though are a little different in that the two 3 1/2 bays sandwich the single 5 1/4 bay. The dual 3 1/2 bays also are not centered like you see in most cases but are in these sort of extended bays with plastic tabs covering the unused portion. It almost looks like if you removed everything you could turn it into a dual 5 1/4 bay but that doesn’t really work. These bays also use rails to secure the drives, yuk.

In the center we have a removable plate (when the case is open) which has our buttons and LED lights. starting on the top left we have a power button followed by a reset button and finally we have a “lock” button. This button when pressed would suspend the system until you entered a passcode. Handy if you were walking away from your desk and didn’t want nosy coworkers, children or perhaps spouses poking around. Mine didn’t seem to work which is probably for the best since I don’t have a passcode. There may be an option in the BIOS to enable this feature though I didn’t see it when I quickly checked.

Below this we have a hard drive activity light as well as a LAN network activity light. Some models came with an audio board and had audio jacks and volume controls on the under the LED lights but mine did not.

On the back starting on the left we have a security lock and under that a special built-in network card featuring a 10T and 100T Ethernet jacks.

Here is a look at that card installed from the side.

To the right of the Ethernet card we have four expansion slots and several clearly labeled built-in I/O ports. We have a parallel printer port as well as a single USB 1.1 port sandwiched between two serial ports. Finally we have dual PS/2 ports for mouse and keyboard. There is an option in the BIOS for this model to power on via pressing the space bar on the keyboard but I couldn’t get it to work on my machine even with the BIOS option enabled. A specific HP keyboard may be required for this function to work.

removing the top to the case is fairly simple and only involves sliding these plastic tabs located on the bottom front of the case.

After this just pull the case lid forward and up to remove.

Here we see the XA with the top of the case removed.

The hard drive is located behind the front drive bays and is secured upside down to a metal bracket hanging over the network card. The hard drive installed in my XA was a 1.6GB Quantum Fireball.

Now let’s take a look at the motherboard with all those expansion cards out of the way.

1 ) CPU – The Vectra XA uses a socket 7 motherboard. Mine came with an Intel 166MHz MMX CPU installed.

The 166MHz Pentium is a classic CPU and perfect for early Windows and late DOS retro machines. The XA should be able to support every CPU from the Intel 75 up to the 233 MMX as well as Cyrix and AMD equivalents. There is no fan on the heatsink since the CPU gets its active cooling from a fan located on the power supply. We will take a closer look at this later.

2 ) Voltage Regulator – It was pretty common for motherboards of this era to have voltage regulator modules. Rather than having the voltage regulator soldered onto the board it was sometimes on a removable module. In theory you could replace the module much easier if it should fail or even swap it out for one that supported different voltages. They tend to be pretty difficult to come across these days.

3 ) Cache Module – Located between the main system RAM and the CPU, the XA uses a pipeline burst COASt module or Cache On A Stick to provide level 2 cache memory. The cache stick in my XA is a 512kb module though a 256kb can be swapped in if you wanted to for some reason.

4 ) RAM – The XA has six 72-pin RAM slots accepting a total of 192MB of RAM. My PC came with 48MB installed

5 ) CMOS battery and switch box – The CMOS battery for the Vectra XA is a BR2325 coin battery as opposed to the more common CR2032 batteries most motherboards tend to use. The BR is slightly larger than the CR and there are some differences as far as battery life but that is beyond the scope of this article.

The switch is mostly used for setting the front side bus and CPU frequency.

6 ) Power supply – The XA power supply is a fairly low power 100w proprietary form factor power supply. To make it even worse the board requires an AUX power connector from the supply and a specifically positioned fan on the underside of the power supply is used to cool the CPU heatsink.

Replacements can be found on eBay but the asking price of these is usually more then what one is likely to purchase the computer for.

Next to the main AT power connector is a floppy drive connector and dual EIDE connectors for attaching hard drives, CD-ROM drives, ect.

Video – The XA does not have built-in video but it did come standard with a discrete PCI Matrox Millenium video card. This card makes sense seeing as the Vectra XA was aimed at business. The Millenium offers excellent image quality for the time. For gaming is offers fast speeds and decent compatibility.

Sound – The sound card that came with my XA is a Sound Blaster 16 with the Vibra16S sound chip. In my opinion the Vibra cards are a little less noisy then early SB cards but they may not sound quite the same. This card also does not have a true FM OPL chip but instead uses a CQM synthesis chip for FM.

The final card that came installed with my XA is some kind of HP branded interface card with an HP-IB aka IEEE-488 interface.

The HP Vectra XA is a pretty decent socket 7 machine and is fairly easily customizable for your retro needs. It can make a great retro game rig with the right video and sound cards. I’d of preferred two 5 1/4 expansion bays as opposed to one and the two 3 1/2 bays but that’s a minor gripe. The biggest weakness of the XA in my opinion (and most of the Vectra line of this period) is the proprietary form factor of the power supply. If your supply dies it does make things a little more difficult as far as replacements go.

pav31002

When I think of Pavilions I think of those wooden roofed buildings found at the park. It hardly evokes images of high speed computing or technology. Apparently one definition is also “lower surface of a brilliant-cut gem” so maybe that’s what they were going for with the HP Pavilion line. Anyways this is the HP Pavilion 3100. I received this machine as part of a lot of three PC’s I picked up. Its actually the second time I’ve had this models as strangely enough that last one was also from a lot of three machines I grabbed although that one didn’t work and when I tried booting it up it sparked and caught fire. This machine though worked fine. As you can see there is one 5 1/4 bay for a CD drive as well as a spot for a 3 1/2 floppy underneath. there’s a power button to the left and LED’s for power and HDD activity but no reset button. This is a no frills machine.

pav31001

Mine still had the sticker attached with what were the factory specs, 166mhz MMX Pentium, 16MB SDRAM, 2GB HDD, 16x CD drive, 1MB video RAM, etc… The machine I acquired was upgraded by the previous owner and I’ll get to that.

pav31003

On the rear of the computer we have a assortment of the usual suspect ports. Serial and printer ports with an interestingly placed gameport above them for a joystick or gamepad. Next to that we have two PS/2 ports for keyboard and mouse, two audio jacks for microphone and speakers, two USB port and finally the VGA port. Its not a bad assortment of ports for such a small machine and all your basics are covered. The expansion card options are very limited with only two slots available. One slot here being taken by an Ethernet card  (its removable). This computer is very compact and light which is a nice plus.

pav31004

The case top slides off after removing three rear screws. Still has what I believe is the original WD Caviar 22000 2GB hard drive. It uses a riser card for the two expansion slots with 1 PCI and two ISA so you can have either one of each type or two ISA cards. The most logical setup if you don’t care about networking and are going for pure gaming would be a PCI video card and an ISA sound card for DOS compatibility.

pav31005

I guess the lack of expansion slots is the tradeoff for the extremely slim case but it is very limiting.

pav31006

First off there is no l2 cache on this motherboard.

1) CMOS battery

2) Two IDE connectors and one floppy connector

3) S3 Trio64V+ with 1MB of video RAM. A classic stand by for DOS. The nice thing about this chip for on board video is you may not need to bother with adding a video card if your primary concern is DOS since the Trio is pretty much the standard and compatible with just about everything.

4) The on board audio chip from Crystal. there’s no true OPL chip on this machine. It does adequate job but if your serious about sound I would recommend adding an ISA sound blaster or clone.

5) gameport connector

6) Piezo speaker, despite not being a true cone speaker the piezo does a pretty decent job and mine was fairly loud.

pav31007

On the other side of the riser card you have your AT power connector as well as

7) CPU – the 3100 came stock with a 166mhz Pentium MMX chip but mine has been upgraded to a 200Mhz chip. I *think* this may be the top CPU upgrade for this machine as the jumpers only allow for 3x at 66mhz fsb. I did try installing a 233mhz P1 but it was only detected and running at 200mhz. *EDIT* I have been informed that you indeed can get the machine to post to 233mhz with the correct jumper configuration which should be jumper JBF0 and JBF1 set to 1-2.

8) RAM – This machine came stock with 16MB of SDRAM but mine has been upgraded to the full 64MB

So my thoughts on this machine. On the plus side its a very compact and light machine. If you lack a lot of space or want an old desktop for DOS or early Windows LAN parties or something this one should work. It has all the basics and could be made into a serviceable DOS/Windows machine. adding a voodoo I/II to compliment the S3 trio would help or just placing an all-in-one solution card like a voodoo 3 or a Nvidia or Matrox card would also help. I would say adding an ISA sound blaster 16 or AWE would also be a must for gaming. That said there seems to be better options out there and the expansion possibilities with this machine are just to limited. Windows 95/98 run fine on the machine but later games would seriously choke on it from the CPU bottleneck. no L2 cache always sucks and hinders overall speed. if you want something compact a Compaq EN is a much better option, especially with its speedier CPU options and ability in BIOS to disable all cache to seriously cut speeds and help with old game compatibility. The 3100’s BIOS options are like the rest of this machine, very limited. It does a good job cramming as much as it does into such a light and slim case and as I said DOES play DOS games and early Windows stuff OK but its hard to take seriously as a gaming machine.

Benchmarks for DOS were decent

200mhz Pentium MMX, 64MB SDRAM, NO L2 Cache, S3 Trio64V+

3DBENCH – 152.9

PCPBENCH – 41.9

DOOM – 72.44

Quake – 38.9

It actually barely beat my main Pentium DOS PC under 3dbench by .7 FPS but then that could be a fluke since that machine beat it by several FPS in all the other tests. Or 3dBench may rely more on the video card and I’m starting to suspect the 2d core of the Trio may be ever so slightly more efficient then in the Virge even though there supposedly are exactly the same.

FDISKformat

A place for the pc collector

I ❤ Old Games!

Probabilmente il miglior blog bilingue al mondo*

Waltorious Writes About Games

Game-related ramblings.

NekoJonez's Gaming Blog

My Gaming Timeline

Evelynn Star

Lynn talks about video games, records and books ...

Retro Megabit

Sharing My Retro Video Game Collection.

133MHz's Junk Box

Random electronics and gaming crap

SNES A Day

Chronogaming project featuring reviews, screenshots, and videos of the entire Super Nintendo library in release order.

Retrocosm's Vintage Computing, Tech & Scale RC Blog

Random mutterings on retro computing, music, plus radio controlled scale modelling.

The PewPew Diaries.

Work(s) in Progress!

1001Up

1001 video games and beyond

retro computing and gaming plus a little more

sparcie

retro computers and stuff

jispylicious

Stay Jispy!