
I’m a huge fan of the Amiga line of computers and I own most of the various models released during its time in the sun. The Amiga 2000 (I’ll refer to it as the A2000 from here on out) eluded me for years though. Finally, a few years back I was able to acquire an A2000 which is what I will be showing you in today’s article.
The A2000 released in 1987 is basically an Amiga 500 placed in a desktop case with expansion ports. Now keep in mind that is a bit of a simplification but the 2000 and 500 use mostly the same chipset and devices that are compatible with the A500 will generally work with the A2000. Also, keep in mind that there were some variations of the A2000 such as the A2000HD, A1500 and the A2500 which are more or less A2000’s with different stock options. The A2000 was mostly marketed as an Amiga for the professional or business market where the A500 was seen as more of a consumer level product.

I’d say the front of the A2000 is pretty unremarkable and looks like a rather bland standard PC case. On the left side of the case are two LED lights labeled power and hard disk. The standard A2000 actually did not come with a hard drive through the A2000/HD did come with one standard via a 2090 controller card and SCSI drive. My A2000 here was upgraded with an HD which we will look at later. There is room for two 3 1/2 drives as well as one 5 1/4 bay. A2000’s came standard with only a single 880KB double density floppy drive as we can see on mine.

Beneath the drive bays are a 5-pin AT style keyboard port as well as dual DE-9 ports. I have a converter in my A2000’s keyboard port so I can use my Amiga 4000 keyboard as I lack an original A2000 keyboard. For the DE-9 ports I generally attach an Amiga mouse as well as a nice Wilco Commander joystick.
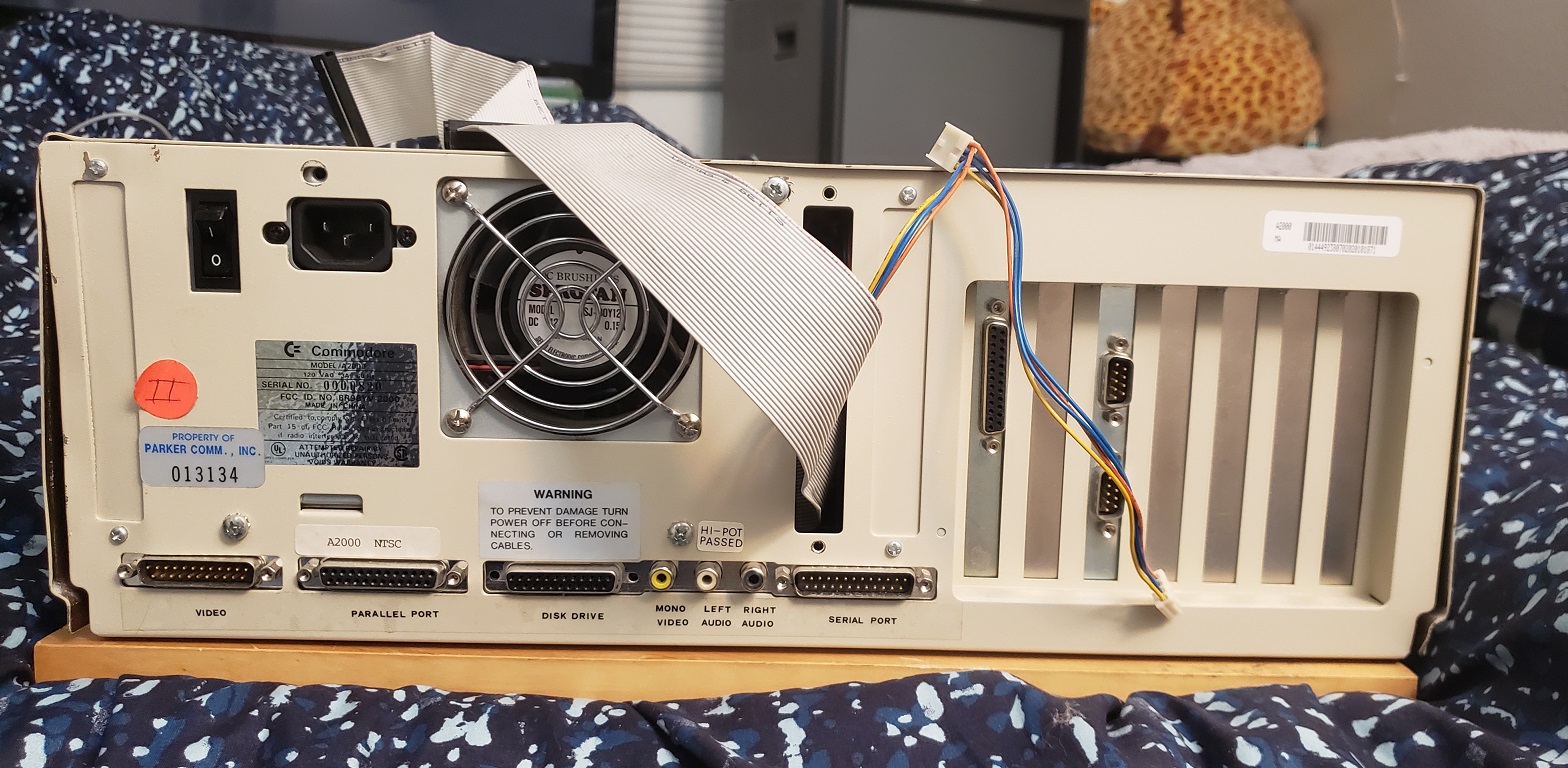
Here is the rear of the A2000. I did remove one of the metal slot covers and currently have a power lead as well as the floppy cable coming out of the back. I will explain that later in the article but for now let’s just ignore it. Let’s take a look at the conveniently labeled various ports below the power supply and the standard 3 prong power connector.

Starting on the left we have a DB-23M analog RGB video out connector for attaching your Amiga to a compatible RGB monitor. Next we have a parallel port as labeled followed by a port to attach an external floppy disk drive. Next we have three RCA A/V out ports. The first of these ports is a mono composite out jack. Keep in mind this port only outputs a composite video signal in black and white. The reason for the black and white output as opposed to color is the A2000’s intended primary market being business professionals. In the mid 1980’s many businesses were still using monochrome monitors for the mostly text based work and the feeling was that color composite would largely be wasted on the A2000. The video out is followed by dual left and right stereo audio out jacks. Lastly we have an RS-232 serial port.

Removing the cover reveals the power supply as well as drive bays and my two currently installed expansion cards which we will talk about a little later.
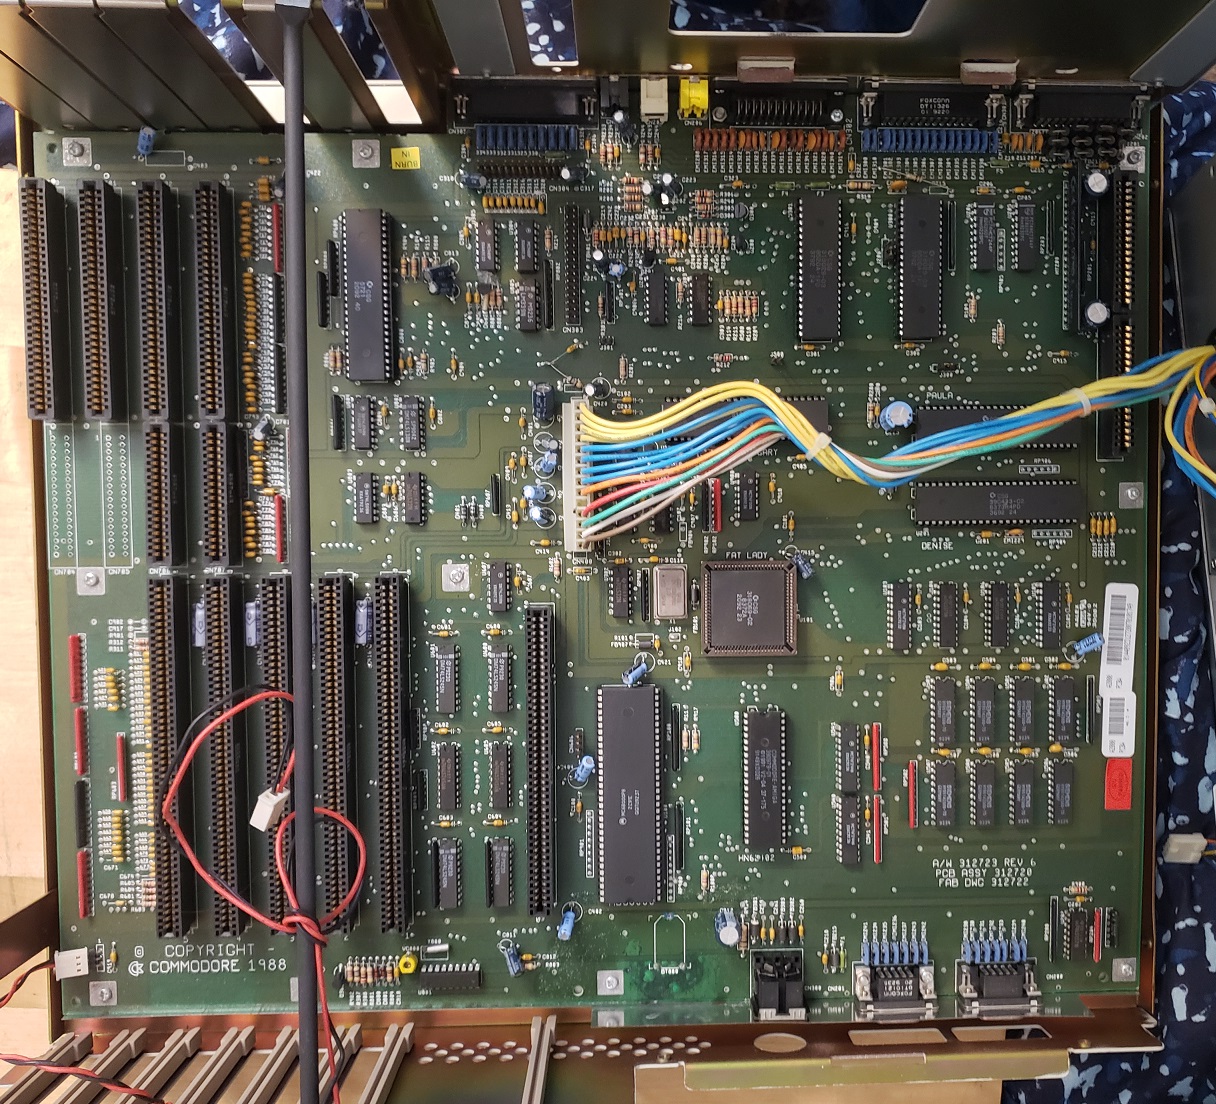

Removing the power supply, drive bays and expansion cards reveal the motherboard of the Amiga 2000. I have a revision 6 motherboard in my Amiga, other revisions of the board may vary somewhat.
1) CPU – The CPU of the A2000 is the Motorola 68000 at 7.16MHz. This is the same CPU and speed as the best selling little brother of the A2000, the Amiga 500. The CPU is socketed and can be replaced with a Motorola 68010. The 68010 offers a small speed boost though the exact amount seems to vary by the source. I’ve read the boost can be anywhere from a negligible 2% all the way to 10%. The 68010 was also popular with users of the WHDload program as it allowed escaping from games without restarting though later versions of the program are said to of fixed this issue allowing closing out games even on the original 68000. Replacing the CPU with the 68010 was also known to cause a small amount of incompatibility with games and generally was not worth the small speed bump.

2) ROM chip – Depending on your model of A2000 the ROM chip could vary but they generally came with a 256k or 512k ROM chip. The kickstart chip determined what Amiga OS could run among many other things. My A2000 came with a V2.04 512k ROM. These ROM chips are also socketed and can be replaced with older ROMs (for compatibility) or newer ROM chips depending on your needs. There are even dual ROM chips that allow users to choose if they would like the machine to boot up using an older or newer ROM version.

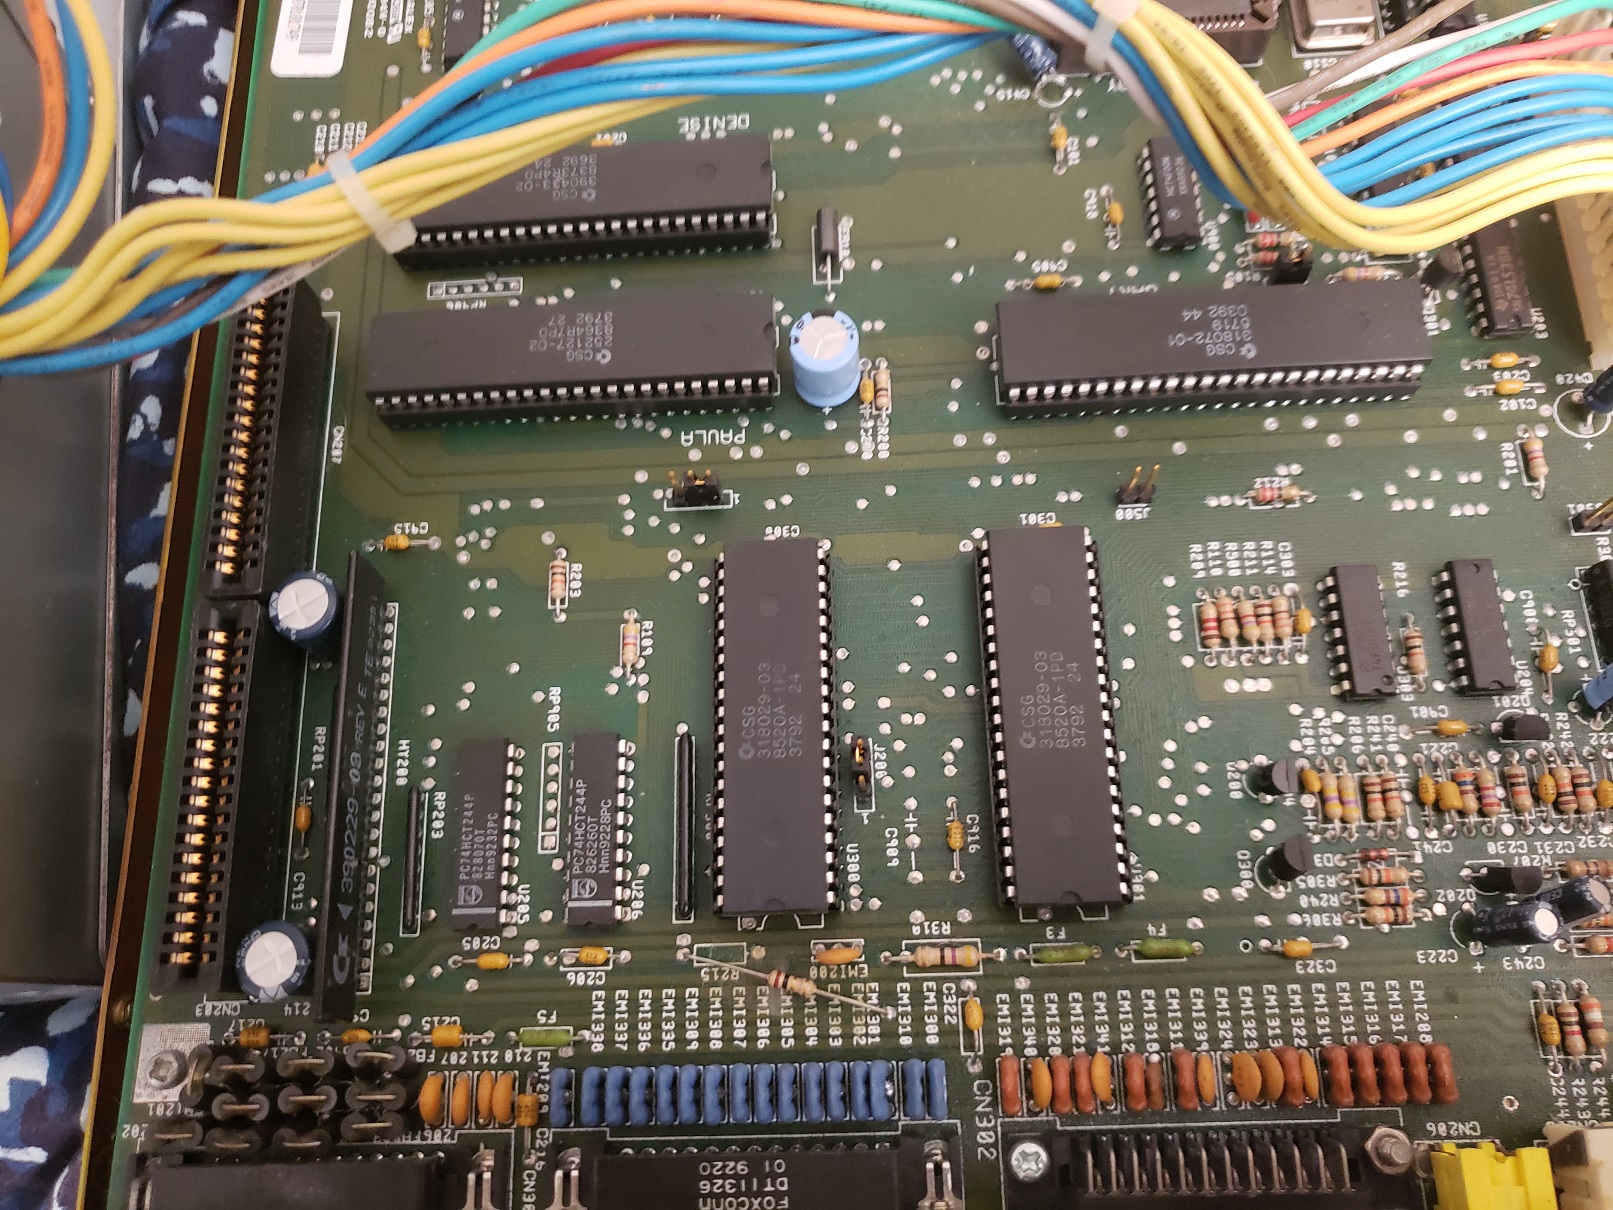
3) Agnus chip – The Agnus chip is a part of the Amiga’s custom chipset which allowed for many of the Amigas advanced features for the time. Agnus was responsible for a variety of tasks such as acting as a memory controller, system clock generator, DMA controller and many other tasks. This chip will vary depending on your Amiga 2000. My Agnus is the 8372A “Fat Agnus” which is a 1MB chip and a part of the ECS chipset (discussed later). This version of Agnus can address up to 1MB of chip RAM but earlier versions only supported up to 512MB of chip RAM. There are also later 2MB versions of this chip which usually are found in Amiga 3000 and 600’s. From what I’ve read you can upgrade this chip on an A2000 to a 2MB “Super Fat Agnus” but most methods seem to require some modding which includes soldering.
4) Gary, Paula, Denise chips – These three chips make up the bulk of the Amiga’s custom chipset and each chip helps to control various aspects of the computer’s functionality. Without getting super technical we will go over the basic functions of these chips.
Gary – System address decoder
Paula – Audio and I/O controller
Denise – Display encoder
My Amiga came with a “Super Denise” chip installed and with the previous “Fat Agnus” chip give my A2000 the ECS chipset or Enhanced chip set. Earlier A2000’s came with the older OCS or Original Chip Set. The ECS only offers fairly minor upgrades over the OCS such as the ability to address more chip RAM, allow for a few higher resolution modes and allowed software switching between 50 Hz PAL and 60 Hz NTSC modes.

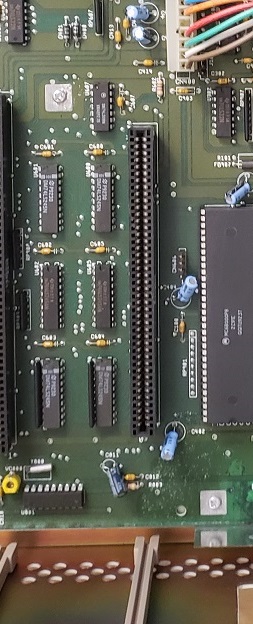
5) RAM – My A2000 is a rev 6 motherboard and came with a full 1MB of “chip RAM” soldered onto the motherboard. Amiga chip RAM is shared between the CPU and the custom chipset while Amiga “fast RAM” is assessable only by the CPU. Earlier A2000s usually shipped with 512k of chip RAM and 512k of fast RAM. Some programs do specifically require a full 1MB of chip RAM while fast RAM is relatively easily addable via the Zorro expansion slot cards.

6) Floppy drive controller chips

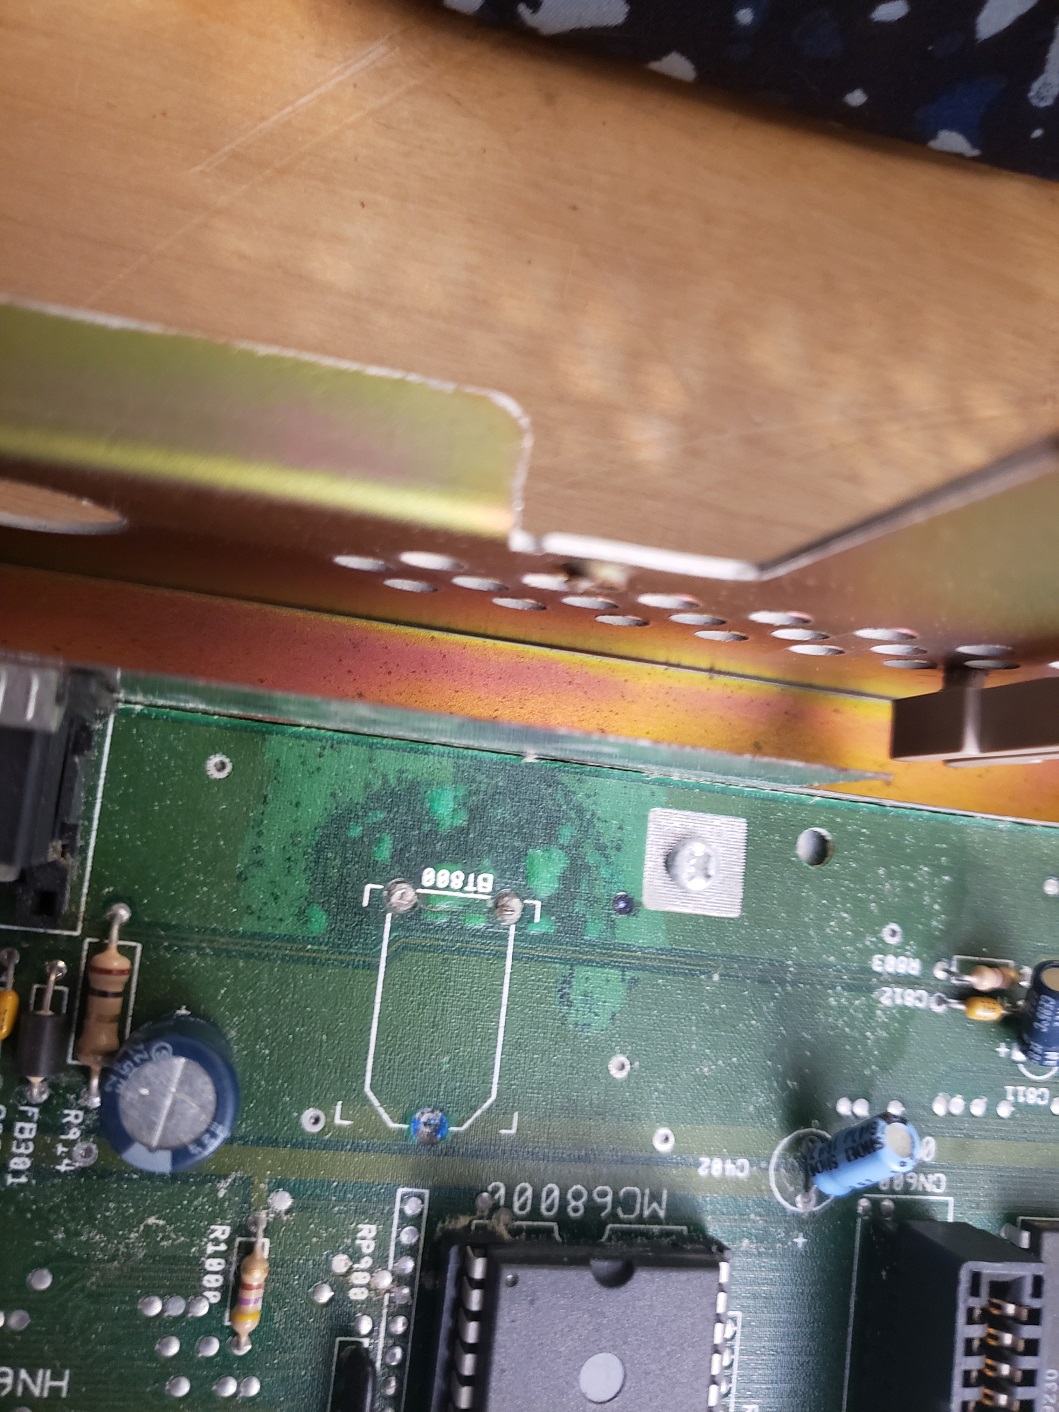
7) Buster chip – The Buster chip (the large vertically positioned chip on the right side of the image below) is another of the Amiga’s custom chips. “Buster” is the DMA arbitrary controller. To the left of the Buster chip and below the power connector are two internal connectors for the floppy header and an internal serial header.


8) Expansion slots – The expansion slots on the A2000 are interesting in that they include several mostly unused PC ISA slots alongside the five proprietary Amiga ZORRO II slots.

The five Zorro II slots support a large variety of Amiga expansion cards and support bus mastering DMA as well as an autoconfig protocol similar to “plug and play”. The ISA slots can only become active by the use of a bridgeboard.
Processor Card Slot – sitting away from the Zorro II slots and next to the CPU chip is a short slot resembling an 8-bit ISA slot. This is the Processor Card Slot.
With this slot you could add various CPU accelerator cards, some featuring co-processors, memory, ect.
9) Power connector
10) Video slot – This slot is used to add various video cards such as Genlock cards, deinterlacers or the “Video Toaster” card. It wouldn’t be correct to think of this in the terms of a PC where you could add better video cards to assist in gaming as this slot was meant for cards that assisted in things like video editing and effects.
11) CMOS battery – This is the internal CMOS barrel battery for saving time/date information. Mine was removed some time ago. This can be modded for a coin style battery.
My A2000 came with two Zorro expansion cards installed by the previous owner.

The first card is just a dual serial port card that adds two additional serial ports to the Amiga.
The second expansion card is much more interesting and useful.

The second card is a GVP A4008. The GVP A4008 is a pretty nice Zorro II SCSI controller card (50 pin SCSI header) and also allows the adding of up to 8MB of “fast RAM” to the Amiga. This is not the HDD controller card that came stock in A2000/HD units but it effectively turns this Amiga into a 2000/HD as well as allowing extra RAM. My card came with a 50MB SCSI drive and 2MB of RAM. I believe my A2000 formerly belonged to a Krogers grocery store as on booting up from the hard drive the machine loads up what appears to be grocery store advertisements. I have since upgraded the hard drive to a 2GB SD card via a SCSI2SD adaptor and have also maxed out the RAM to 8MB.
UPGRADES
Other than replacing the hard drive with an SD card and upping the amount of fast ram to 8MB I have also performed a few other upgrades to the A2000.
Floppy Emulator drive.
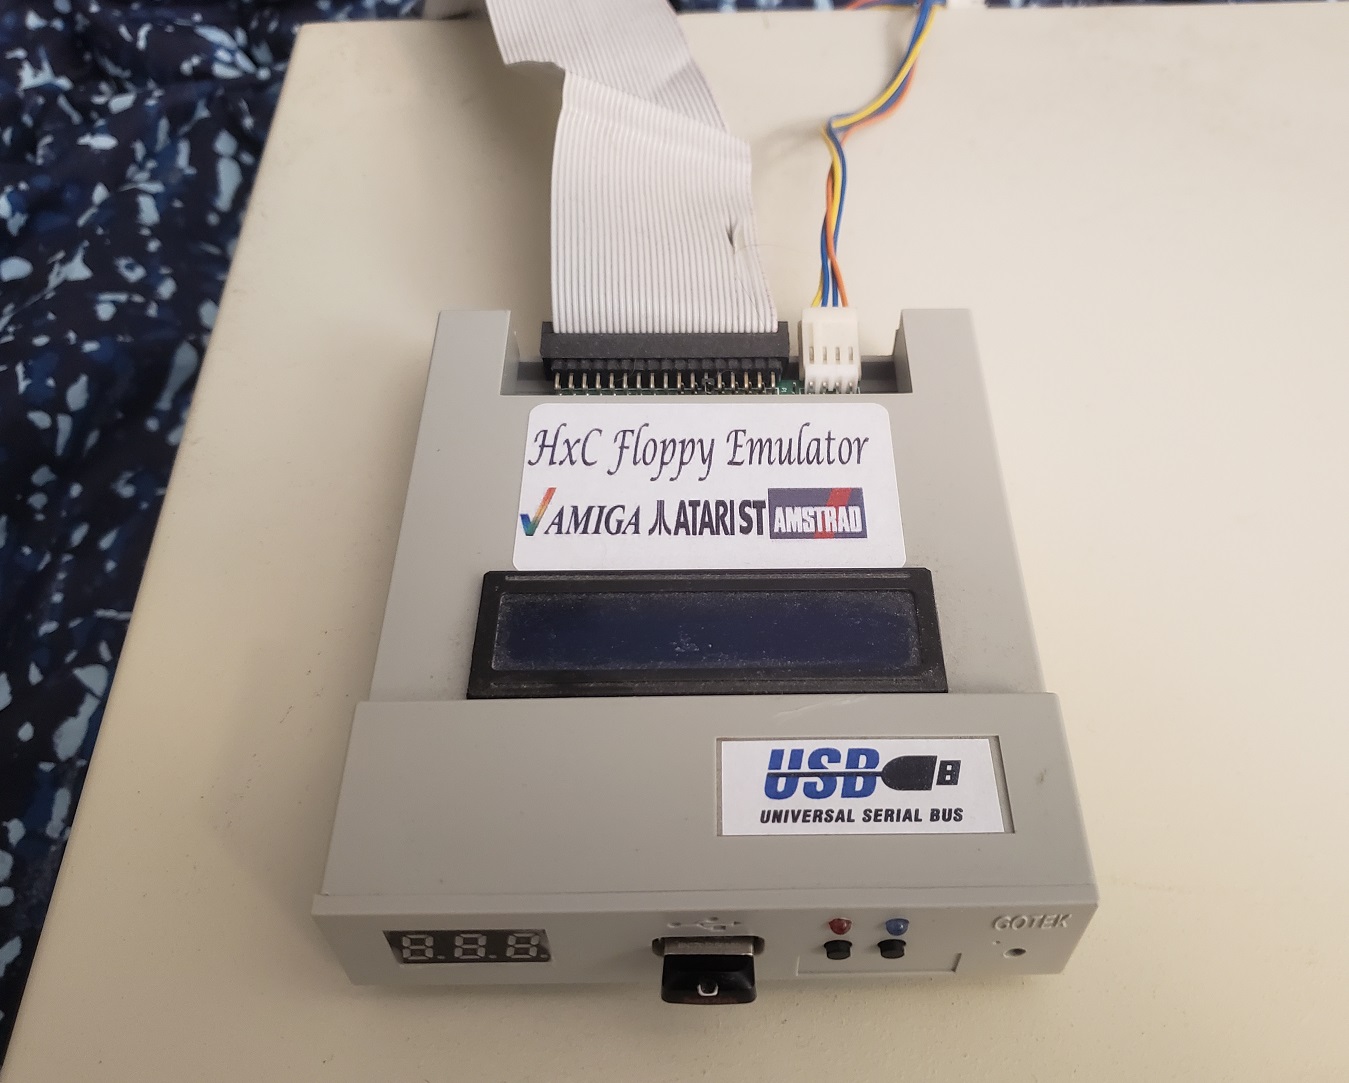
In my experience Amiga floppy disks seem to fail much more common than the PC variety. Thankfully there are answers to this problem in the form of programs like WHDload which lets you install games to a hard drive as well as floppy drive emulators which allow the use of USB flash drives to act as floppy disks. Unfortunately I feel that adding these emulator drives ruins the classic look of the machines. On something like an Amiga 500 where the disk drive is on the side of the machine this isn’t so bad but on a forward facing A2000 it’s just kind of hideous in my opinion.
Because of this I have opted for an external floppy drive emulator. It’s still not the most elegant solution but it maintains the classic look of my A2000. To achieve this I currently have the actual floppy drive in my Amiga disconnected and rerouted the floppy cable out of the back of the Amiga to the emulator. There are mods available that allow you to add a switch to change the main floppy drive to the external floppy port but I haven’t had much luck with these mods.
Next I have replaced my original ROM chip with a dual kickstart ROM that allows me to choose kickstarts via a switch.

The ROM is dual KS 1.3 and 3.1 thus I can use it to take advantage of the enhanced features that KS 3.1 provides while retaining the ability to drop back to KS 1.3 to maintain compatibility with some older games and programs.
The Amiga 2000 is one of my favorite Amiga’s as it shares most of the same specs as the ubiquitous Amiga 500. It retains a very high level of compatibility with games while at the same time it allows for both more and easier expansion options such as adding more memory and things like hard drive and CD drives. Like most Amigas the A2000 can be hard to come by as well as demand a premium.


