Skip navigation

Tag Archives: Mac

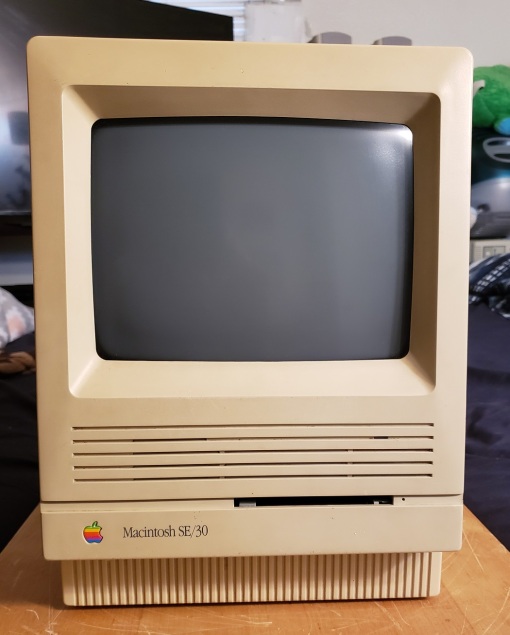
Previously we have looked at several black and white compact Macintosh computers including the Classic, Classic II and Macintosh SE. Today we are going to take a look at the pinnacle of the B/W compact Mac family, the Macintosh SE/30.

The Macintosh SE/30 was released in 1989 and was a compact mac to rule them all. It offered the power of its larger Macintosh II brothers in a small compact package as well as some future upgradability.

The front of the SE/30 is obviously dominated by its 9-inch 512×346 pixel black and white screen. The quality of this screen is excellent and games designed for the b/w mac look great on this machine. Other then the screen we have a small HDD activity LED hidden within the horizontal lines below the screen. The floppy drive is a 1.44MB drive which on the SE/30 for the first time came standard on a compact mac.

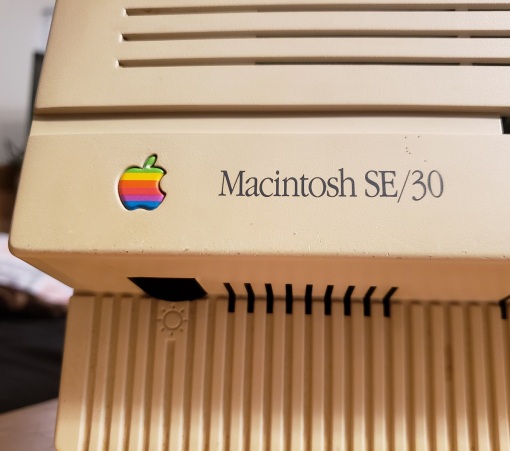
The only dial or button on the face of the SE/30 is a brightness dial for the monitor hidden away below the Apple badge and model name.

First off on the lower left side of the rear is the expansion card plate for certain expansion cards. This SE/30 previously seems to have had a Radius display card but unfortunately the card was removed by the previous owner but the bracket was left behind. To the right of this we have a standard 3-prong power connector and the power switch.

Taking a look at the various ports starting from the lower left we have dual ADB ports for keyboard and mouse. Next to this we have an external floppy drive connector for attaching well, an external floppy drive. Next is an external SCSI port for connecting external SCSI devices such as hard drives and CD-ROM drives. Next is an apple printer and then modem jack and lastly we have a 1/8 stereo audio out jack for connecting headphones or external speakers. Since we are talking about the sound the SE/30 uses an Apple Sound Chip (ASC) including four-voice, wavetable synthesis and stereo sampling generator. The sound coming from the built in internal speaker will be mono but anything through the rear audio jack, wether speakers or headphones will be stereo.

Removing the case reveals the drives and internals.

It is fairly cramped inside but the motherboard is fairly easy to remove as it just slides up and then away. Remember to detach the cables before removing the motherboard though.

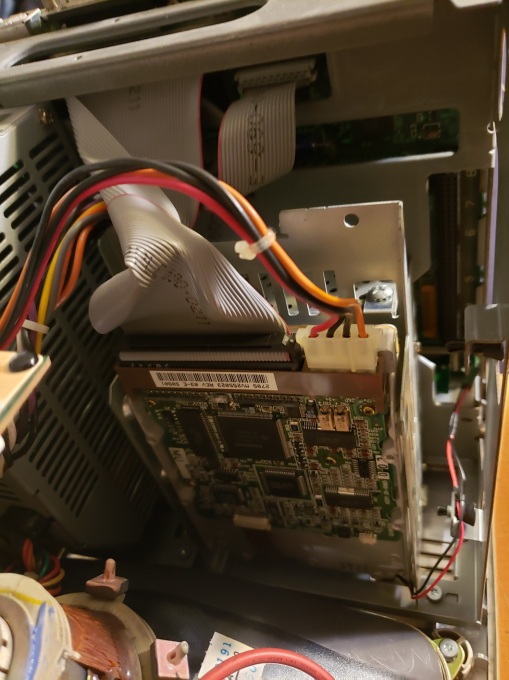
The fan header, floppy and SCSI cable and power cable need to be unplugged from the motherboard. Only the power cable may present an issue since it can be a little stubborn and hard to reach. Below the CRT tube is a tray for an optional SCSI hard drive. Generally the SE/30 was sold with either a 40MB or 80MB hard drive installed but the system will take as large as a drive as you can find. I currently have a 300MB hard drive installed. Below the hard drive is a 1.44MB floppy drive.

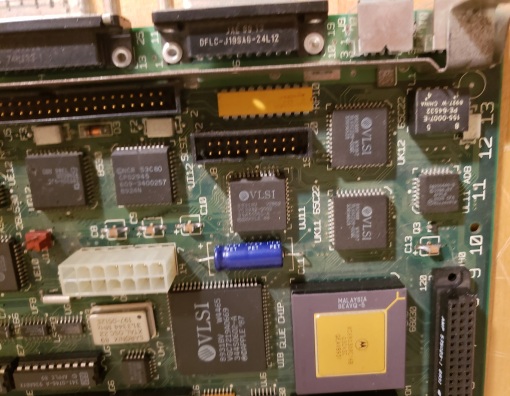
Above is the motherboard for the SE/30 after being separated from the case. A common point of failure on these boards as with most of the older Macs are the silver surface mounted capacitors. These tend to leak over time but can be replaced with modern equivalents.

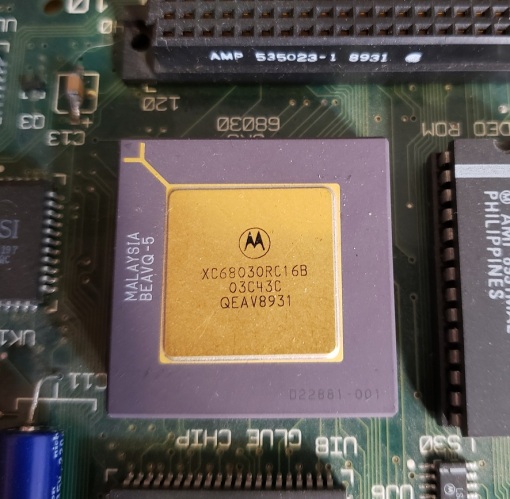
1 ) CPU – The CPU is the Motorola 68030 running at 16MHz. This is the same CPU and speed as some of the SE/30’s big brother full sized Macs such as the Macintosh IIx and IIcx. Due to the SE/30’s 32-bit bus it is the fastest of the black and white compact macs being even faster than the Mac classic II which features the same CPU and speed but only ran on a 16-bit bus.

2 ) FPU – One other feature of the SE/30 is the inclusion of an FPU co-processor standard on the motherboard as opposed to being optional. The Motorola 68882 FPU unit helped when performing more complex math functions though like the on the PC I’m not sure it was utilized very often in games. You could argue that an optional FPU socket is a better option since if the FPU fails you can replace it much easier.

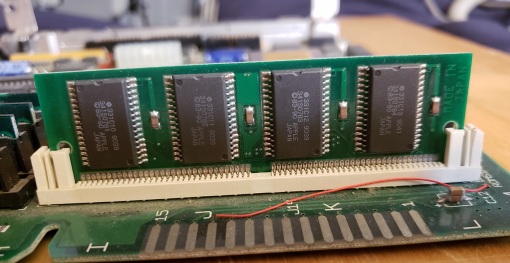
3 ) RAM – The SE/30 features eight slots for 30-pin RAM SIMMS. 1MB or seems to of been stock but it’s not unusual to find SE/30’s with 8 to 16MB of memory.

Unofficially the SE/30 can support up to 128MB of RAM using 8 16MB SIMMs. This is a staggering amount of memory for 1989 when this model was released let alone in such a compact machine. I was able to upgrade My SE/30 to 128MB, just be sure to remember afterward to navigate to the memory option in your OS and enable 32-bit memory mode.

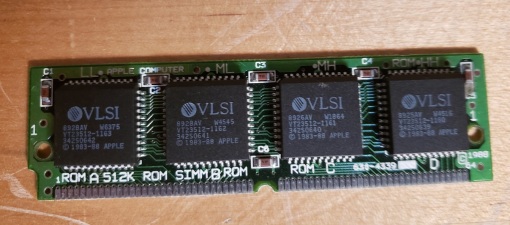
4) ROM – The original ROM that came stock with the SE/30 was a 32-bit “dirty” ROM meaning that it still had some 24-bit code. This meant the SE/30 was limited to 8MB of RAM though there was a software solution called Mode32 which allowed 32-bit mode. Both SE/30s I have come across had Mode32 installed and if yours does not the software is freely available with an internet search.

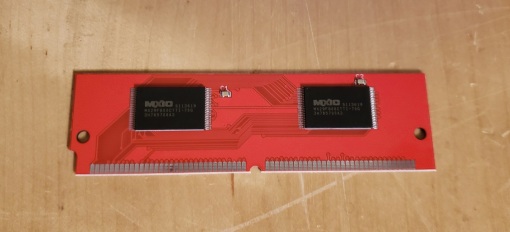
Thankfully the ROM on the SE/30 is not soldered to the motherboard and can be swapped out as easily as if it was a stick of RAM. One way to make your SE/30 32-bit “clean” was to swap the stock ROM out with the ROM from a Macintiosh IIsi or IIfx. For a while I had swapped my ROM with one from a Mac IIsi and it seemed to work fine.

Possibly the best option currently for making your SE/30 32-bit “clean” would be ordering the reasonably priced ROM-inator-II from Bigmessowires. The ROM-inator II is a modern replacement for your SE/30 which makes it 32-bit “clean” but also adds HD20 hard disk support, various utilities and lets your Mac boot to System 7.1 from the ROM.

5 ) PDS slot – The PDS or Processor Direct Slot allowed the SE/30 to accept a number of expansion cards. Something not seen in most of the compact Macs. Various cards such as accelerators and display cards can be added via this slot.

6 ) PRAM battery

7 ) SCSI connector

8 ) floppy connector

9 ) Power connector

10 ) Interrupt and reset buttons

The SE/30 is one of the all time classic Macintosh computers and along with the color classic I and II one of the absolute best compact Macs. The SE/30 has all of the power of a full sized Macintosh II in a much smaller package. With a ROM replacement, a sizable SCSI hard drive and the full 128MB of RAM the SE/30 becomes a monstrous classic Macintosh. The smaller black and white monitor can be a handicap when it comes to games but games designed for the B/W mac look stunning on the monitor and the lack of color even lends itself to the atmosphere of certain games such as the Infocom Macventure series.
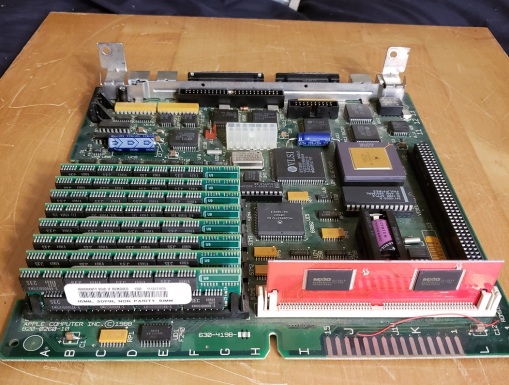
re-capped Mac SE/30 motherboard upgraded with ROM-inator II and 128MB of memory

I would highly recommend tracking an SE/30 down if you want a classic compact Mac. You’ll probably never need the 128MB of RAM but I would certainly recommend adding a nice sizable SCSI hard drive or even a SCSI2SD adaptor for storage. I would also highly recommend the very affordable ROM-inator II if only to make your machine 32-bit “clean” and to get that very nice ability to boot from ROM.

SE/30 with external SCSI CD-ROM drive
This slideshow requires JavaScript.

lc3mp

In previous articles we covered both the nearly identical LC and the LC II, both of which were early attempts to bring an affordable color Macintosh to the market. Both machines more or less accomplish what they set out to do but also both were heavily compromised in functionality to achieve this end.  The main compromises of the original LC and following LC II were

1 – A 32-bit CPU on a 16-bit motherboard severely hampering the performance of the LCs 16mhz 68020 CPU.

2 – An imposed limit of 10MB of RAM regardless of the size of the RAM stick(s) installed.

3 – complete lack of a MMU or FPU socket on the motherboard.

4 – Difficulty getting the LC to run with monitors outside of the fixed resolution 512×386 monitor it was intended to be paired with or period Apple or early VGA monitors.

The LC II added the ability to use virtual memory via the CPU’s built in MMU and tweaked the video a bit but was otherwise identical. Thankfully the LC III finally addressed all the above issues while maintaining the same small form case. Finally we have a full 32-bit data bus so as not to strangle the 32-bit CPU. There is now a MMU as there was built into the LC II but also much more expandability for RAM as well as a socket for a FPU chip and the video memory supports 640 x 480 resolution without any kind of fiddling or upgrade.

Other then the LC III badge the case is identical to the LC I and II. bear in mind there are two versions of the LC III case and one features a manual eject floppy drive that looks a little different with an indentation to grasp the disk. These cases also have the case badge as more of a label then etched onto the case. Otherwise these machines are identical.

The rear of the case though is identical to the LC I & II. from left to right you have the power connector and switch, Mac video port, modem and printer ports, external SCSI port, ADB port and finally an audio jack for speakers and mic. The Ethernet card installed on the right is the same one that used to be installed in my LC II.

The LC III like the LC I & II does not support power on via the keyboard and use of the rear switch is required. Opening the LC II is exactly the same as the other LC’s with just two fairly sturdy tabs securing the top.

Now with the top removed.

The general layout is basically the same as it was in the LC II with a single floppy drive and space for a SCSI hard drive. Mine came with a standard 80mb SCSI hard drive but I upgraded mine to a 500mb model by transferring the upgraded hard drive from my LC II.

Now lets take a look at the motherboard.

1) Enhanced LC PDS slot – The PDS slot on the LC has a slight extension to it compared to the PDS slot in the LC and LC II. The “enhanced LC PDS slot” in the LC III supports both 16-bit PDS cards of the type that would be used in the older LC machines but also 25mhz 32-bit PDS cards. Unfortunately these 32-bit cards are quite uncommon.

2) CPU – The LC III unlike the LC I & II now uses a full 32-bit data bus as opposed to a 16-bit but so the CPU can be taken full advantage of. The CPU in the LC III is a Motorola 68030 running at 25mhz, also a bump up from the 16mhz of the previous LC’s.   Some benchmarks of the time placed the LC III twice as fast as the LC II in overall performance. There is also a version of the LC III known as the LC III+ which is identical save for the CPU which got a speed bump up to 33mhz. There is no way to tell the two models apart as there was no indication given on the outer case. Only opening the case and checking the CPU or powering the machine up and checking in software would reveal the difference. There are guides available on modding the LC III into an LC III+ but perform at your own risk. Also Later LC III’s with the manual floppy drive eject are more likely to be the plus models though be aware this isn’t a sure thing.

3) FPU – Finally we have a socket to add an optional 68882 math coprocessor to assist in complicated math calculations. This doesn’t seem to of been a popular upgrade though as I’ve never come across an LC III with this upgrade though the chips are fairly cheap (as of 2018).  Like on the x86 PC though I don’t think the FPU was heavily utilized in any number of games on the Mac so the FPU upgrade was not seen as a priority.

Empty FPU socket to the right of the CPU

68882 coprocessor installed

4) RAM – The LC III has 4mb of RAM on the motherboard but also unlike the previous LC’s the LC III has a single 72 pin SIMM socket with the ability to add up to 32 additional MB or RAM for a potential max of 36mb. This is the configuration of my LC III featured here. The LC III was also the first Macintosh to use 72 pin SIMMs. This was a welcome feature as the previous 10mb was serviceable for the time but the ability to add up to 36MB total went a long way to extending the usefulness of the LC III in the future.

5) Video – The LC III features built in video and 512kb of VRAM standard. This allows 640 x 480 resolution on a 640 x 480 capable monitor out of the box and I had a much easier time hooking this LC up to my various monitors via a Mac to PC VGA adapter and getting a image without any hassle or “out of range” errors. The VRAM is upgradeable to 768kb via a VRAM slot and 256 KB 100ns VRAM SIMM. This will allow a maximum resolution of 832 x 624 at 16-bit

6) PRAM – this is the ever present PRAM battery for saving settings. It is always recommended to swap this battery out when you get a new Mac or if you start encountering strange instabilities.

The Mac LC III was a great evolution of the LC line finally fixing all of the shortcomings of the line while maintaining a lower price point. For all intents and purposes the LC III was a Macintosh IIci in a smaller form factor case with slightly lower performance and much less expansion capabilities. If all you wanted to do was some light work and gaming and didn’t need the expansion slots of the Macintosh II line the LC III was an excellent option that saved money and took up a little space in the house.

For the retro Mac gamer I would easily recommend this machine over the LC I and II. They don’t take up much space, are light and relatively cheap and easy to fine. They also offer enough power to run early color Macintosh games or black and white titles well and can work with most monitors hassle free.

On this blog we have already taken a look at two models of the Apple G4 Macintosh line. In this article we are going to take a brief look at another of this line. The Macintosh G4 “Sawtooth” also referred to as the AGP G4 due to its addition of an AGP slot for video.

The Sawtooth as we will refer to it uses the same style case and color scheme as the Digital Audio G4 that I covered earlier as well as the entire early G4 line. Released in 1999 the Sawtooth was a modest improvement over the earlier “Yikes” G4 with an AGP slot for video as well as faster ATA controller for IDE devices and the option of some faster video cards as well as faster CPU speeds.

The front is identical to the earlier models with the center speaker and power button as well as the smaller reset and debug buttons on the lower section. There are two bays, one 5 1/4  and the lower bay being 3 1/2. Mine has a DVD drive installed as well as an optional ZIP drive.

Turning the Macintosh around we see the PSU connector as well as four expansion slots on the lower portion of the case.

On the upper half we have our various connectivity jacks and ports.Closest to the top we have two Firewire 400 ports with a 10/100 Ethernet jack below that and then below that we have two USB 1.1 ports and finally two audio jacks for speaker and / or microphone. We also have a jack for a modem to the right.

Like the other G4 Macs the case opens very easily by pulling on a handle on the side. Here I have all the expansion cards removed as to give a better view. Up top we see the power supply as well as the two drive bays. The bays are actually one single piece that slides out by removing the front panel and undoing two screws. The lower bay appears to be 5 1/4 at a glance but it’s really a 3 1/2 bay. Mine originally had a hard drive installed in it for some reason.

The G4 Macintosh actually has ample room for hard drives and mine came with six hard drives installed. Possibly the previous owner was running a RAID array. I took out most of them but left in two. One is a 400GB and the other is 250GB. I left the OS that was installed though which was OS X 10.2 though I believe the original OS shipped was 8.6.

Now lets take a better look at the motherboard.

Compared to a PC motherboards I always found Macintosh motherboards from this time to look rather sparse and boring though this may be attributed to having components on the underside of the board. This motherboard like the Yikes model before it and the Gigabit Ethernet model after run on a 100mhz front side bus.

1) CPU – All of the original model G4 Macs run on the Power PC G4 (7400) CPU.  The CPU in this machine is a 450mhz version with 1mb of L2 cache but they also came in speeds of 350mhz to 500mhz. The 450mhz would be the middle range option and is probably comparable to an earlier Pentium III in performance.

2) RAM – There are four slots present designed to handle up to 2GB of PC100 SDRAM. stock though the most the machine usually came with was 256mb. Also earlier OS’s which originally came loaded onto the Sawtooth can only detect up to 1.5gb

3) Internal Firewire. The Sawtooth G4 has an interesting internal connector not present on the earlier Yikes models nor the later Gigabit Ethernet version. This is a Firewire 400 jack on the lower right corner of the motherboard presumably to power an internal Firewire hard drive.

4) Wireless airport card connector for attaching a wireless card. This was a feature not present on the earlier model.

5) ATA connectors – Two ATA66 connectors for attaching up to four IDE devices such as CD drives and hard drives.

6) CMOS battery – Is the standard 3.6 V lithium battery to save settings. Like all Macs the death of these batteries tend to cause more issues then what I see happen in PC’s. If your having odd instabilities replace these things first.

7) ATX power connector

Finally lets take a look at the expansion slots and cards I have installed.

The Sawtooth comes with three 66mhz PCI slots which will accept your standard PCI cards as well as special cards meant for the faster 66mhz PCI slot. Also new to this model over the Yikes Macintosh is the x2 AGP slot for a dedicated video card.

Video – The video card I have installed is an AGP ATI Rage 128 Pro card. This would of been the stock video card to come with this G4 though some models also came with non Pro versions. These cards came with 16mb of video memory onboard. I think the Rage 128 Pro is a decent card for the time and these were found in virtually all Apple Macintosh machines at the time. They have decent performance compared to something like the TNT2 as well as good compatibility with older titles. The video out options on this particular card are also nice offering standard VGA as well as DVI and S-video. This card does seem to run out of steam fairly quickly when you start running games post 2001 or so. Id recommend it for late 90’s Mac games but if you looking to upgrade this card maybe should be close to top on the your list for replacement.

SCSI was also an option on these Macs and many long time Macintosh users were still quite accustomed to the SCSI hard and CD drives. My machine came with a PCI Adaptec SCSI controller which I suspect was installed stock. I was able to use this card to replace the hard drive in the ZIP drive bay with an actual purple face plate SCSI ZIP drive although stock these machines used IDE ZIP drives with a face plates matching the translucent blue plastic.

CPU UPGRADE

I did also happen to acquire a Sonnet Encore ST/G4 upgrade CPU that I wanted to test out on this machine. Mine is a whopping 1.7ghz upgrade but they also made a 1.8Ghz upgrade chip and possibly faster. Installation was fairly easy and saw a massive speed boost over the 450mhz G4

I did notice that OS 10.2 did identify the CPU as a G3 though this didn’t seem to really affect anything.

sawtoothug3

Another upgrade I tried out as adding a PCI ATA133 card to match with the installed Maxtor ATA133 hard drive. This created noticeable faster booting times.

All an all another solid G4 machine from Apple. The Sawtooth does a modest job of improving on the Yikes G4 (a machine I hope to one day cover) but doesn’t offer anything to dramatic. Again, this is machine would certainly make a nice 90’s Mac gaming rig with a CPU that falls into the area of being capable but not to fast. The case is also rather nice being built quite solidly compared to earlier “brittletosh” cases and is also super easy to access and work on. I’ve never had any issues with the G4 processor and its always a treat to work with. These machines can also be found very cheaply so don’t hesitate to pick one up.


m76005

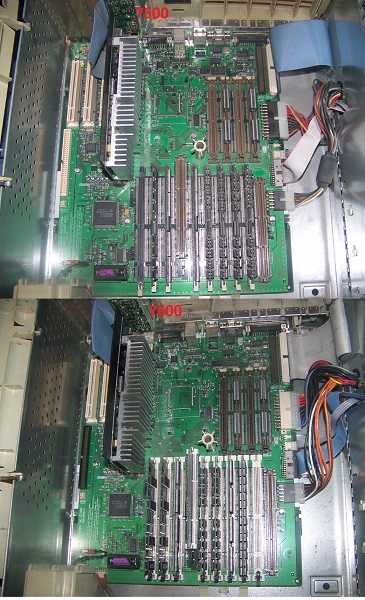
For this article I’ll be taking a look at my Macintosh 7600 from 1996 but I’m also considering this a overview of the 7500 as well since they are basically the exact same computer using the same case and motherboard. The only difference as far as I can tell besides the case badge is the 7600 came with a slightly more advanced CPU, which since the CPU on these models came on a removable daughtercard you could easily upgrade/downgrade to either or.

Here’s a few pics if you don’t believe me since at one time I had both models.

m760017500inter

I ended up Frankensteining RAM and drives from the 7500 into my 7600 so I condensed it into one machine that I used for some time.

late 90’s Macs are some of the most hated by Macintosh fans but ironically I rather like them, at least in principal. My fondness for them though is the reason many Mac lovers probably dislike them, they are very “PC like”. You can actually easily open and expand a late 90’s Mac unlike earlier models where actually getting inside the machine and tinkering was somewhat discouraged. That said they also share qualities that I hate. chief among them is the plastic tooless cases that although makes it easy to get inside they have not aged well and are very prone to having critical retention tabs snap.

The 7600 is somewhat of a mainstay of late 90’s Macintosh computers and offers decent expansion abilities as well as being pretty easy to work on.

m76003

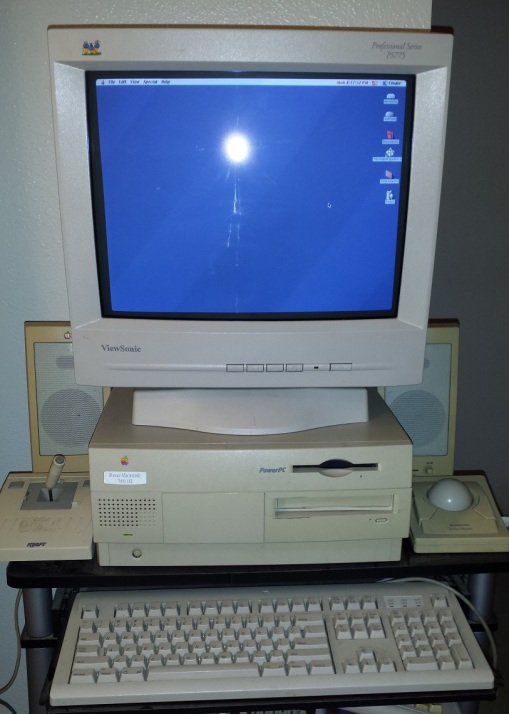
The 7500/7600 both use the “Outrigger” style case that’s basically a desktop style casing. These models both come with a 1.44mb floppy drive and SCSI CD-ROM drive. To the left of the CD drive bay is room for another drive. When I bought my 7600 off Craigslist it had a purple SCSI 100mb ZIP drive installed in this bay that I promptly removed for another project. To the left of this bay is a built in speaker and below that is a manual power button. Thanks to the brittle plastic my tabs holding the power button in place have broken so it is not always reliable. Thankfully there is a power key on the keyboard.

m760014

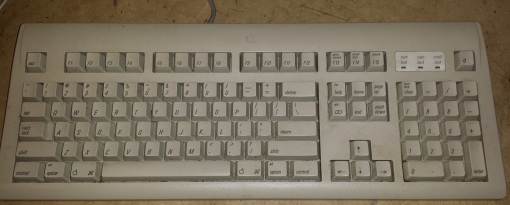
I used an Apple Design M9280 ADB keyboard with mine.

The number after the 7600 on the case badge designates the CPU speed that the machine came with stock. Mine came stock with a 132mhz CPU.

m760012

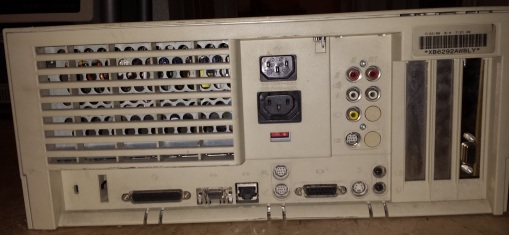
The back features a full range of connections. First from the left we have an external DB-25 SCSI connector. This is followed by two ethernet connector types. First the AAUI or Apple Attachment User Interface, a type of ethernet connector I honestly never knew about before this machine. Next to it is a more standard 10Base-T ethernet jack. Next are two Geoports which are for printer and modem interfaces. This is followed by the Macintosh DB-15 VGA out, of course if you need to connect to a standard VGA monitor adapters are plentiful. Next is a ADB port for keyboard or mouse (your supposed to plug a keyboard in here and then the mouse into the keyboard). Finally we have two 3.5mm minijacks for a microphone and speakers.

Above the ports we have a nice array of video in/out jacks. My models only has RCA stereo out but it does have stereo audio in as well as composite video and S-video in. I don’t really do any editing or work like that much on a Macintosh but these must of been pretty convenient in its day.

There are only three expansion slots as you can tell from the plates on the right but seeing as so much is built in I never found this to be so much of an issue.

m76006

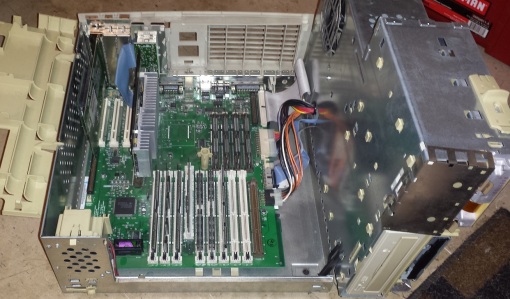
The cover comes off relatively easy. You need to depress two plastic tabs located under the front bezels overhang and then pull forward. With luck your will slide off without anything snapping off. You cant see it here because I removed them but theres is a lot of annoying and flimsy metal shielding across the front drive bays. I have upgraded my machine a little. I replaced the stock 4x SCSI CD drive with a 8x SCSI CD drive from another Macintosh. Macs are very touchy about what drives you use so for simplicity sake I just pulled mine from a Mac from the same era. There are of course ways to get non apple drives to work but for the CD drive I didn’t go through the hassle.

I also added a second SCSI hard drive that you cant see in this image. It is a 2GB IBM SCSI drive. I had to first install it in my other G3 machine and format and initialize it before the 7600 would detect it.

The insides again unfold relatively easily giving access to the motherboard.

m760013

Most of my little tabs and what not have snapped over time. I have to watch the right part of the chassis doesn’t fall down on my hands since the little black plastic stand that props it up also snapped some time ago. With access to the motherboard lets take a closer look.

m76007


1) CPU – Here we have the CPU card. To be honest I like the PowerPC line of CPU’s and I like how easy it is to swap out CPU’s in this fashion. The 7500 shipped with a 100 MHz PowerPC 601 CPU while the 7600 sported a 120 MHz, 132 MHz PPC 604 or a 200 MHz 604e. The front side bus is 40mhz to 50mhz controlled by the CPU card. Mine was originally a 132mhz model but when I received it my machine had been given a 300mhz G3 CPU upgrade. Interestingly my 7500 also had a G3 CPU upgrade leading me to believe these were fairly common upgrades and generally recommended as they seem to really give the Mac some additional power.

m76008

2) PRAM Battery – running without a battery or a low battery seems to have much harsher effects on a Mac then a PC. 3.6V PRAM batteries are relatively cheap and should probably be the first thing to check/replace if your machine is acting odd or unstable.

3) RAM – The 7500/7600 use 70ns 168-pin DIMMs with the standard amount being 16-34MB. I haven’t really expanded mine to much beyond that but the eight slots support 512mb officially and 1GB unofficially with 128mb DIMMS. This is actually a pretty incredible amount of RAM for a consumer computer of the time.

m76009

4) L2 cache – The 75/7600 use a COASt (Cashe On A Stick) module for L2 cache up to 256kb. I don’t know if the machine will support sticks larger then 256k such as 512kb or 1mb but initial research suggests it will. When using a G3 upgrade card such as myself I have read it is advisable to remove the L2 cache stick as the G3 cards have faster L2 cache on the CPU card.

5) ROM – This slot actually confused me for a long time. It’s a ROM slot for some kind of ROM chip which the system I assume would NEED to function yet on both my machines it was not present. It wasn’t until later I found out the ROM chip is on the underside of the motherboard and this slot was left in case any ROM upgrades came later this slot could be used to implement them.

6) Video Ram – Like many Macs the 75/7600 has built in video capabilities. I was not able to find specifics except that at max it supports 1152×870 resolutions at 24-bit and 1280×1024 at 16-bit. The on board video supports up to 4MB of VRAM which is what the four slots are for with 2MB being standard. I was able to lift two 1MB sticks from my 7500 for this machine maxing it out. Keep in mind you need the full 4MB to achieve the highest resolutions. This though is rendered pointless since I did eventually install a dedicated video card.

m760010

7) DAV (Digital Audio Video) slot – This is another slot that took me some time to figure out what it does. Apparently this slot with a cable can be combined with certain expansion video cards. according to here “The DAV connector provides access to the Audio/Video card”s 4:2:2 unscaled YUV video input data bus and associated control signals. By means of a 60-pin cable to the DAV connector, a PCI expansion card can gain access to the digital video bus on the Audio/Video Input/Output Card and use it to transfer real-time video data to the computer. Such a PCI expansion card can contain a hardware video compressor or other video processor.”

8) These are just internal connectors. From top to bottom we have two SCSI connectors, power connector, speaker/CD audio jack, floppy connector and finally 3.3v power connector.

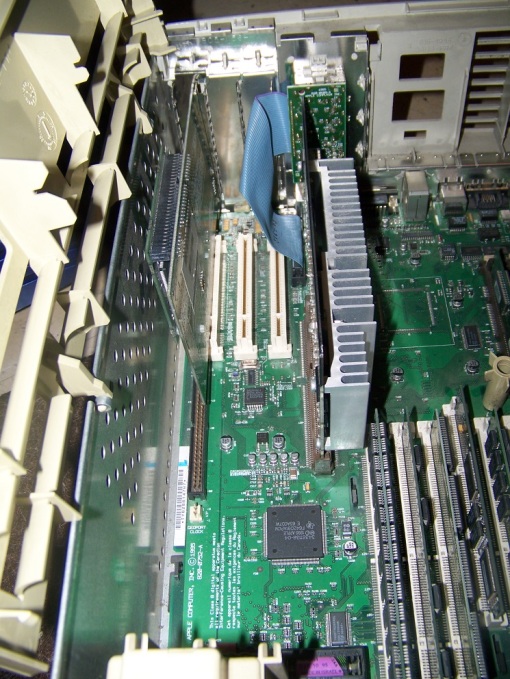
9) The 75/7600 fortunately come with three PCI expansion slots. Adding a video card or two is probably a good choice. There are really no Audio cards made for the Mac to speak of so video upgrade is really your best option. Keep in mind you need Macintosh specific cards. The PCI slots themselves are the same as a PC but the cards BIOS is different. The video card I am using is a RAGE 128 w/16MB of RAM.

m760011

The lack of an AGP slot limits your options but I find the Macintosh Rage 128 cards to be pretty cheap and abundant as well as providing enough power for the majority of 90’s Mac games. You can also add a Voodoo 2 mac edition or if you can find and afford one a Mac edition Voodoo 5500. I actually chanced across a boxed card at a swap meet for $3 once so they can be found.

v5mac

So my final opinion? The 7500/7600 can be found pretty cheap and easily off places like Craigslist. I’m running OS 8.5 on mine but they can run OS 7 and 9 without issues according to your needs and wants. With a G3 upgrade and 1GB of RAM these things fly for a machine that came out in 1996. Even with a moderate graphics card like the Rage 128 and a more moderate amount of RAM such as 512MB or even 256MB you should be able to do most of you 90’s Macintosh gaming with ease. The SCSI can be a bit of a hassle though if your not familiar with it and of course replacing drives is more of a hassle. It just makes a nice all around 90’s gaming Macintosh in my opinion and for a time served as my main Macintosh

The toolless cases though as with most 90’s Macs I could do without. It seems kind of cheap and as I’ve said the plastic did not age well and is prone to cracking.

m76004

FDISKformat

A place for the pc collector

I ❤ Old Games!

Probabilmente il miglior blog bilingue al mondo*

Waltorious Writes About Games

Game-related ramblings.

NekoJonez's Gaming Blog

My Gaming Timeline

Evelynn Star

Lynn talks about video games, records and books ...

Retro Megabit

Sharing My Retro Video Game Collection.

133MHz's Junk Box

Random electronics and gaming crap

SNES A Day

Chronogaming project featuring reviews, screenshots, and videos of the entire Super Nintendo library in release order.

Retrocosm's Vintage Computing, Tech & Scale RC Blog

Random mutterings on retro computing, music, plus radio controlled scale modelling.

The PewPew Diaries.

Work(s) in Progress!

1001Up

1001 video games and beyond

retro computing and gaming plus a little more

sparcie

retro computers and stuff

jispylicious

Stay Jispy!